Maintenance
Aftereachuseofthetrimmer,completethefollowing:
1.Removethebatteryfromthetrimmer.
2.Wipethetrimmercleanwithadampcloth.Do
nothosethetrimmerdownorsubmergeitin
water.
CAUTION
Thelinecutoffbladeonthedeectoris
sharpandcancutyou.
Donotuseyourhandstocleanthe
deectorshieldandblade.
3.Wipeorscrapecleanthecuttingheadareaany
timethereisanaccumulationofdebris.
4.Checkandtightenallfasteners.Ifanypartis
damagedorlost,repairorreplaceit.
5.Brushdebrisawayfromairintakeventsand
exhaustonmotorhousingtopreventthemotor
fromoverheating.
ReplacingtheString
Important:Useonly2mm(0.080in)diameter
monolamentstring(PartNo.88611).
1.Removethebatterypackandcleananydebris
fromthetrimmerhead.
2.Removeanyoldstringonthespoolby
repetitivelypressingthebumpbuttonwhile
pullingthelineoutequallyfrombothsidesofthe
trimmer.
3.Cutapieceof2mm(0.080inch)stringto
approximately3.9m(13.0ft).
Important:Donotuseanyothergauge
ortypeofstring,anddonotexceed3.9m
(13.0ft)ofstring,asthiscoulddamagethe
trimmer.
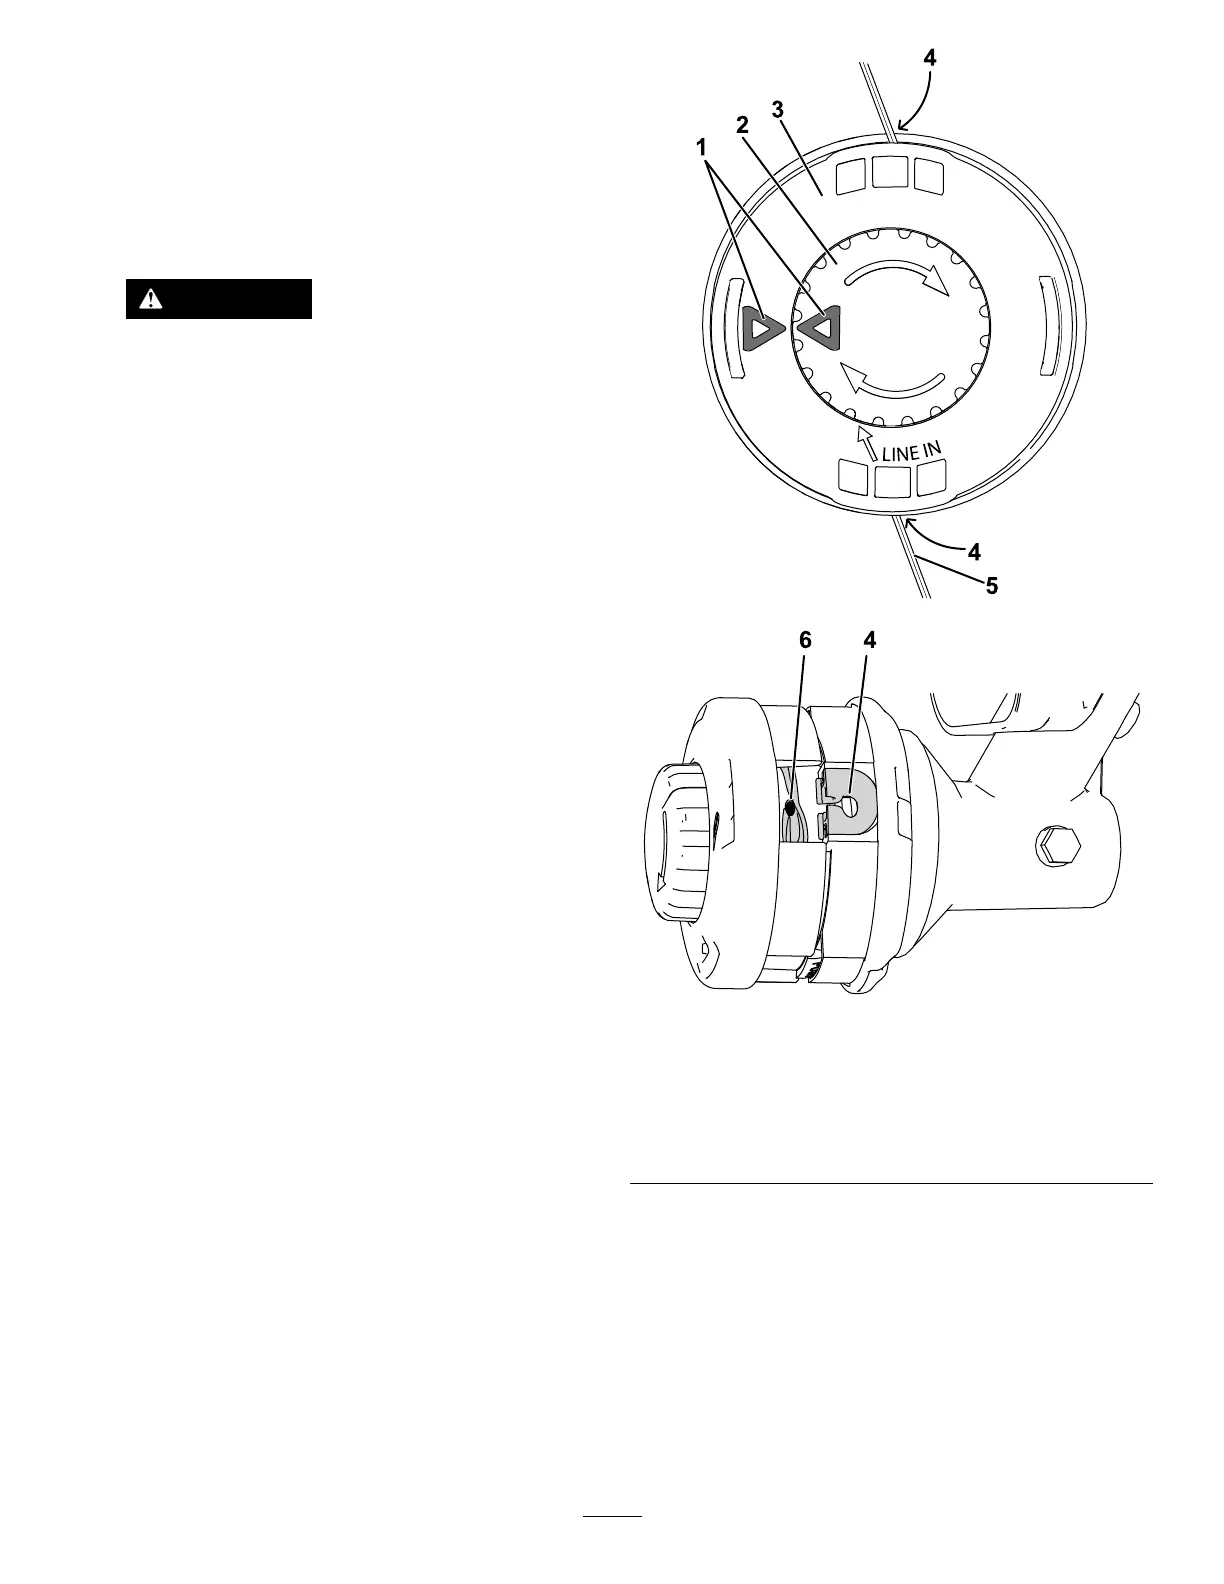
4.Pressandturntheknobonthestringheaduntil
arrowontheknobalignswitharrowonthestring
head(Figure16).
5.Insert1endofthelineatanangleintotheLINE
INeyeletandpushthelinethroughthestring
headtrackuntilitcomesoutthroughtheeyelet
ontheotherside.Pullthelinethoughthestring
headuntilthelineoutsidethestringisevenly
dividedoneachside.
g330983
g330985
Figure16
Disassembledviewshownforclarity
1.Arrows4.Eyelet
2.Knob
5.String
3.Stringhead
6.Track
Important:Donotdisassemblethetrimmer
head.
6.Holdthestringheadinplacewithonehand.
Withyourotherhand,rotatethebumpknobin
thedirectionshownbythearrows(clockwise).
7.Windtheline,leavingabout130mm(5inches)
extendingbeyondtheeyeletoneachside.
18
 Loading...