Do you have a question about the Toyota PZQ60-00341 and is the answer not in the manual?
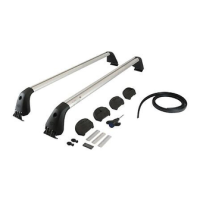
Lists all components included in the Satellite Navigation Kit.
Specifies the part number and quantity for the PZQ60-00350 patch harness.
Specifies the part number and quantity for the PZQ60-00230 patch harness.
Detailed instructions for safely removing the vehicle's audio fascia panel.
Procedures for removing the blanking plate and associated brackets.
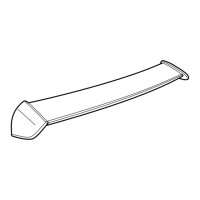
Guidance on peeling and preparing the GPS antenna earth plate sticker.
Instructions for attaching the GPS antenna to its earth plate.
Procedures for installing the GPS antenna assembly behind the air vent.
Attaching mounting brackets to the head unit using specified bolts.
Identifying the necessary vehicle connectors for head unit connection.
Connecting vehicle and patch harness connectors to the head unit.
Reassembling interior panels, ensuring proper alignment and no gaps.
Reconnecting the battery terminal with the correct torque specification.
Checking the correct operation of steering wheel switches and audio controls.
Placing the owner's manual into the vehicle's glove box.
Performing initial system checks upon turning the ignition ON.
Verifying microphone connectivity via the phone button interface.
Testing GPS signal outdoors and accessing the vehicle's service menu.
Navigating to and performing the system sensors diagnostic check.
Checking GPS status (OK/NG) and SPD pulse count.
Restarting the head unit after all system checks are completed and rectified.
Finalizing the head unit installation process.
Lists all components included in the Satellite Navigation Kit.
Specifies the part number and quantity for the PZQ60-00350 patch harness.
Specifies the part number and quantity for the PZQ60-00230 patch harness.
Detailed instructions for safely removing the vehicle's audio fascia panel.
Procedures for removing the blanking plate and associated brackets.
Guidance on peeling and preparing the GPS antenna earth plate sticker.
Instructions for attaching the GPS antenna to its earth plate.
Procedures for installing the GPS antenna assembly behind the air vent.
Attaching mounting brackets to the head unit using specified bolts.
Identifying the necessary vehicle connectors for head unit connection.
Connecting vehicle and patch harness connectors to the head unit.
Reassembling interior panels, ensuring proper alignment and no gaps.
Reconnecting the battery terminal with the correct torque specification.
Checking the correct operation of steering wheel switches and audio controls.
Placing the owner's manual into the vehicle's glove box.
Performing initial system checks upon turning the ignition ON.
Verifying microphone connectivity via the phone button interface.
Testing GPS signal outdoors and accessing the vehicle's service menu.
Navigating to and performing the system sensors diagnostic check.
Checking GPS status (OK/NG) and SPD pulse count.
Restarting the head unit after all system checks are completed and rectified.
Finalizing the head unit installation process.
This document outlines the installation and system check procedures for a Satellite Navigation Kit in a C-HR vehicle, along with a list of required parts.
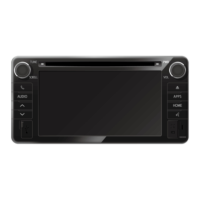
The device is a Satellite Navigation Kit designed for the Toyota C-HR, integrating navigation capabilities into the vehicle's audio system. It provides GPS functionality, rear camera display, and microphone connectivity for hands-free communication. The system replaces the existing audio facia panel and blanking plate, offering an upgraded infotainment experience.
PZQ60-00341: Satellite Navigation Kit
PZQ60-00350: Patch Harness
PZQ60-00230: Patch Harness
Connectors (Head Unit Connection Schematic Diagram):
Installation Torque Specification:
| Brand | Toyota |
|---|---|
| Model | PZQ60-00341 |
| Category | Automobile Accessories |
| Language | English |