7106505931 REV1.0.0
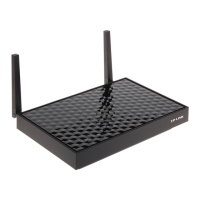
Wired Router
A
B
C
D
Internet
AP200’s SSID
Internet
Host AP
Host AP’s SSID
A
B
AP200’s SSID
Host AP’s SSID
or
or
Other
Device
TV
Host AP
Internet
A
B
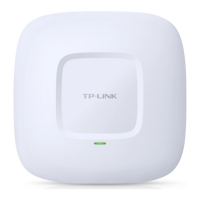
AP200
11AC Wireless Gigabit Access Point
Quick
Installation Guide
Before your start
Now, connect your wired-only device to the AP device using an Ethernet cable.
5. Click Quick Setup, then select Client mode and click Next. Follow the
step-by-step on-screen instructions to complete the configuration.
Client Mode
The AP device functions as a wireless adapter to connect the wired device (e.g. Xbox/TV) to a wireless network.
AP Mode (Default)
The AP device transforms your wired network into wireless.
Repeater/Bridge Mode
The AP device extends the range of an existing Wi-Fi network.
Configure the AP Device
3. Launch a web browser and enter http://tplinkap.net, then log in using admin
(all lowercase) for both Username and Password.
Note: You can enjoy the Internet surfing now. For your wireless network security, it is recommended to change the
default SSID (network name) and the password of your Wi-Fi network. To do so, perform the following steps.
1. Connect the AP device according to steps A and B in the diagram.
2. Turn on the power and wait until the Power ( ) and Wireless ( & ) LEDs
are lit and stable, use the default SSID and Password printed on the product
label to join the AP device’s Wi-Fi network.
1. Connect the device according to the steps A and B in the diagram.
2. Turn on the power and wait until the Power ( ) LED is lit and stable.
Now, connect your wireless devices to the Wi-Fi network using the AP device’s
SSID and password.
5. Relocate the AP device to a good place. For details, you can refer to Q5 in
Frequently Asked Questions (FAQ).
Enjoy!
Enjoy!
Enjoy!
Now, reconnect your wireless devices to the new Wi-Fi network.
4. Click Quick Setup, then select Access Point mode and click Next. Follow the
step-by-step on-screen instructions to complete the configuration.
Operating Modes
AP Mode (Default Mode)
Repeater/Bridge Mode
Client Mode
Scenarios
You are in a Wi-Fi dead-zone or a place with weak wireless
signal. You want to have a greater effective range of the
wireless signal throughout your home or office.
You want to convert your wired (Ethernet) network to a
wireless network.
You have a wired device with an Ethernet port and no wireless
capability, for example, a Smart TV, Media Player, or game
console. You want to connect it to the Internet wirelessly.
Which mode do you need? Please refer to the table to choose a proper mode.
You want your devices connected to different wireless
networks and isolated by VLANs.
Multi-SSID Mode
3. Launch a web browser and enter http://tplinkap.net, then log in using admin
(all lowercase) for both Username and Password.
3. Connect your computer or smart device to the AP device via a wired or
wireless connection. The default SSID and wireless password are printed on
the product label.
1. Connect the AP device according to steps A to D in the diagram.
2. Turn on the power and wait until the Power ( ) and Wireless ( & ) LEDs
are lit and stable, use the default SSID and Password printed on the product
label to join the AP device’s Wi-Fi network.
4. Click Quick Setup, then select Repeater/Bridge mode and click Next. Follow
the step-by-step on-screen instructions to complete the configuration.
4. Launch a web browser and enter http://tplinkap.net, then log in using admin
(all lowercase) for both Username and Password.