10 18-AC107D1-1A-EN
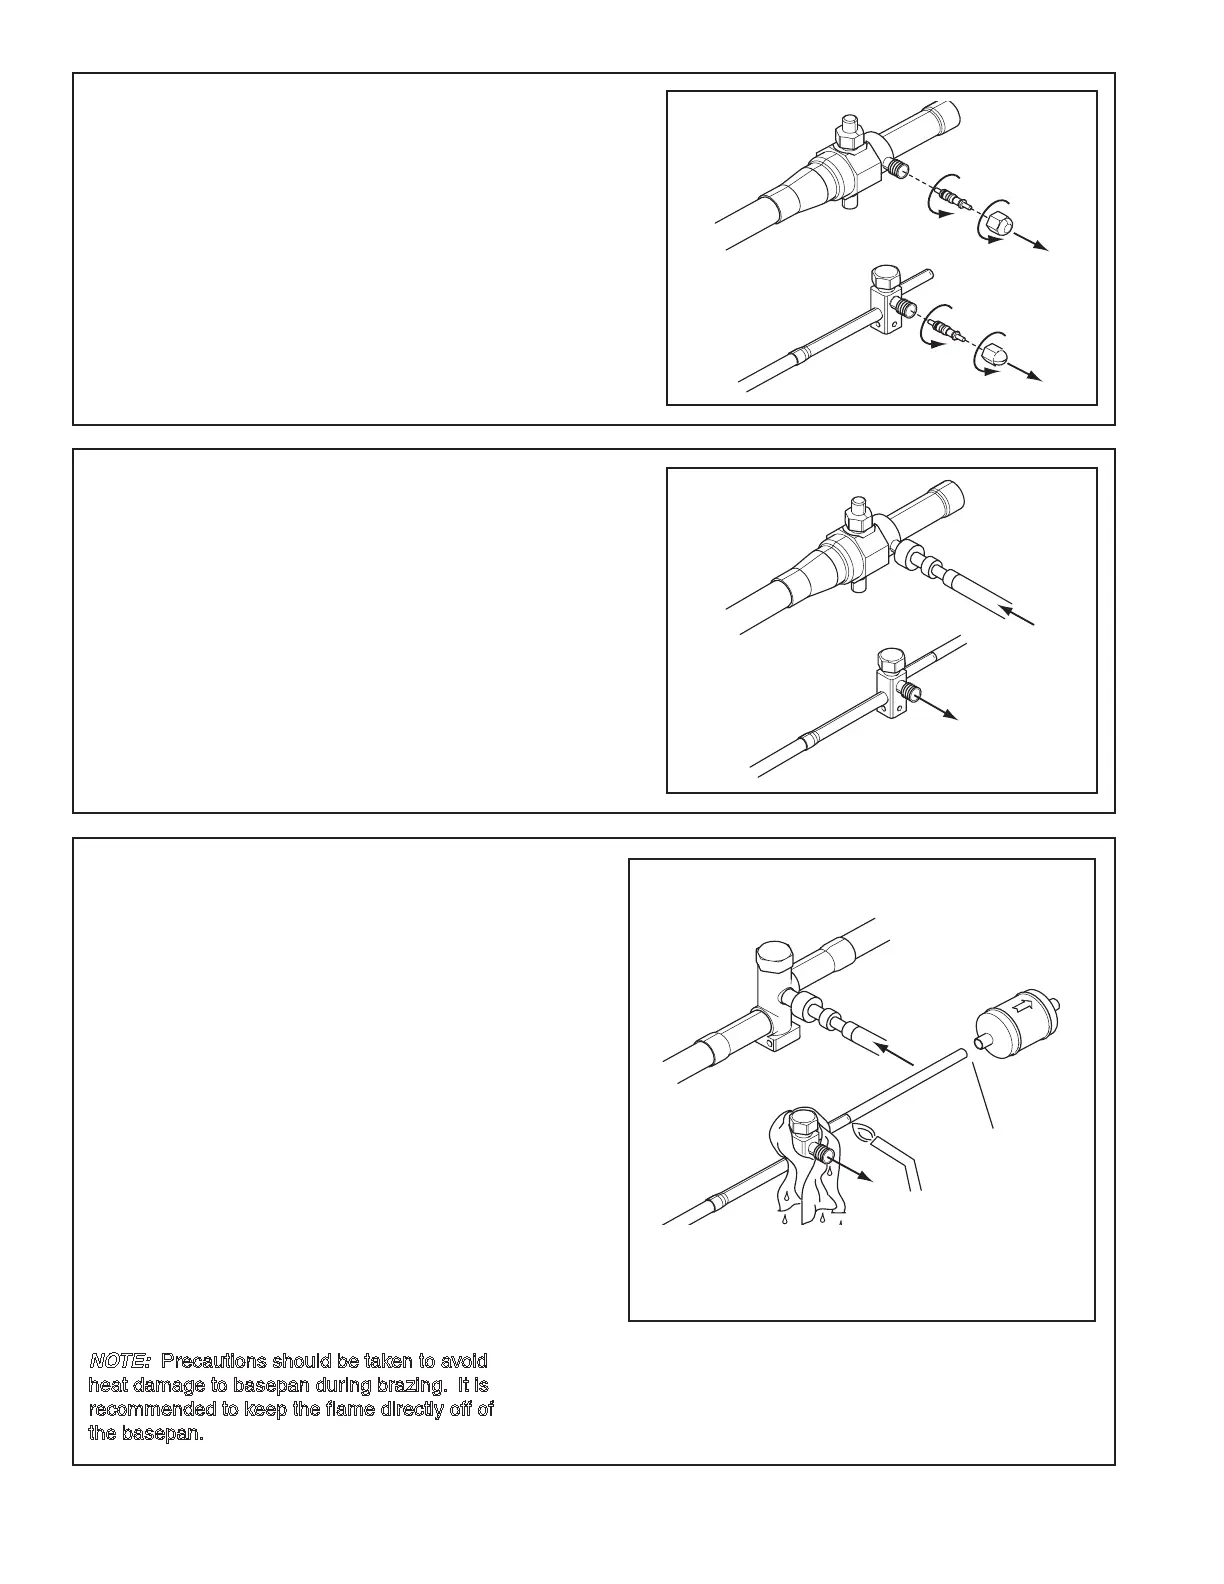
STEP 2 - Remove the pressure tap cap and
valve cores from both service valves.
STEP 3 - Purge the refrigerant lines and indoor
coil with dry nitrogen.
STEP 4 - Wrap a wet rag around the valve body
to avoid heat damage and continue the dry nitro-
gen purge.
Braze the refrigerant lines to the service valves.
For units shipped with a field-installed external
drier, check liquid line filter drier’s directional flow
arrow to confirm correct direction of refrigeration
flow (away from outdoor unit and toward evapo-
rator coil) as illustrated. Braze the filter drier to
the Liquid Line.
Continue the dry nitrogen purge. Do not remove
the wet rag until all brazing is completed.
Important: Remove the wet rag before stopping
the dry nitrogen purge.
Note: Install drier in Liquid Line.
NOTE: Precautions should be taken to avoid
heat damage to basepan during brazing. It is
recommended to keep the flame directly off of
the basepan.
 Loading...