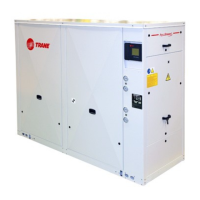
RT-SVX060D-GB
48
4 UNT-PRC002-GB
Technical Data
FWD 08 12 20 30 45
Power supply (V/Ph/Hz) 230/1/50
Capacities
Cooling capacity on water (1) (kW) 5,2 8,3 15 18,8 30,1
Heating capacity on water (2) (kW) 6,3 11,9 18,9 20,9 38,2
Fan motor (type) 2 x direct drive centrifugal
Fan power input (3) (kW) 0,23 0,46 0,65 1,04 1,51
Current amps (3) (A) 1,1 2,2 3,1 4,7 5,5
Start-up amps (A) 3,2 5,5 9,3 14,1 16,5
Air flow
minimum (m
3
/h) 490 980 1400 1800 2700
nominal (m
3
/h) 820 1650 2300 3000 4500
maximum (m
3
/h) 980 1970 2600 3600 5400
Main coil
Water entering/leaving connections (type) ISO R7 rotating female
(Dia) 3/4" 3/4" 1 1/2" 1 1/2" 1 1/2"
Electric heater (accessory for blower only)
Electric power supply (V/Ph/Hz) 230/1/50 230/1/50 or 400/3/50 400/3/50 400/3/50 400/3/50
Heating capacity (kW) 2/4 8 10 12 12
Hot water coil (accessory for blower only)
Heating capacity (4) (kW) 6,3 12 17,4 22,4 34,5
G2 filter (filter box accessory)
Quantity 2 2 2 2 2
Dimensions ( LxWxth) (mm) 386x221x8 486x271x8 586x321x8 586*421*8 586*621*8
G4 filter (filter box accessory)
Quantity - 2 2 2 2
Dimensions ( LxWxth) (mm) - 486x264x48 586x314x48 586*414*48 586*614*48
Condensate pump (accessory) (type) Centrifugal
Water flow - lift height (l/h - mm) 24 - 500
Not available for FWD30 and FWD45
Sound level (L/M/H speed)
Sound pressure level (5) (dB(A)) 36/40/43 38/41/44 46/50/53 47/52/57 47/52/58
Sound power level (5) (dB(A)) 46/50/53 48/51/54 56/60/63 57/62/67 57/62/68
Unit dimensions
Width x Depth (mm) 890 x 600 1090 x 710 1290 x 820 1290 x 970 1290 x 1090
Height (mm) 250 300 350 450 650
Shipped unit dimensions
Width x Depth (mm) 933 x 644 1133 x 754 1333 x 864 1333 x 1008 1333*1133
Height (mm) 260 310 360 460 660
Weight (kg) 32 46 61 76 118
Colour galvanised steel
Recommended fuse size
Unit alone (aM/gI) (A) 8/16 8/16 8/16 8/25 8/25
Unit with electric heater (gI) (A) 16 (2kW),25 (4kW) 40 (230V),3*16 (400V) 3*20 3*25 3*25
(1) Conditions: Water entering/leaving temperature: 7/12 °C, Air inlet temperature 27/19°C DB/WB - Nominal air flow
(2) Conditions: Water entering/leaving temperature: 50/45 °C, Air inlet temperature 20°C DB - Nominal air flow
(3) At high speed with nominal air flow.
(4) Water entering/leaving temperature 90/70 °C, air inlet temperature 20 °C DB, Nominal air flow.
(5) A rectangular glass wool duct 1m50 long is placed on the blower.The measurement is taken in the room containing the blower unit.
Heat exchanger operating limits:
FWD:
*water temperature: max 100° C
*absolute service pressure: min 1 bar/max 11 bars
Accessories - Hot water coil:
*water temperature: min. +2° C/max. 100° C
*absolute service pressure: min 1 bar/max 11 bars
End user Routine Maintenance
Some of the periodic maintenance functions for the
unit can be undertaken by the end user. This includes
replacing (disposable) or cleaning (permanent) air lters,
cleaning unit cabinet, cleaning the condenser coil, and
carrying out a general unit inspection on a regular basis.
WARNING! Disconnect the power supply before
removing access panels to service the unit. Failure to
disconnect power before attempting any servicing can
result in severe injury or death.
Air lters
It is very important for the central duct system air lters
to be kept clean.
These should be inspected at least once a month when
the system is in constant operation (in new buildings,
the lters should be checked every week for the rst
four weeks). If disposable-type lters are used, they
should only be replaced with ones of the same type and
size.
The economizer fresh air lter should be inspected
(washed if needed) at least once a month.
Note: Do not attempt to clean disposable lters.
Permanent lters can be cleaned by washing with a
mild detergent and water. Ensure that the lters are
thoroughly dry before reinstalling them in the unit (or
duct system).
Note: Replace permanent lters when required or at
least annually if washing fails to clean them, or they
show signs of deterioration. Be sure to use the same
type and size as were originally installed.
Condenser coil
Unltered air circulates through the unit’s condenser
coil and can cause the coil’s surface to become clogged
with dust, dirt, etc. To clean the coil, brush the coil
surface in the direction of the ns with a soft bristled
brush.
Keep all vegetation away from the condenser coil area.
Hot water coil (option)
Stop the unit. Do not disconnect the main supply to the
unit. This will permit the anti-frost protection to continue
to operate, and avoid water to freeze-up in the coil.
Service Technician Maintenance
Before the cooling season, your service technician may
examine the following areas of your unit:
• Filters, for cleaning or replacement
• Motors and drives system components
• Economizer gaskets, for replacement if necessary
• Condenser coils, for cleaning
• Safety controls, for mechanical cleaning
• Electrical components and wiring, for replacement
and tightening of connections as necessary
• Condensate drain, for cleaning
• Unit duct connections, to ensure they are physically
sound and sealed to the unit casing
• Unit mounting support, to ensure that it is sound
• The unit, to ensure there is no obvious deterioration
Before the heating season, your service technician may
examine the following areas of your unit:
• The unit, to ensure that the condenser coil can
receive the required airow (that the condenser fan
grille is not obstructed)
• The control panel wiring, to verify that all electrical
connections are tight, and that wire insulation is
intact
Troubleshooting Alarm and Warnings
The optional control display has the ability to provide
the service personnel with some unit diagnostics and
system status information.
1. Step the system through all of the available modes,
and verify operation of all outputs, controls, and
modes. If a problem in operation is noted in any
mode, proceed to troubleshooting search.
2. Refer to the individual component test procedures if
other microelectronic components are suspect.
3. In additon review carefully the components which
can lead to the alarm: temperature sensor, zone
temperature sensor, clogged lter switch
Maintenance

 Loading...

