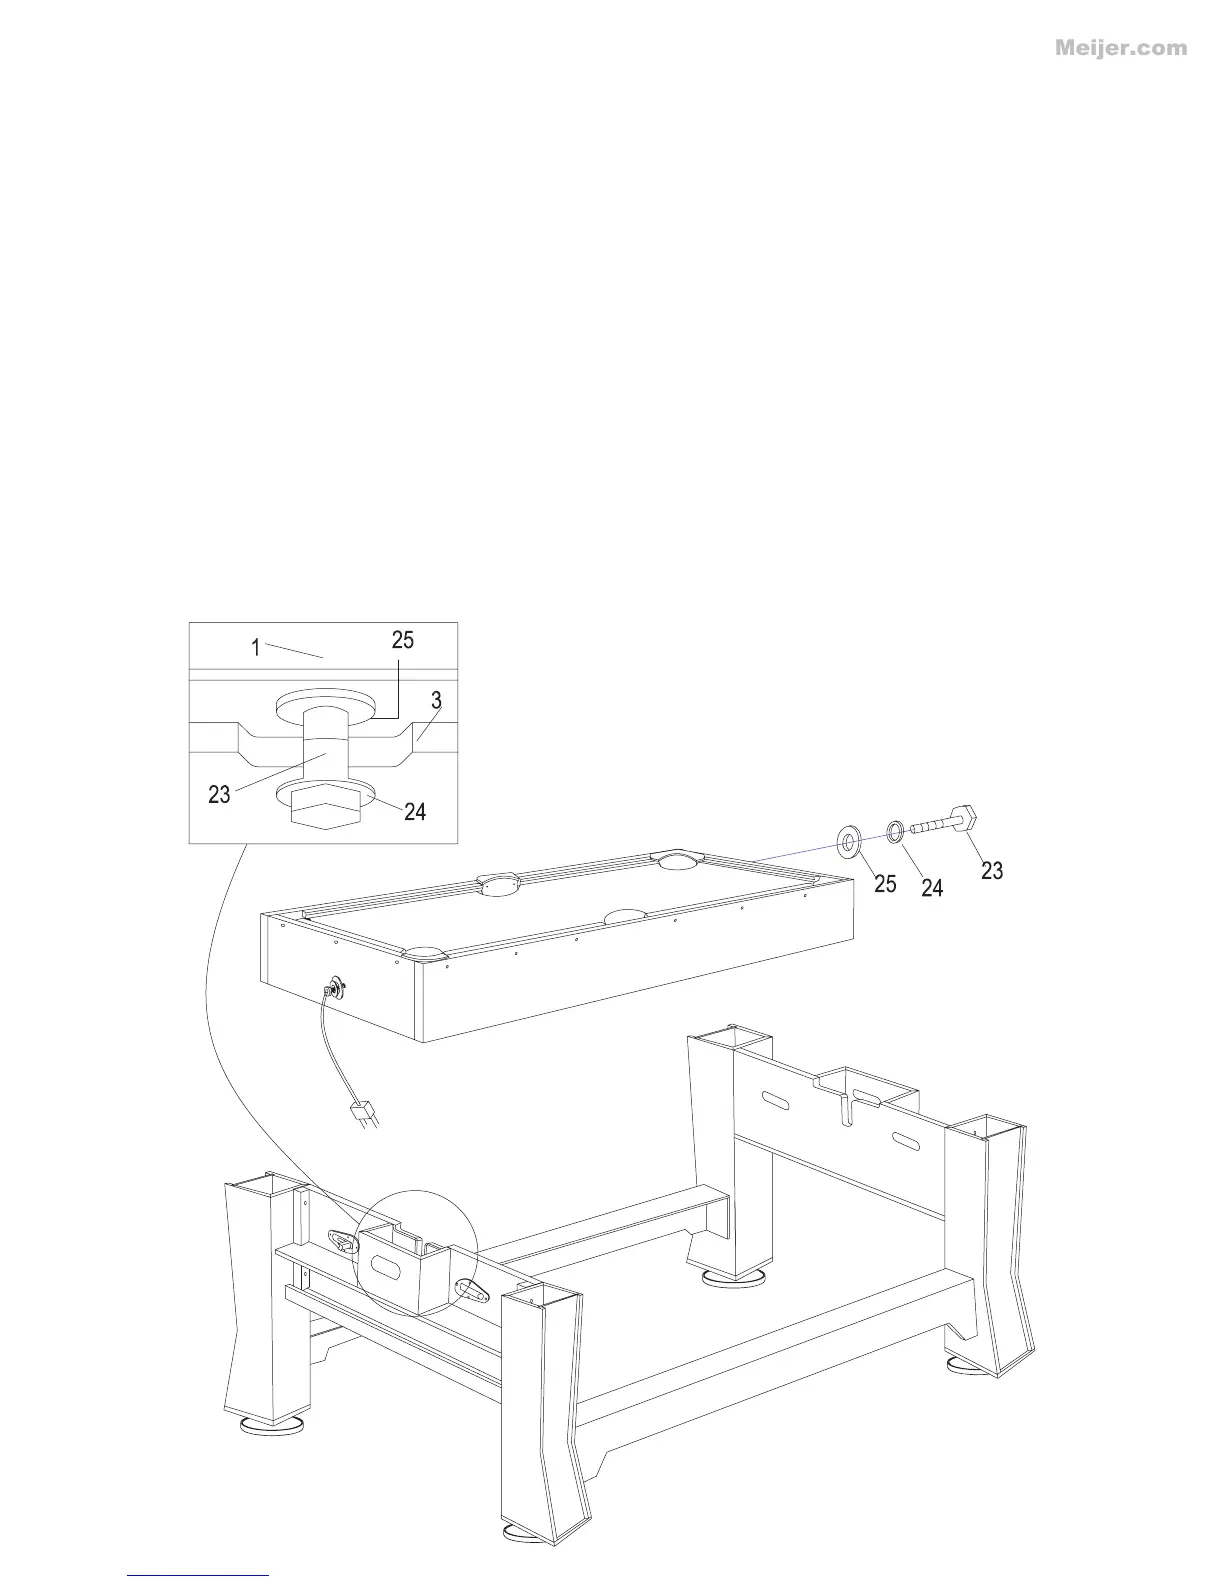
Preparing the table top for mounting.
The threaded shaft in the cabinet-hockey (#1) cannot be removed, be sure to pull it out as far as pos-
sible, about 2 to 3 inches on the end with the electric plug. On the opposite end, slide ½” washer (#24)
and ½” plastic washer (#25) onto the ½” hex bolt (#23). Insert the ½” hex bolt (#23) into the threaded
shaft. Screw the bolt into the shaft leaving about 2 to 3 inches of the hex bolt exposed when the bolt is
secured into the threaded shaft.
Attaching the table top to the base frame.
You are now ready to place the table top (#1) onto the base frame. With the help of a few friends, have
two people on each side of the table top, and the other on the end to help guide the hex bolt (#23) into
the slot on the on the leg pedestal. Once in place make sure the head of the hex bolt (#23) and the 1/2”
washer (#24) are sticking out past the leg panel. Make sure the plastic washer (#25) is against the
cabinet-hockey (#1) as it will act as the spacer for the table to rotate.
To securer the table top to the leg panel use the wrench (#28) provided. Tighten each of the 1/2” hex
bolts (#23) on each side of the leg panel towards each other, firmly tighten. This will lock the table top
to the base frame, and still allow the table top to spin freely. When complete, engage all 4 lock pins.
Step 7
 Loading...