10 11
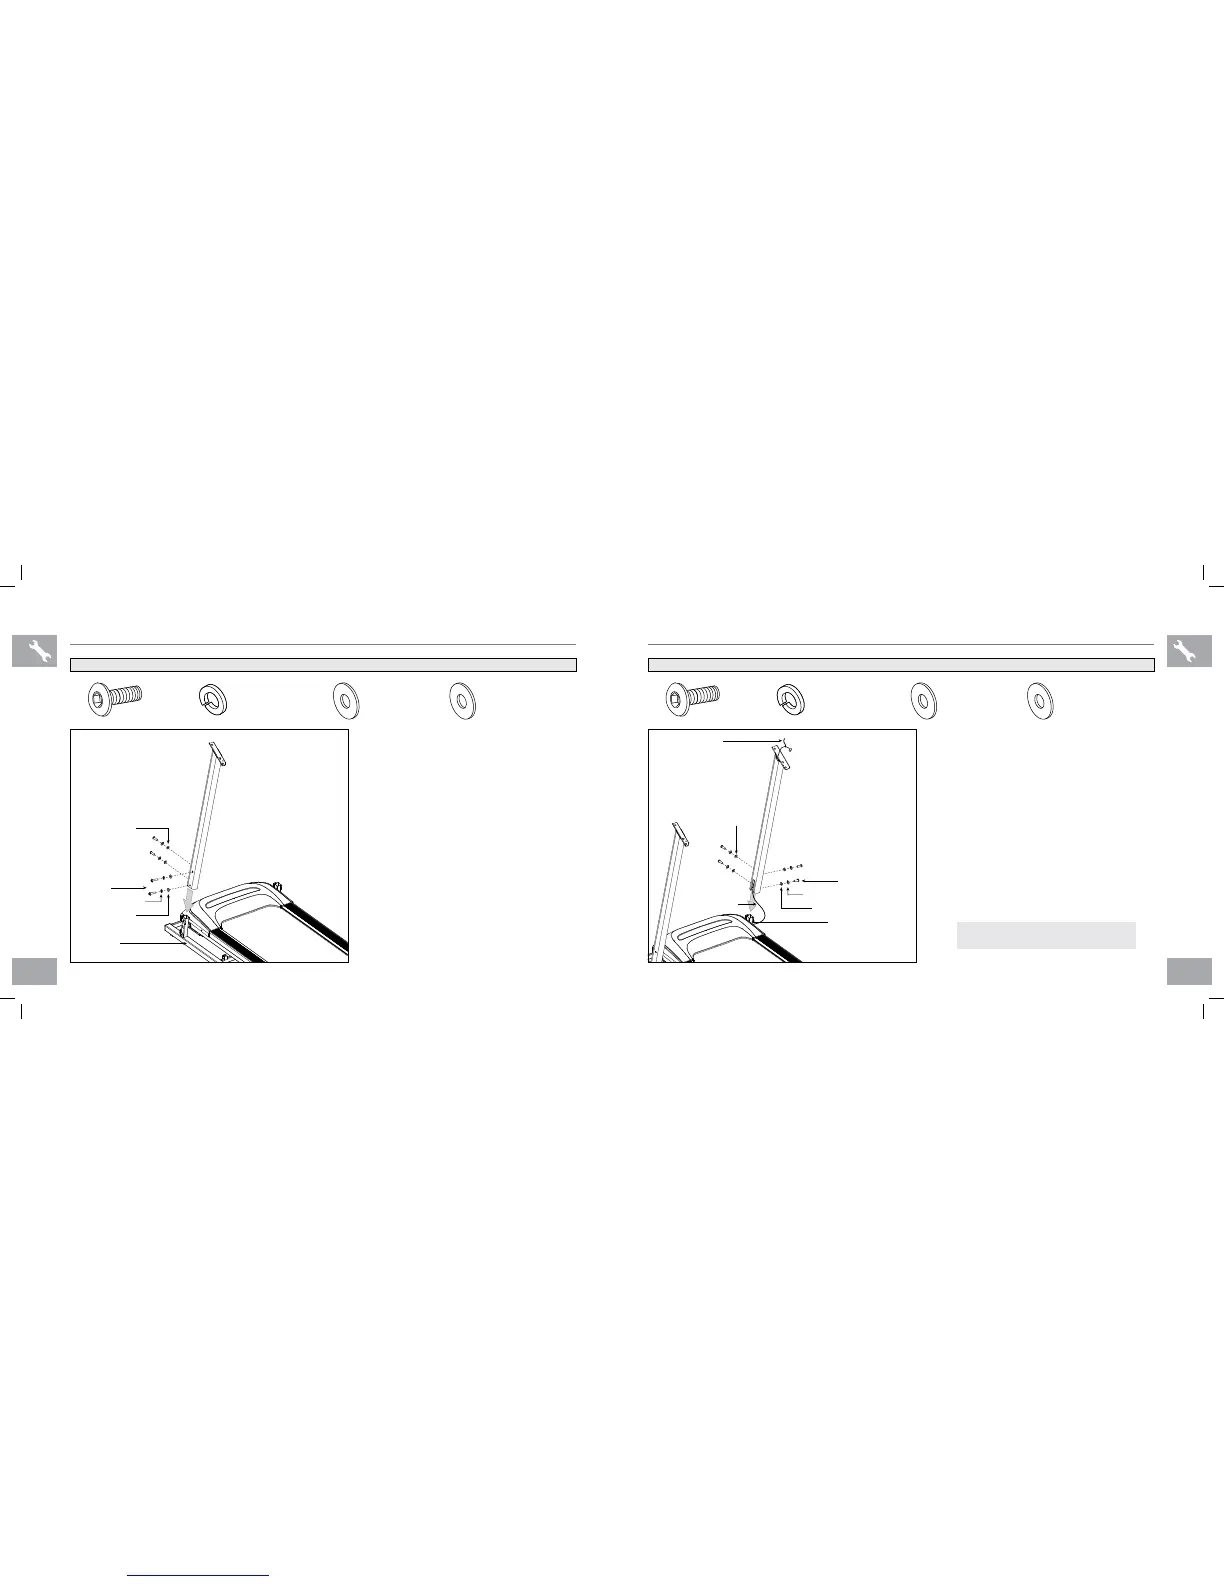
ASSEMBLY STEP 1
A Cut the yellow banding straps and lift the
running deck upward and remove all
contents from underneath the running deck.
B Open hardware bag 1.
C With the running deck lowered, attach
the left console mast to the base
frame using 2 bolts (a), 2 spring
washers (b) and 2 flat washers (c)
from the side and 2 bolts (a), 2 spring
washers (b) and 2 arc washers (d)
from the rear.
BOLT (A)
20 mm
Qty: 4
SPRING WASHER (B)
8 mm
Qty: 4
FLAT WASHER (C)
8 mm
Qty: 2
ARC WASHER (D)
8 mm
Qty: 2
HARDWARE BAG 1 CONTENTS :
BOLTS (A)
SPRING WASHERS (B)
715T PLUS
LEFT CONSOLE MAST
ARC WASHERS (D)
FLAT WASHERS (C)
BASE FRAME
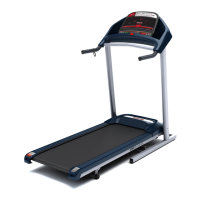
ASSEMBLY STEP 2
BOLT (A)
20 mm
Qty: 4
SPRING WASHER (B)
8 mm
Qty: 4
FLAT WASHER (C)
8 mm
Qty: 2
ARC WASHER (D)
8 mm
Qty: 2
HARDWARE BAG 2 CONTENTS :
BOLTS (A)
SPRING WASHERS (B)
715T PLUS
RIGHT CONSOLE MAST
ARC WASHERS (D)
CONSOLE CABLE
FLAT WASHERS (C)
BASE FRAME
LEAD WIRE
A Open hardware bag 2.
B Pull lead wire through right console
mast. After pulling the lead wire through the
mast, the top of the console cable should
be located at the top of the mast. Detach and
discard the lead wire.
C With the running deck lowered, attach
the right console mast to the base
frame using 2 bolts (a), 2 spring
washers (b) and 2 flat washers (c)
from the side and 2 bolts (a), 2 spring
washers (b) and 2 arc washers (d)
from the rear.
NOTE: Be careful not to pinch any wires
while assembling the right console mast.
400T-OM-rev1_1.indd 10-11 10/29/10 1:44 PM