12
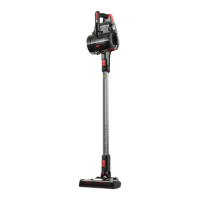
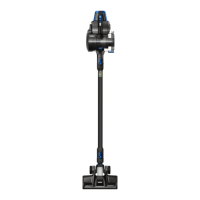
GETTING TO KNOW YOUR MACHINE
Fig.
1
A. Carry handle
B. Dirt container
C. Dirt release button
D. Filter cover and lter
E. Dirt container release latch
F. Battery level indicator light
G. Boost button
H. Brushbar ON/OFF button
I. ON/OFF button
J. Charging port
K. Reach wand
L. Powered head
M. Brushbar
N. Charger
O. Wall mount, 2 screws and wall plugs
P. Crevice tool storage caddy
Contents Fig.
2
A. Crevice tool B. Dusting brush
Unpacking and assembly
1. Unpack the contents and check they are
complete. (Fig.
1
and
2
).
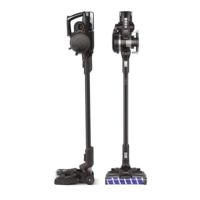
2. Attach the reach wand and powered
head to the handheld. They will click
when locked into place (Fig.
3
).
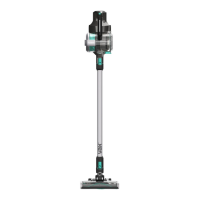
3. Push the crevice tool storage caddy
onto the reach wand and slot the tool
into place (Fig.
4
).
Attaching the wall mount
1. Without the handheld attached to the
reach wand and powered head, push the
wall bracket onto the top and back of the
reach wand. (Fig.
5
/1 ).
2. Choose a location for the stick vac to be
stored, preferably near to a mains supply
although not directly above or below a
mains socket. Stand the stick vac powered
head and wand against the wall, ensuring
the powered head is at on the oor.
3. Holding the wall bracket securely
against the wall, use a pencil to make a
small mark for each screw. (Fig.
5
/2 )
Use the screws and wall plugs to secure
the wall bracket to the wall.
4. The charger cord and dusting brush
can be tted onto the wall bracket
(Fig.
6
).
5. Fully assemble the stick vac and rmly
press the stick vac into the wall bracket
to secure. Always ensure the stick vac is
securely locked into place.
Charging the stick vac
1. To charge the stick vac, securely attach
the stick vac into the wall bracket. You
can also charge as a handheld; detach the
stick vac from the reach wand and tools,
and place on a at, stable surface.
2. Insert the charger lead into the
charging port (Fig.
1
/J ) located on the
carry handle of the handheld and plug the
charger plug into the mains.
3. The battery indicator level lights will
illuminate in turn as the battery charges,
until all four lights are illuminated (Fig.
7
/1 and
7
/2 ) Once fully charged, the
lights will go out. If charging for the rst
time the initial charge time is 3 hours.
4. When the stick vac is in use the battery
level indicator lights will illuminate
indicating how much charge is remaining.
NOTE The initial charge is 3 hours
and charging will be required before
rst use. Failure to fully charge the
battery before rst use may result in
poor battery performance. The life
expectancy of the battery will vary
depending on the usage of the
stick vac.
 Loading...