EasyManua.ls Logo

Volkswagen T1 CAMPER VAN - User Manual

Volkswagen T1 CAMPER VAN
21 pages
Print Icon
To Next Page IconTo Next Page
Loading...
VOLKSWAGEN T1 CAMPER VAN #10220 Basic Version
Pocket Content
1 X 12-Port Expansion Board
1 X Square Button Battery Pack
2 X 30cm Warm White Dot Lights
7 X 30cm White Dot Lights
LEGO Pieces
Note:
Place wires on the surface or under the LEGO building blocks.
The wire can be place between the building blocks or under the block, but they should be placed
between the studs correctly.
Insert the connectors to the ports.
Be careful when you are operating, there’s only one correct way to insert, make sure the expansion
board is upward, find the soldered “=” sign on the left of the port. When you are inserting, the side
which the wires can be seen should be faced to the “=” sign and if you feel hard to insert, please stop,
and don’t force it, for that may result in bent pins inside the port or overheating of the expansion board.
At this point, use the tweezers to straighten the bent pins.
Question and Answer IconNeed help?

Do you have a question about the Volkswagen T1 CAMPER VAN and is the answer not in the manual?

Summary

Initial Setup and Component Connections

Wire Placement and Connector Insertion

Guidelines for correctly routing wires and connecting components to the expansion board, emphasizing correct orientation.

Connecting Strip Lights and Battery

Detailed instructions for connecting cable connectors to strip lights and precautions for battery installation.

Battery Installation and Polarity

Correct installation of batteries into the case, paying close attention to positive and negative terminals.

Headlight Installation

Disassembly of Front Headlight Area

Steps to remove the front bumper and parts of the headlights to prepare for light installation.

Installing Right Headlight LED

Guide to folding, passing, and placing the white dot light for the right headlight assembly.

Replacing Headlight Components

Replacing gray plate with a new one, passing plug, and fixing with the orange transparent piece.

Completing Right and Left Headlights

Finalizing the right headlight installation and repeating steps for the left side.

Headlight Cable Management

Bundling headlight cables and routing them through the vehicle's underside.

Reassembly and Testing Headlights

Reattaching front parts and connecting the battery pack to test the installed headlights.

Taillight Installation

Preparing for Taillight Installation

Removing the tailgate and associated components on the left side to access the taillight area.

Installing Left Taillight LED

Separating base plate, placing dot light, and routing the wire for the left taillight.

Completing Left Taillight Assembly

Securing the LED with transparent parts and routing the cable to the vehicle's underside.

Installing and Finalizing Taillights

Repeating the process for the right taillight and reinstalling base plates to complete the installation.

Taillight Reassembly and Testing

Reinstalling the rear door and connecting power to verify the functionality of the taillights.

License Plate Light Installation

Preparing License Plate Light Area

Removing the middle piece to access the license plate light housing and prepare for LED insertion.

Installing and Securing License Plate Light

Inserting the dot light, reconnecting pieces, securing the cable, and routing the plug.

Interior Light Installation

Preparing for Interior Light Installation

Removing the roof and top transparent plate to access the interior for light installation.

Installing Interior Lights and Routing Cables

Passing plug ends from interior light locations to the vehicle's bottom for connection.

Finalizing Interior Light Installation

Securing interior lights by reattaching the roof after cable routing.

Final Assembly and Power Connection

Cable Management on Vehicle Underside

Collecting and organizing cables at the bottom of the car and securing them under base plates.

Attaching Expansion Board and Battery Pack

Fixing the expansion board to the car's bottom and connecting the battery pack.

Overview

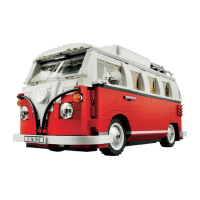
This document provides instructions for installing a lighting kit for the VOLKSWAGEN T1 CAMPER VAN #10220 Basic Version. The kit is designed to add illumination to the LEGO model, enhancing its visual appeal.

The primary function of this device is to provide decorative lighting for the LEGO Volkswagen T1 Camper Van model. It allows users to illuminate various parts of the model, including the headlights, taillights, license plate light, and interior lights, creating a more realistic and dynamic display.

Usage Features:

The installation process is broken down into several steps, starting with the headlights, then moving to the taillights and license plate light, and finally the interior lights.

Headlight Installation:

  1. Preparation: Begin by removing the front white bumper and the front part of the headlights from the LEGO model.
  2. Right Headlight - Dot Light: Take a 30cm white dot light and fold its end into a 90-degree angle. Pass the plug end of the light through a designated gap in the LEGO structure. Insert the lighting side of the dot light into the transparent round top piece and reattach it to the model.
  3. Right Headlight - Orange Transparent Piece: Remove the orange transparent piece and the adjacent red base plate.
  4. Right Headlight - Second Dot Light: Take another 30cm white dot light and a gray small round plate. Replace the original gray round plate with a small round plate that has holes. Pass the plug end of the dot light through these holes, ensuring the lighting side faces up. Secure it with the orange transparent piece.
  5. Connecting and Securing: Insert the plug end through the hole next to the transparent original plate and reattach the orange transparent piece. Press the line with the red base plate and reinstall all previously removed front parts. This completes the right-side headlight installation.
  6. Left Headlight: Repeat the entire process for the left headlight to ensure symmetrical lighting.
  7. Cable Management: Screw the cables from both sides into a single strand. Pull the left end of the plug through the hole under the front of the vehicle and out from the bottom for neat routing.
  8. Final Assembly: Repeat the same operation on the right side, reinstall the head, and reattach the white front bumper. This completes the installation of the headlights.
  9. Testing Headlights: Connect the 12-port socket and button battery case to the headlight plugs to test the lighting effect before proceeding.

Taillight Installation:

  1. Preparation: Move to the rear of the car. Remove the tailgate, the red transparent light on the left, the red base plate, and the gray pieces on the left. Ensure corresponding pieces on the right side are also removed.
  2. Left Taillight - First Dot Light: Separate the red piece from the gray base plate. Take one dot light and place its lighting face up on the stud gap. Wrap the line to the right as shown in the instructions.
  3. Securing Taillight: Fix the dot light with the transparent part. Pass the plug end from the rear of the vehicle to the bottom, pulling it out (tweezers can assist this step). Install the red transparent light and gray pieces, hiding the cables with the gray pieces.
  4. Left Taillight - Second Dot Light: Repeat the above operation for the second dot light and install the right side light.
  5. License Plate Light: Install the license plate light. Remove the middle piece in the picture, take the third dot light, insert the light end into the gap, and fold it into 90 degrees. Reconnect the pieces and press the cable between the studs to fix the dot light (adhesive square can also be used). Pull the plug end into the bottom of the car and out.
  6. Final Taillight Assembly: Install back the red base plate. Reinstall the rear door. This completes the installation of the taillights.
  7. Testing Taillights: Connect to the power supply to verify the effect of the taillights and license plate light.

Interior Light Installation:

  1. Preparation: Remove the roof and the transparent plate on the top of the model.
  2. First Interior Light: Take one 30cm warm white dot light and one 2x2 transparent round plate. Pass the plug end from the side of the rear part into the bottom of the vehicle.
  3. Second Interior Light: Install the roof. Remove the roof of the front section. Take another warm white dot light and transparent plate. Thread the plug end from the back of the seat into the bottom of the vehicle.
  4. Final Interior Light Assembly: Reinstall the roof. This completes the installation of the interior lights.

Cable Management and Power Connection:

  1. Collecting Cables: Collect all cables at the bottom of the car. Remove the black base plate on the side of the car.
  2. Routing Cables: Screw the cables from the same side into a single strand. Follow the stud gap and press the cables under the base plate. Repeat this process on the other side to hide all cables neatly under the base plate.
  3. Expansion Board: Take two pieces of adhesive square and place them on the two ends of the 12-port expansion board. Wrap the cables around the board according to their slack. Stick the expansion board to the bottom of the car in a suitable location.
  4. Battery Pack Connection: Connect the battery pack to the 12-port expansion board. Stick the battery pack to the bottom of the vehicle.

Maintenance Features:

  • Correct Insertion: Users are advised to be careful when inserting connectors into ports. There is only one correct way to insert them. Ensure the expansion board is upward and locate the soldered "=" sign on the left of the port. The side of the connector with visible wires should face the "=" sign.
  • Avoid Forcing: If a connector feels difficult to insert, stop immediately and do not force it. Forcing can lead to bent pins inside the port or overheating of the expansion board.
  • Pin Straightening: If pins are bent, use tweezers to straighten them carefully.
  • Dot Light Placement: When installing dot lights, ensure they are correctly placed with the yellow LED package exposed. They can be placed either on top of the studs or between studs.
  • Strip Light Connection: Exercise extra care when connecting cable connectors to Strip Lights. Connectors can only be inserted one way. With the Strip Light facing up, ensure the side of the connector with exposed wires faces down. Again, do not force plugs that do not fit easily, as this can damage both the plug and the connector.
  • Battery Polarity: Pay close attention to the positive and negative terminals when installing the battery into the battery case to ensure correct power supply.

Volkswagen T1 CAMPER VAN Specifications

General IconGeneral
ModelT1 Camper Van
ManufacturerVolkswagen
Production Years1950-1967
Transmission4-speed manual
Drive TypeRear-wheel drive
Engine1.2L Flat-4, 1.5L Flat-4
Length4280 mm
Height1940 mm
Wheelbase2400 mm
Fuel Capacity40 L
Width1720 mm

Related product manuals