4
SD MEMORY CARD INSERTION
Kidizoom Camera™ supports up to a 2GB Secure Digital (SD) memory card (not
included) for memory expansion.
• Make sure the camera is turned OFF.
• Open the battery cover on the right side (as you are facing the camera’s LCD screen).
• Locate the SD card slot inside.
• Insert the SD card (not included) as illustrated below.
• Replace the battery cover and tighten the screw. Do not over-tighten the screw.
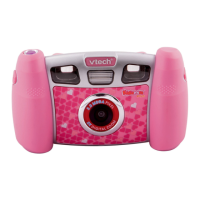
CHANGING THE FACEPLATE
1. Gently lift up the lower part of faceplate and remove the
faceplate from the Kidizoom Camera™.
2. Insert the new faceplate by placing the hooks into the holes as illustrated
on the right.
3. Press the lower part of the faceplate against the camera to secure it in
place.
TO BEGIN USING KIDIZOOM CAMERA™
• Press the ON/OFF Button to turn on the camera. After turning
on, Kidizoom Camera™ will go directly into camera mode and
you can start taking photos.
• To switch to other activities, press the Mode Button to go to
the Main Menu. From the Main Menu, you can select the following
activities: Camera, Movies, Photo Workshop, Games and System
Settings.
• To increase or decrease the volume, press the up or down Volume Buttons .
• To connect to a TV or PC, follow the instructions in Connecting to a TV or Connecting
to a PC below.
• Press the ON/OFF Button again to turn the unit off.
SD card
Main Menu
To Begin Using Kidizoom Camera™
 Loading...
