Lawn Mowing Robot EN
14
B. Replace the Blades
After some time, usually every season, your Landroid
®
L’s Blades will
need to be replaced. Your Landroid
®
L does not like mowing while
using Blades of different age and quality. So when replacing the
Blades, make sure to replace all of them at the same time. You can
replace them with one of the three spare Blade kits and extra Blade
screws supplied with your Landroid
®
L.
Before attempting to replace your Landroid
®
L’s Blades, turn the
power off and put on protective gloves. Then follow these steps:
1. Gently flip the Landroid
®
L over.
2. Take the screws off the Blades with a straight or Phillips screwdriver.
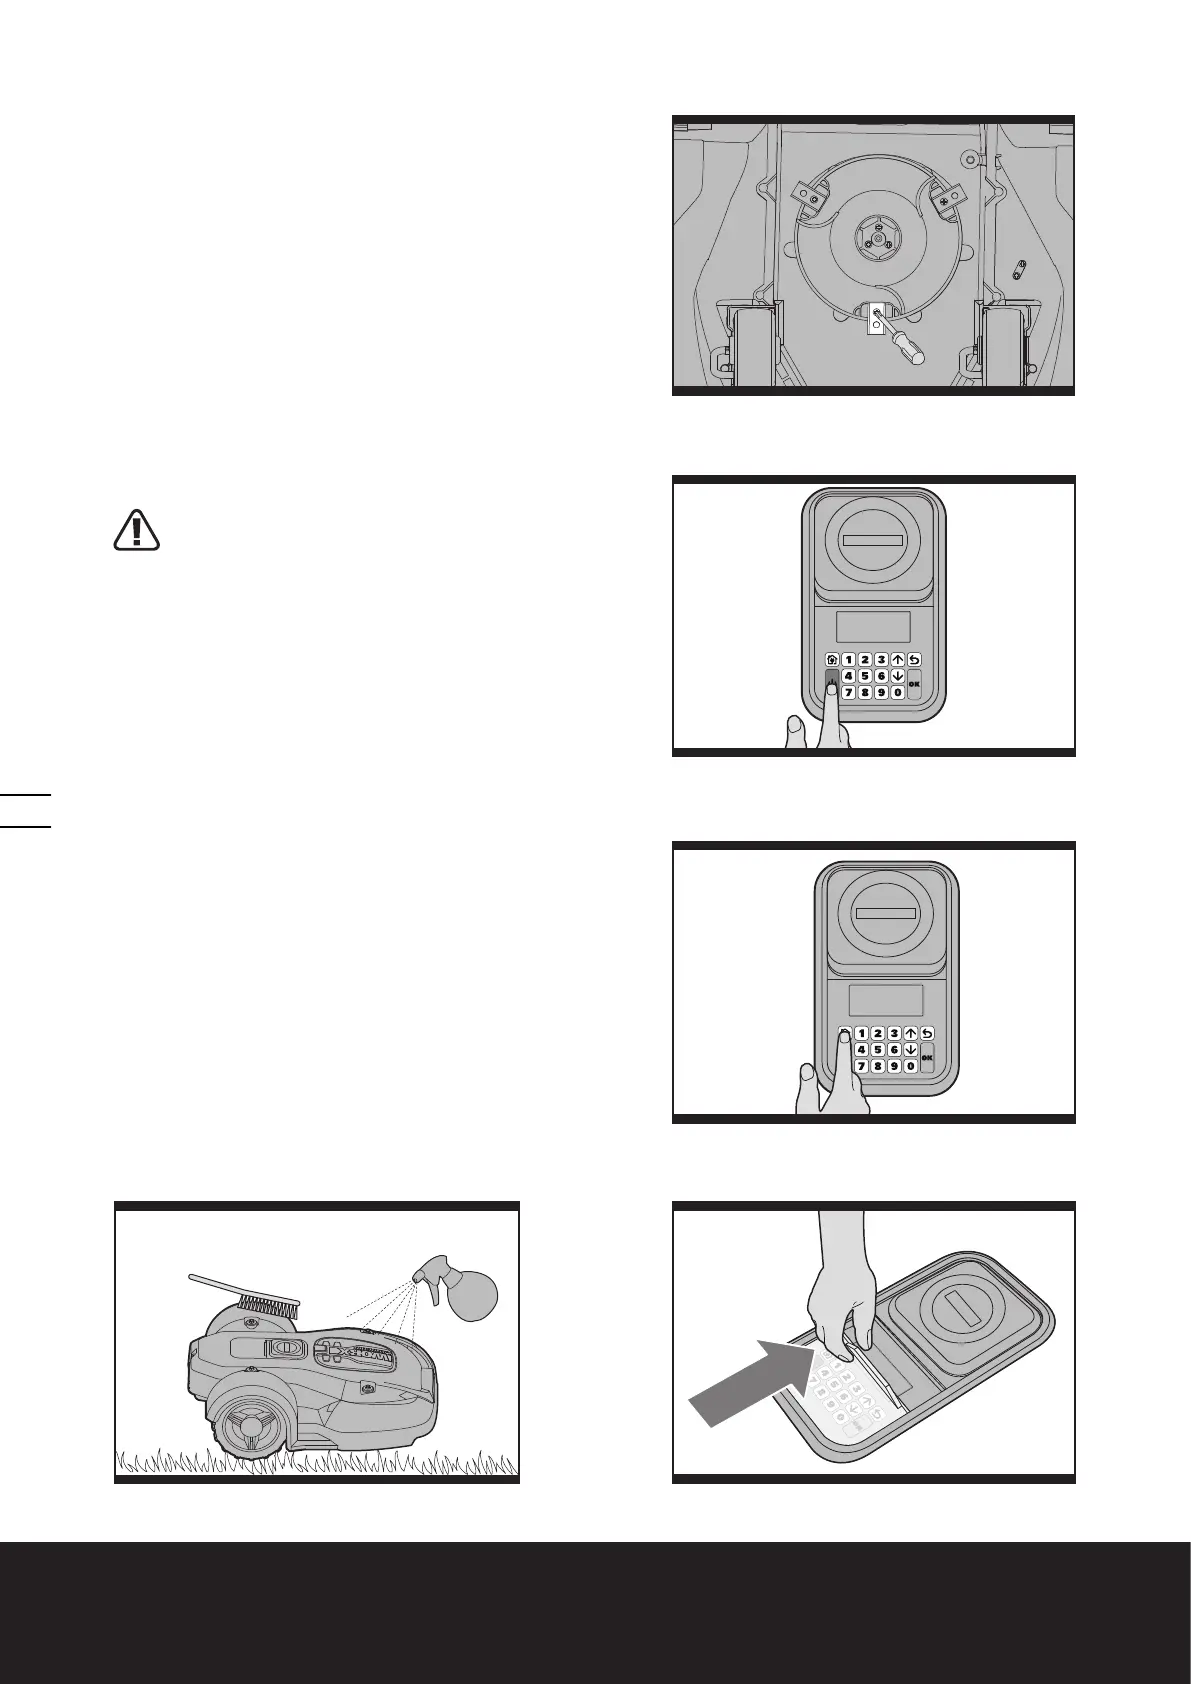
3. Firmly screw on the new Blades. (See Fig. K)
IMPORTANT: After screwing the Blade to the Blade Disc, make
sure the Blade is able to spin freely.
5.2 Keep it Clean
WARNING! Before cleaning turn your Landroid
®
L
OFF by pressing the ON/OFF Button to OFF. Put on
protective gloves before cleaning the Blade Disc (16) and
do not use running water. (See Fig. L,M,N)
A. Cleaning the Body
Your Landroid
®
L will live a much happier and longer life if it is cleaned
regularly. Although, as your Landroid
®
L is an electric machine, you
will need to take care when cleaning, so DO NOT use a hose,
high pressure washers or otherwise pour running water on your
Landroid
®
L, it is best to use a spray bottle filled with water. When
cleaning the machine body use a soft brush or clean cloth and avoid
using solvents or polishes. (See Fig.O) Lastly, make sure that you
remove all build up of grass clippings and debris.
B. Cleaning the Underside
Again, it is important that you power the Landroid
®
L OFF using the
ON/Off Button and wear protective gloves before touching the Blade
Disc (16).
First, flip your Landroid
®
L upside down to expose its underside. Here
you will see the Blade Disc (a), the surrounding Motor Frame Box
(b) (14), and the Front (18) and Drive (11) Wheels. Clean everything
thoroughly with a soft brush or moist rag. (See Fig.P)
Rotate the Blade Disc to make sure it moves freely and that there
is not anything lodged between it and the surrounding Motor Frame
Box. Also, make sure the Blades are able to spin freely and that
there's no grass obstructing them.
IMPORTANT: Remove any lodged debris so that it does
not cause a crack in the Blade Disc. Even the tiniest
crack can decrease your Landroid
®
L's mowing output.
O
N
L
M
K

 Loading...