EasyManua.ls Logo

Xantrex SW Series User Manual

Xantrex SW Series
152 pages
To Next Page IconTo Next Page
To Previous Page IconTo Previous Page
Page #116 background image
TECHNICAL INFORMATION
Page
108
2001 Xantrex Technology, Inc.
5916 - 195th Street N. E.
Arlington, WA 98223
Telephone: 360/435-8826
Fax: 360/435-2229
www.traceengineering.com
SW Series Inverter/Charger
Part No. 2031-5
Rev. C: February 2001
PARALLEL CONNECTION
Batteries are connected in parallel when all the positive terminals of a group of batteries are connected
and then, separately, all the negative terminals are connected. In a parallel configuration, the battery bank
have the same voltage as a single battery, but an amp/hour rating equal to the sum of the individual
batteries. This is usually only done with 12-volt battery-inverter systems.
Each individual 12-volt battery capacity = 50 amp hours
Figure 33, Parallel Configuration: 12-Volt Battery Wiring
SERIES - PARALLEL CONNECTION
As the name implies, both the series and parallel techniques are used in combination. The result is an
increase in both the voltage and the capacity of the total battery bank. This is done very often to make a
larger, higher voltage battery bank out of several smaller, lower voltage batteries. This is common with all
battery-inverter system voltages. The smaller, lower voltage batteries are first connected in series to
obtain the needed voltage, then these batteries, connected in series sets are connected in parallel to
increase the battery bank capacity.
The best arrangement when using a series-parallel configuration is to connect all the smaller, lower
voltage batteries in parallel, then connect all these batteries in parallel into series sets to obtain the
needed voltage. This configuration is often called cross-tying. This is less convenient and requires
additional cables but reduces imbalances in the battery, can improve the overall performance and in a
shorted cell scenario, would cause only the battery(s) that are actually in parallel with the shorted
battery to discharge. This would allow you to re-configure your battery bank with the other batteries that
are in parallel with the shorted/discharged battery(s) and still be operational only at a lower capacity.
The more efficient cross-tying method is shown in Figure 34 and Figure 35 as dash (- - -) lines. If
cross-tying is not desired, the dash lines shown may be ignored.
12V 12V
12V INVERTER
(Total Battery Capacity
= 200 Amp Hours)
12V 12V
FUSED
DISCONNECT

Table of Contents

Question and Answer IconNeed help?

Do you have a question about the Xantrex SW Series and is the answer not in the manual?

Xantrex SW Series Specifications

General IconGeneral
Input Voltage12V, 24V, or 48V DC
Output Voltage120V AC
WaveformPure Sine Wave
Output Frequency60 Hz
Operating Temperature-20°C to +50°C
Battery ChargerYes
ProtectionsOverload, Over-temperature, Short Circuit

Summary

Important Safety Instructions

General Precautions

General safety guidelines and warnings for using the inverter.

Special Notices

Important notes regarding tools, wiring, and system configuration.

Personal Precautions

Specific safety measures for working with batteries and equipment.

Installation

DC Cabling

Instructions for connecting DC power cables to the inverter and battery.

AC In Cabling

Procedure for connecting AC power input to the inverter.

AC Out Cabling

Procedure for connecting AC power output to the loads.

AC Wiring

Requirements and recommendations for AC wiring connections.

AC Input and Output Connections

Details on connecting AC power to the terminal block.

AC Installation Guidelines

Step-by-step guidelines for AC wiring installation.

DC Wiring

Cautions and recommendations for DC wiring and battery cable sizing.

Battery Cable Sizing

Guidelines for selecting appropriate battery cable size and length.

DC Disconnect and Overcurrent Protection

Requirements for battery overcurrent protection and disconnect switches.

Battery Cable Connections

Procedure for properly connecting battery cables to the inverter.

System Grounding

Instructions and requirements for grounding the inverter system.

Functional Test

Menu System

User Menu

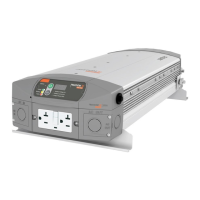
Daily controls and settings for inverter and generator operation.

Inverter Mode (1) Menu Heading

Controls for turning the inverter ON/OFF, Search, or Charger modes.

Generator Mode (2) Menu Heading

Controls for managing generator operation: OFF, AUTO, ON, EQ.

Error Causes (5) Menu Heading

Assists in investigating error conditions indicated by the ERROR LED.

Setup Menu

Configuration settings for various inverter operating modes.

Inverter Setup (9) Menu Heading

Configures inverter operation modes like FLT, SELL, SLT, LBX.

Battery Charging (10) Menu Heading

Adjusts settings for the three-stage battery charging process.

AC Inputs (11) Menu Headings

Configures operating characteristics for utility and generator AC inputs.

Gen Auto Start Setup (12) Menu Heading

Sets automatic generator start conditions and run times.

Gen Starting Details (13) Menu Heading

Configures generator start routines for different generator types.

Low Battery Transfer (LBX) (16) Menu Heading

Sets voltage points for automatic transfer to utility during low battery.

Battery Selling (17) Menu Heading

Controls selling power to the grid and sets sell current limits.

Grid Usage Timer (18) Menu Heading

Manages when utility power is used for charging or selling.

Operation

Operating Modes

Describes the various operational modes of the inverter/charger.

Inverter Mode

Detailed explanation of the inverter's operating modes: OFF, SRCH, ON, CHG.

Low Battery Protection

Mechanisms to prevent battery over-discharge.

Adjusting the Low Battery Protection

Settings for managing low battery cut-out and cut-in voltages.

Charger Mode

Operation details for the inverter acting as a battery charger.

Recommended Battery Charger Settings

Guidelines for setting charger parameters based on battery type.

Inverter/Charger Mode

How the inverter transfers between modes and manages AC power.

Generator Support Mode

Using the generator to assist the inverter with heavy loads.

Automatic Generator Control Mode

Setting up automatic generator start and stop based on system conditions.

Generator Error Causes

Troubleshooting generator errors indicated by the ERROR LED.

Utility Backup Mode

Operating the inverter for utility backup during outages.

Utility Interactive Mode

Using the inverter to sell excess power to the utility grid.

Utility Interactive Operation With Utility Backup

Combining utility interactive sales with backup power.

Energy Management Mode

Managing utility power usage for battery charging and load support.

Peak Load Shaving Mode

Limiting peak AC load draw from the utility grid.

Low Battery Transfer (LBX) Mode

Automatically transferring loads based on low battery voltage.

Technical Information

Battery Sizing

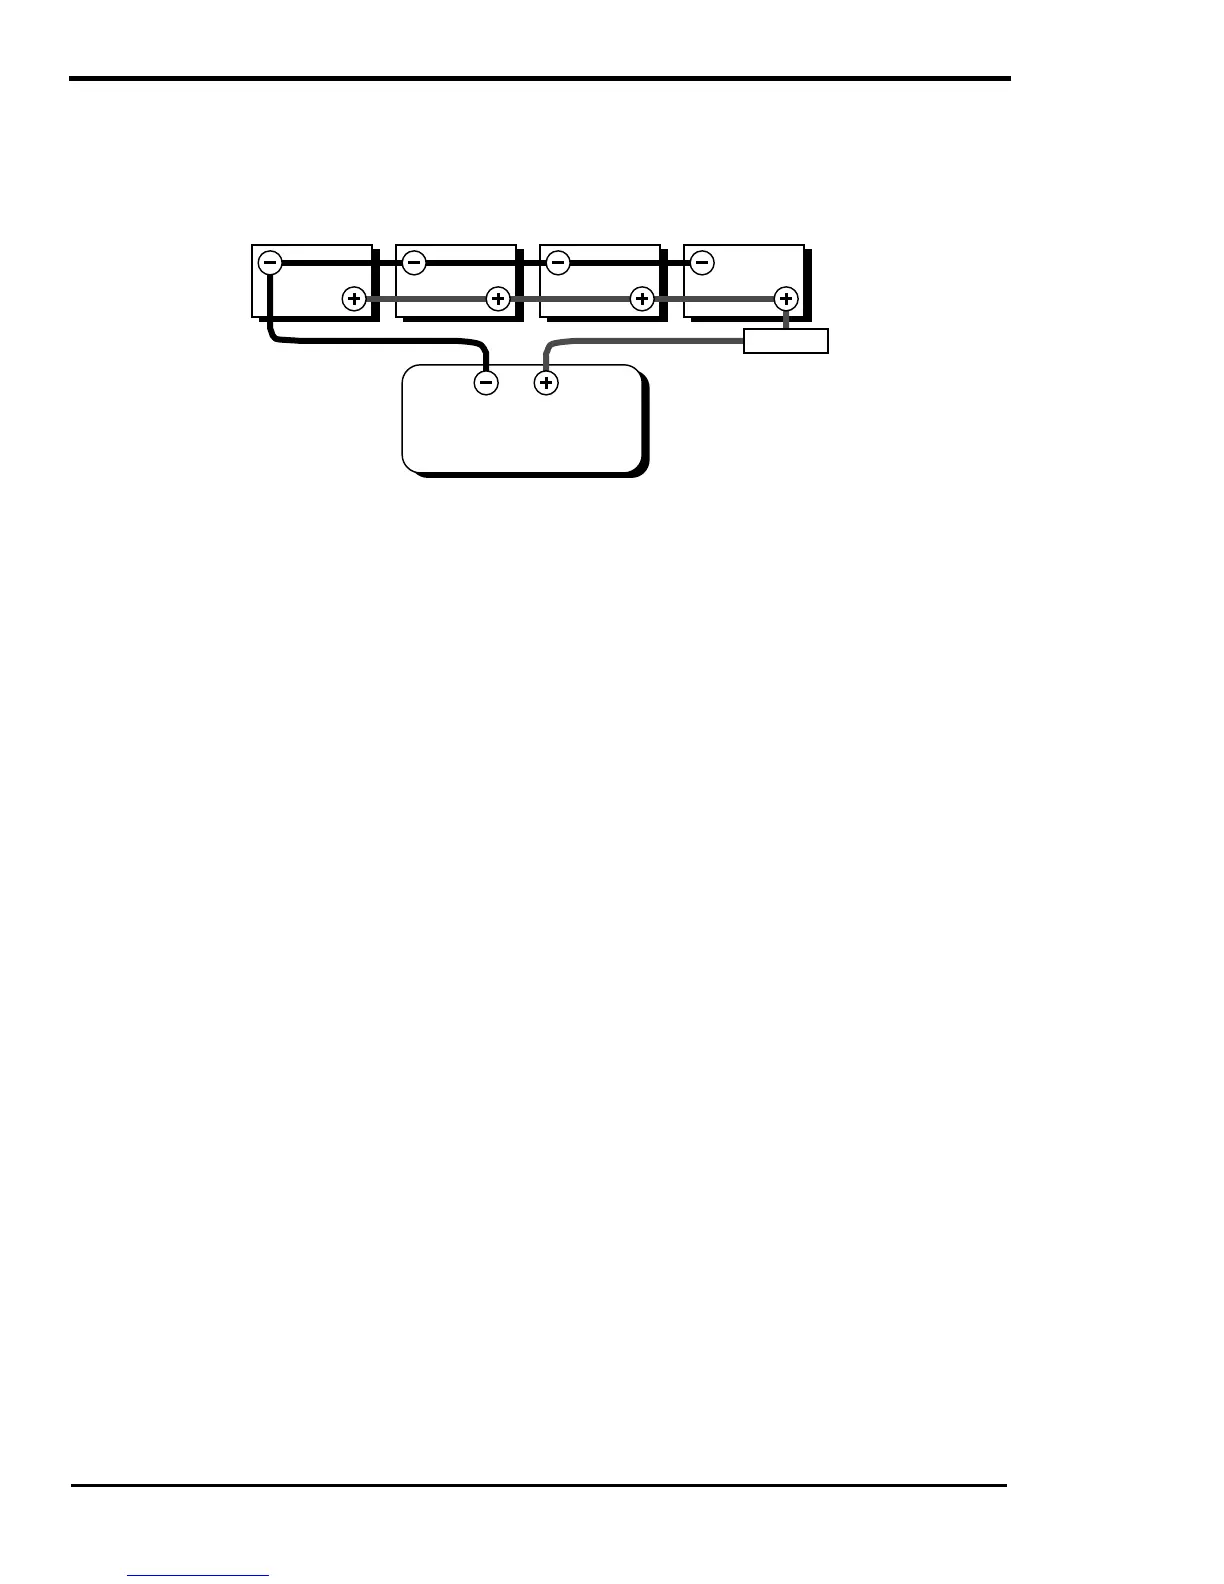
Guidelines for determining the appropriate battery bank size.

Battery Hook-Up Configurations

Methods for connecting batteries in series, parallel, or series-parallel.

Troubleshooting Guide Page 1

Guide to diagnosing and resolving inverter issues based on symptoms.

Troubleshooting Guide Page 2

Troubleshooting battery charger issues and error indications.

Troubleshooting Guide Page 3

Troubleshooting specific error causes and their solutions.

Setup Menu – 12 VDC (120 VAC/60HZ) Models

Default and adjustable settings for 12 VDC models.

Setup Menu – 24 VDC (120 VAC/60HZ) Models

Default and adjustable settings for 24 VDC models.

Setup Menu – 48 VDC (120 VAC/60HZ) Models

Default and adjustable settings for 48 VDC models.

Warranty/Repair Information

Limited Warranty

Details of the product warranty, coverage, and exclusions.

Warranty or Repair Service Required

Procedure for returning products for warranty or repair service.

Related product manuals