3. Choose one of the following:
• Click Check for updates > I agree, start update.
• Upload the flash file. To upload the flash file, perform the
following steps.
To get the latest firmware, go to www.xerox.com, and search for
your printer model.
1. Browse to the flash file.
Note: Make sure that you have extracted the firmware
zip file.
2. Click Upload > Start.
CCoonnffiigguurriinngg WWii--FFii DDiirreecctt
Wi-Fi Direct
®
is a Wi-Fi-based peer-to-peer technology that allows
wireless devices to connect directly to a Wi-Fi Direct-enabled printer
without using an access point (wireless router).
1. From the control panel, navigate to:
Settings > OK > Network/Ports > OK > Wi-Fi Direct > OK
2. Configure the settings.
• Enable Wi-Fi Direct—Enables the printer to broadcast its own
Wi-Fi Direct network.
• Wi-Fi Direct Name—Assigns a name for the Wi-Fi Direct
network.
• Wi-Fi Direct Password—Assigns the password for negotiating
the wireless security when using the peer-to-peer connection.
• Show Password on Setup Page—Shows the password on the
Network Setup Page.
• Auto-Accept Push Button Requests—Lets the printer accept
connection requests automatically.
Note: Accepting push-button requests automatically is
not secured.
CCoonnnneeccttiinngg aa MMoobbiillee DDeevviiccee ttoo tthhee PPrriinntteerr
Before connecting your mobile device, make sure that Wi-Fi Direct has
been configured. For more information, see Configuring Wi-Fi Direct.
CCoonnnneeccttiinngg UUssiinngg WWii--FFii DDiirreecctt
Note: These instructions apply only to Android mobile
devices.
1. From the mobile device, go to the settings menu.
2. Enable Wi-Fi, and then tap Wi-Fi Direct.
3. Select the printer Wi-Fi Direct name.
4. Confirm the connection on the printer control panel.
CCoonnnneeccttiinngg UUssiinngg WWii--FFii
1. From the mobile device, go to the settings menu.
2. Tap Wi-Fi, and then select the printer Wi-Fi Direct name.
Note: The string DIRECT-xy, where x and y are two random
characters, is added before the Wi-Fi Direct name.
3. Enter the Wi-Fi Direct password.
CCoonnnneeccttiinngg tthhee PPrriinntteerr ttoo aa WWii--FFii NNeettwwoorrkk
Make sure that Active Adapter is set to Auto. From the control panel,
navigate to Tools > Network/Ports > OK > Network Overview > OK >
Active Adapter > OK > Auto > OK
Clearing Jams
AAvvooiiddiinngg jjaammss
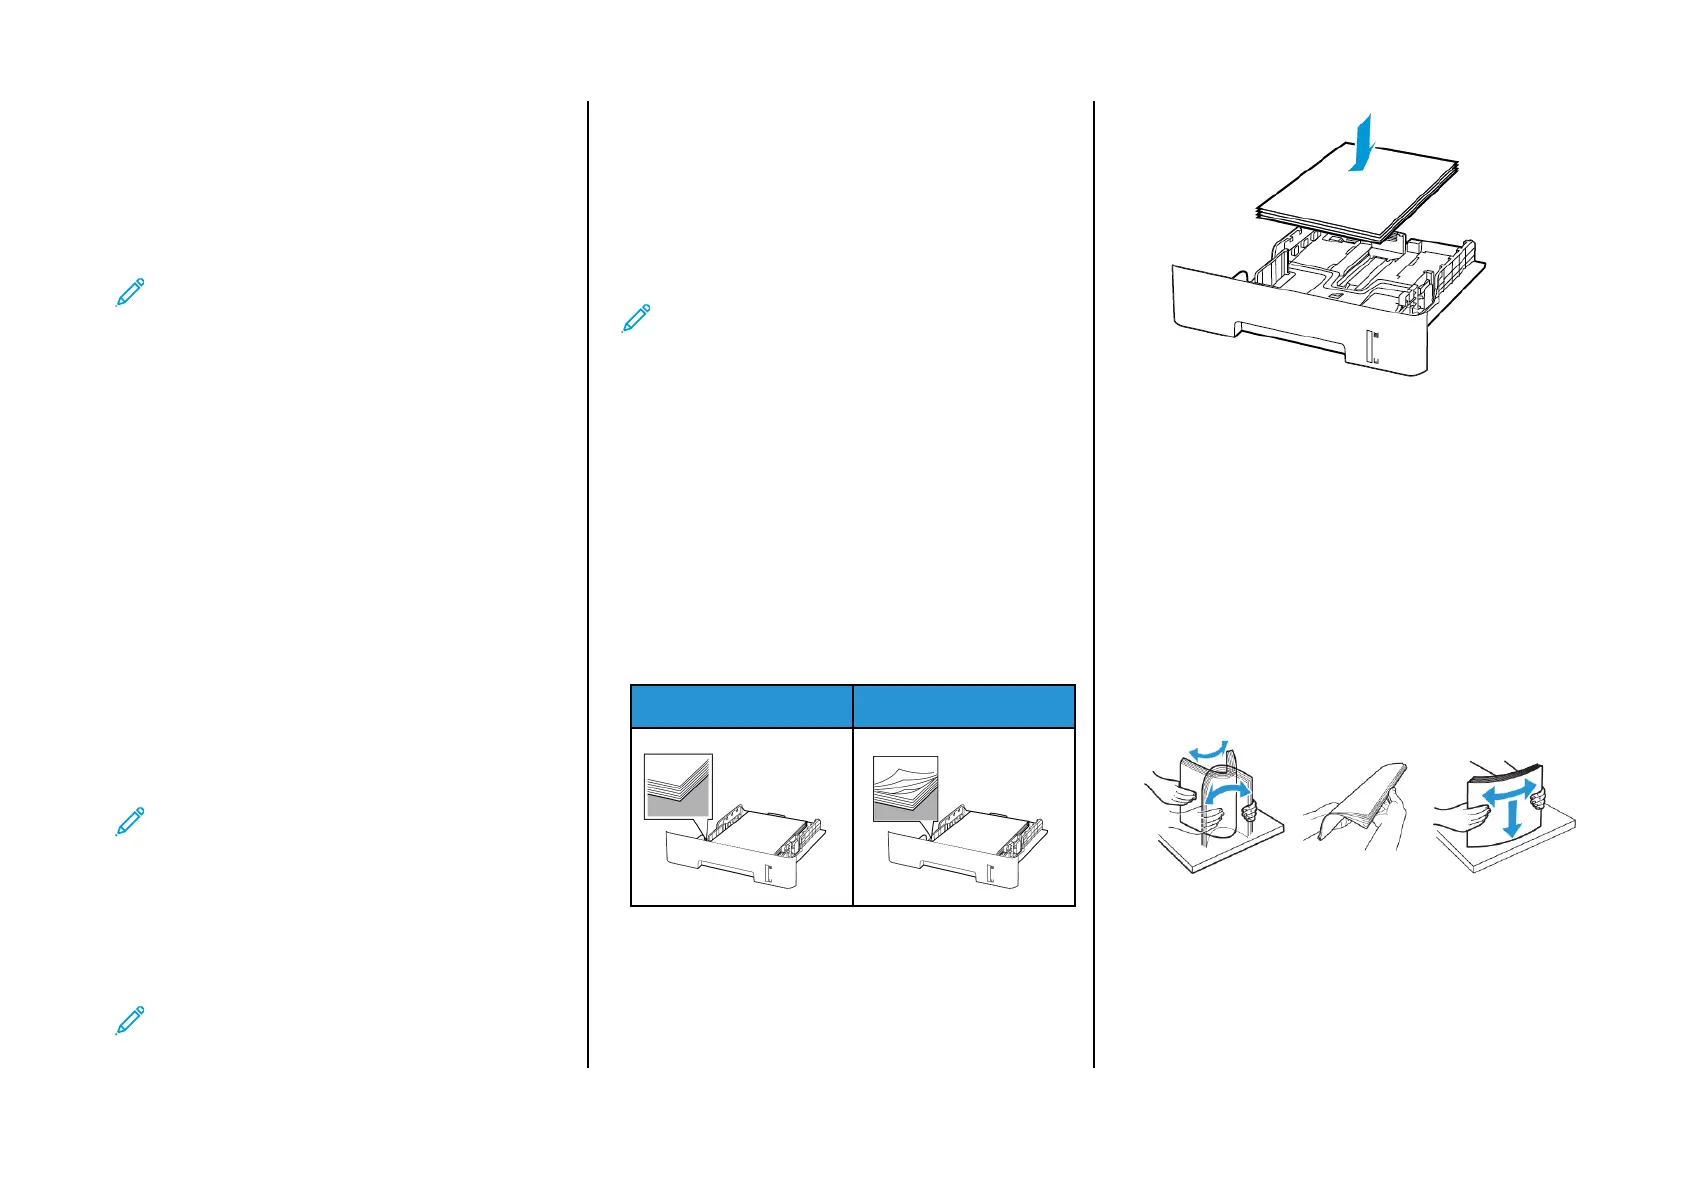
LLooaadd PPaappeerr PPrrooppeerrllyy
• Make sure that the paper lies flat in the tray.
Correct loading of paper Incorrect loading of paper
• Do not load or remove a tray while the printer is printing.
• Do not load too much paper. Make sure that the stack height is
below the maximum paper fill indicator.
• Do not slide paper into the tray. Load paper as shown in the
illustration.
• Make sure that the paper guides are positioned correctly and are
not pressing tightly against the paper or envelopes.
• For two-sided printing on A4-size paper, make sure that the paper
size setting in the duplex unit is set to A4.
• For two-sided printing on letter-, legal-, Oficio-, or folio-size paper,
make sure that the paper size setting in the duplex unit is set to
Letter.
• Push the tray firmly into the printer after loading paper.
UUssee RReeccoommmmeennddeedd PPaappeerr
• Use only recommended paper or specialty media.
• Do not load paper that is wrinkled, creased, damp, bent, or curled.
• Flex, fan, and align the paper edges before loading.
• Do not use paper that has been cut or trimmed by hand.
• Do not mix paper sizes, weights, or types in the same tray.
• Make sure that the paper size and type are set correctly on the
computer or printer control panel.
• Store paper according to manufacturer recommendations.
4
 Loading...