I-Class 79
5.2 Printhead Replacement
þ Note: Printheads are fragile; use extreme care when handling and never use
a sharp object on the surface. If you have questions, contact a
qualified technician or Datamax
Technical Support before proceeding.
To replace the printhead:
Œ Touch a bare metal part of the printer’s frame to discharge any static
electricity that may be present on your body.
• Turn ‘Off’ and unplug the printer.
Open the access cover; if ribbon is
installed, remove it.
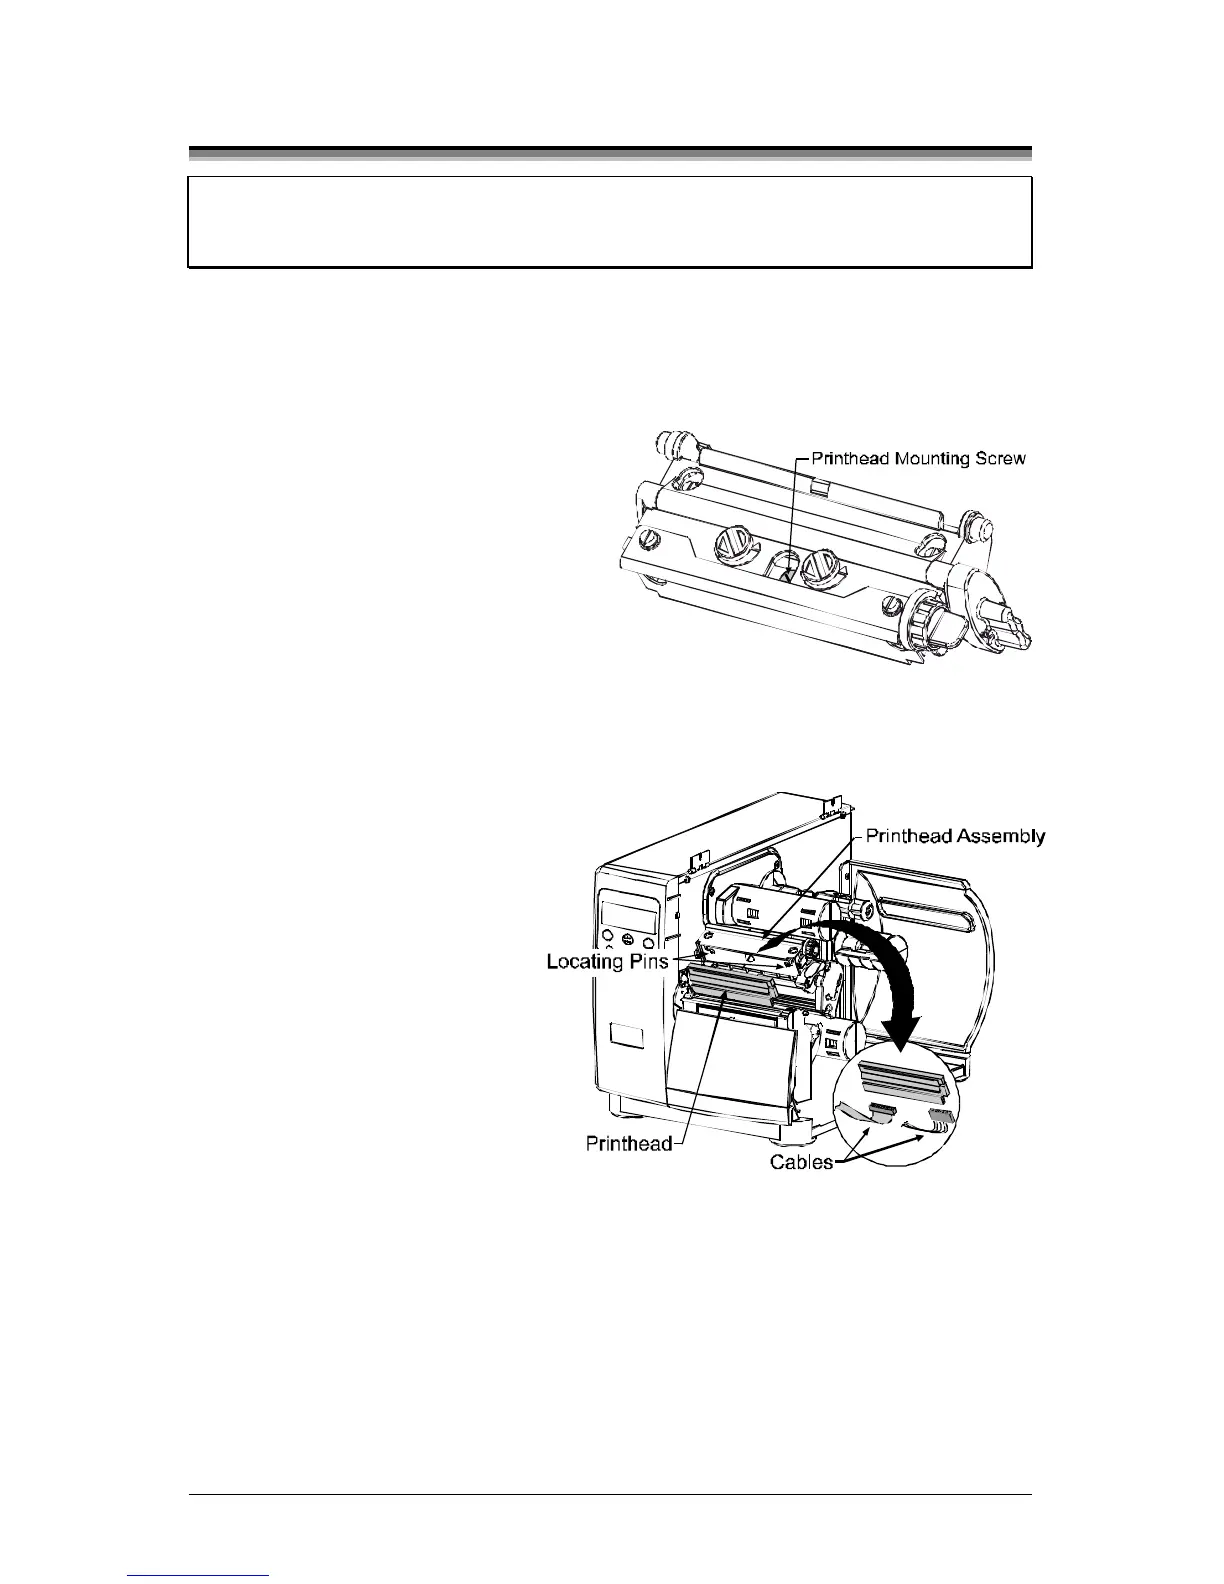
Ž With the printhead locked in the
down position, loosen the
Printhead Mounting Screw (it will
remain in the assembly).
• Rotate the printhead latch forward. While holding the Printhead, raise the
assembly. Disconnect the two Cables and then remove the old Printhead.
• While carefully holding
the new Printhead,
connect both Cables.
‘ Position the Printhead
onto the Locating Pins in
the Printhead Assembly
and secure in place with
the Printhead Mounting
Screw (do not over-
tighten). Please note that
a printhead alignment is
normally not required.
’ Clean the Printhead; see Section 5.3.1.
“ Reload ribbon (if removed), lower the printhead assembly, and rotate the
printhead latch back, into the locked position. Plug in and turn ‘On’ the
printer. Print a Validation Label (Section 4.3.5) and if necessary, adjust the
Print Control/Custom Adjustments/Darkness setting (Section 4.1.3) so that
the print contrast produced by the new printhead matches the previous one.
 Loading...