7 - 180 Phase
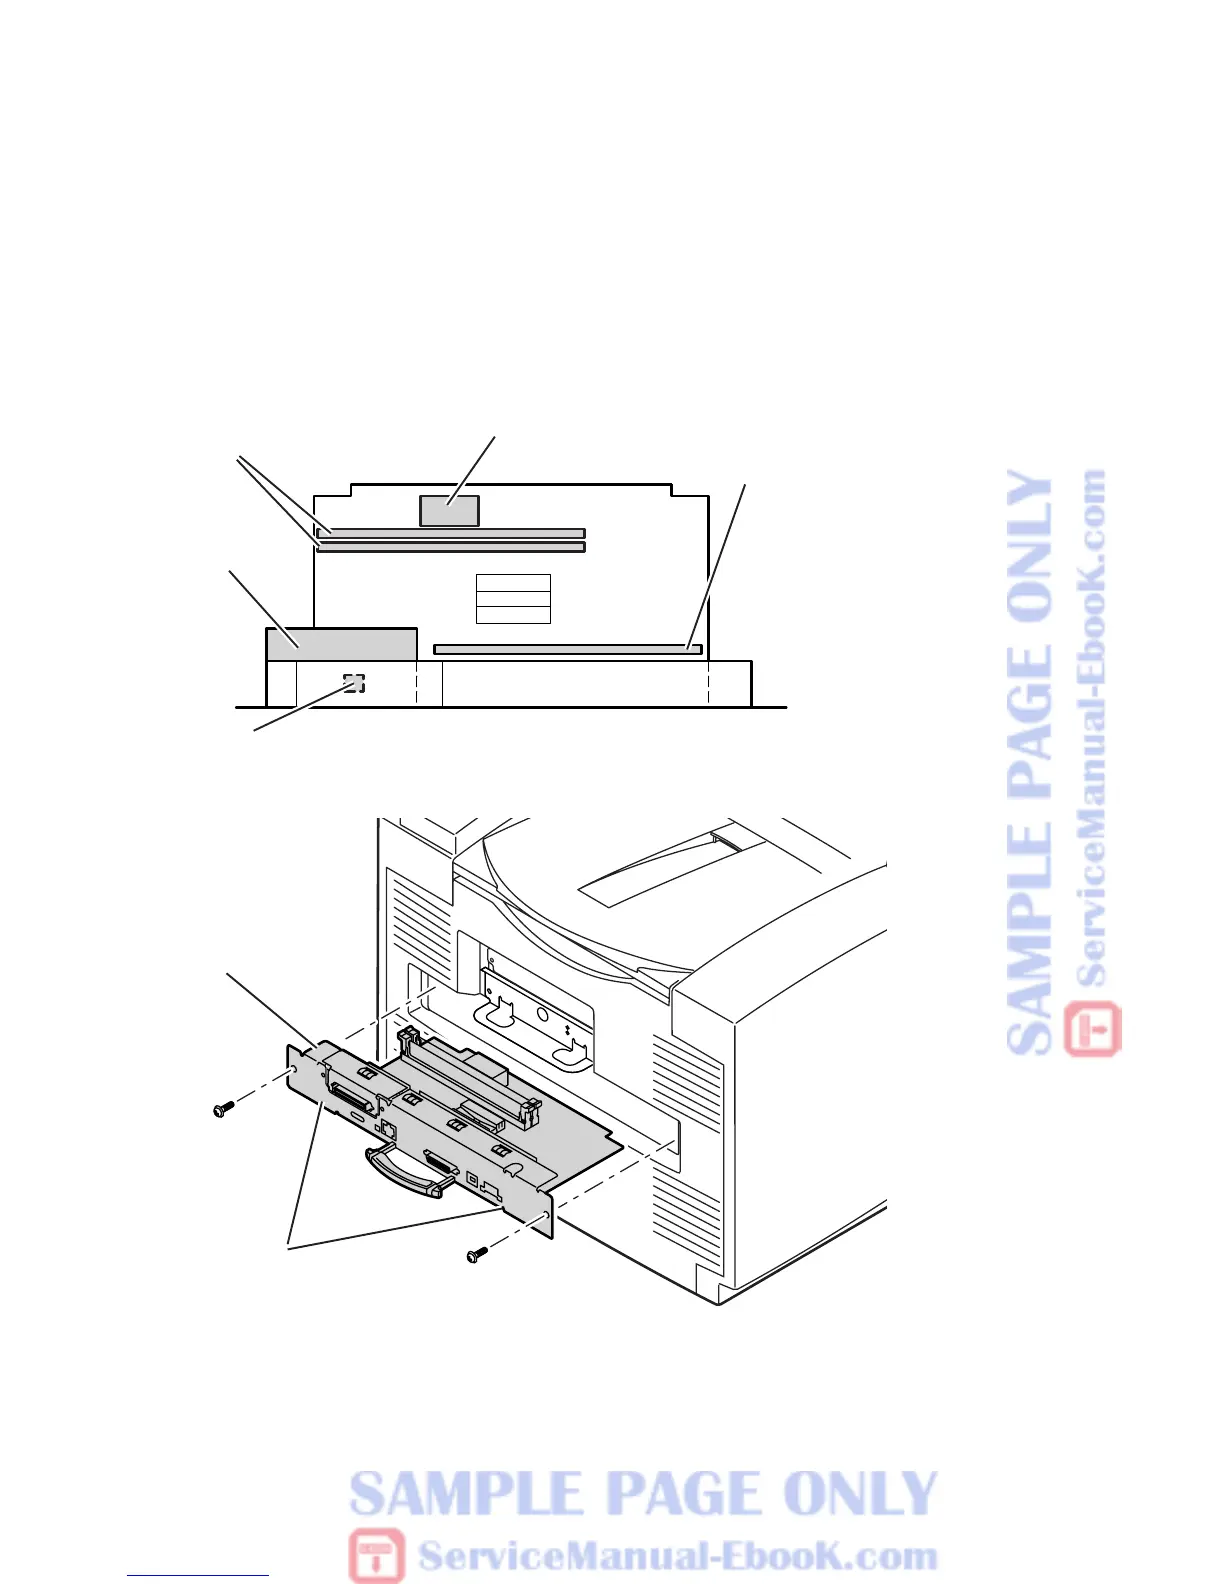
Main board and its components
Phaser 840 printer:
1. Power down the printer. Leave the power cord plugged in to provide a ground path for
static discharges. Remove the interface cables.
2. Loosen the two rear panel securing screws.
3. Slide out the main board.
4. If you are replacing the main board, transfer the socketed realtime clock/NVRAM chip
and the printer ID chip to the new board so that the printer’s settings and Ethernet
address are retained. Also swap the SCSI riser board, code ROM DIMM and the
SDRAM DIMMs.
Fig 7-1 Removing the Phaser 840 printer main board
840-4-36
Main
board
Press here
when installing
RAM
DIMMS
Realtime
clock/NVRAM
SCSI
riser
board
Printer
ID
Code ROM
DIMM
 Loading...