EasyManuals Logo

Yamaha MAJESTY 400 User Manual

Yamaha MAJESTY 400
98 pages
To Next Page IconTo Next Page
To Previous Page IconTo Previous Page
Page #81 background imageLoading...
Page #81 background image
PERIODIC MAINTENANCE AND MINOR REPAIR
6-37
2
3
4
5
6
7
8
9
clockwise.
7. Insert a new bulb into the socket,
push it in, and then turn it clock-
wise until it stops.
8. Install the socket (together with the
bulb) by turning it clockwise.
9. Place the turn signal light unit in
the original position, and then in-
stall the screws.
10. Install the windshield by installing
the screws.
11. Install panel A.
EAU34260
Replacing a rear turn signal
light bulb
1. Place the scooter on the center-
stand.
2. Remove cowling C for replacing
the left turn signal light bulb or
cowling D for replacing the right
turn signal light bulb. (See
page 6-7.)
3. Remove the socket (together with
the turn signal light bulb) by turning
it counterclockwise.
4. Remove the defective bulb by
pushing it in and turning it counter-
clockwise.
5. Insert a new bulb into the socket,
push it in, and then turn it clock-
wise until it stops.
6. Install the socket (together with the
bulb) by turning it clockwise.
7. Install the cowling removed.
1. Turn signal light bulb socket
1

Table of Contents

Questions and Answers:

Question and Answer IconNeed help?

Do you have a question about the Yamaha MAJESTY 400 and is the answer not in the manual?
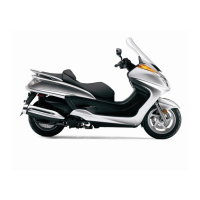
Yamaha MAJESTY 400 Specifications

General IconGeneral
Displacement395 cc
Bore x Stroke83.0 mm x 73.0 mm
Compression Ratio10.6:1
Fuel SystemFuel Injection
IgnitionTCI
Starter SystemElectric
TransmissionV-belt automatic
Front SuspensionTelescopic fork
Rear SuspensionUnit Swing
Front Tire120/80-14
Rear Tire150/70-13
Length2, 230 mm
Seat Height760 mm
Wheelbase1, 565 mm
Fuel Capacity14 liters
Maximum Torque36.0 Nm (3.7 kg-m) @ 6, 000 rpm
Rear BrakeSingle disc

Related product manuals