Installation, Administration and Maintenance
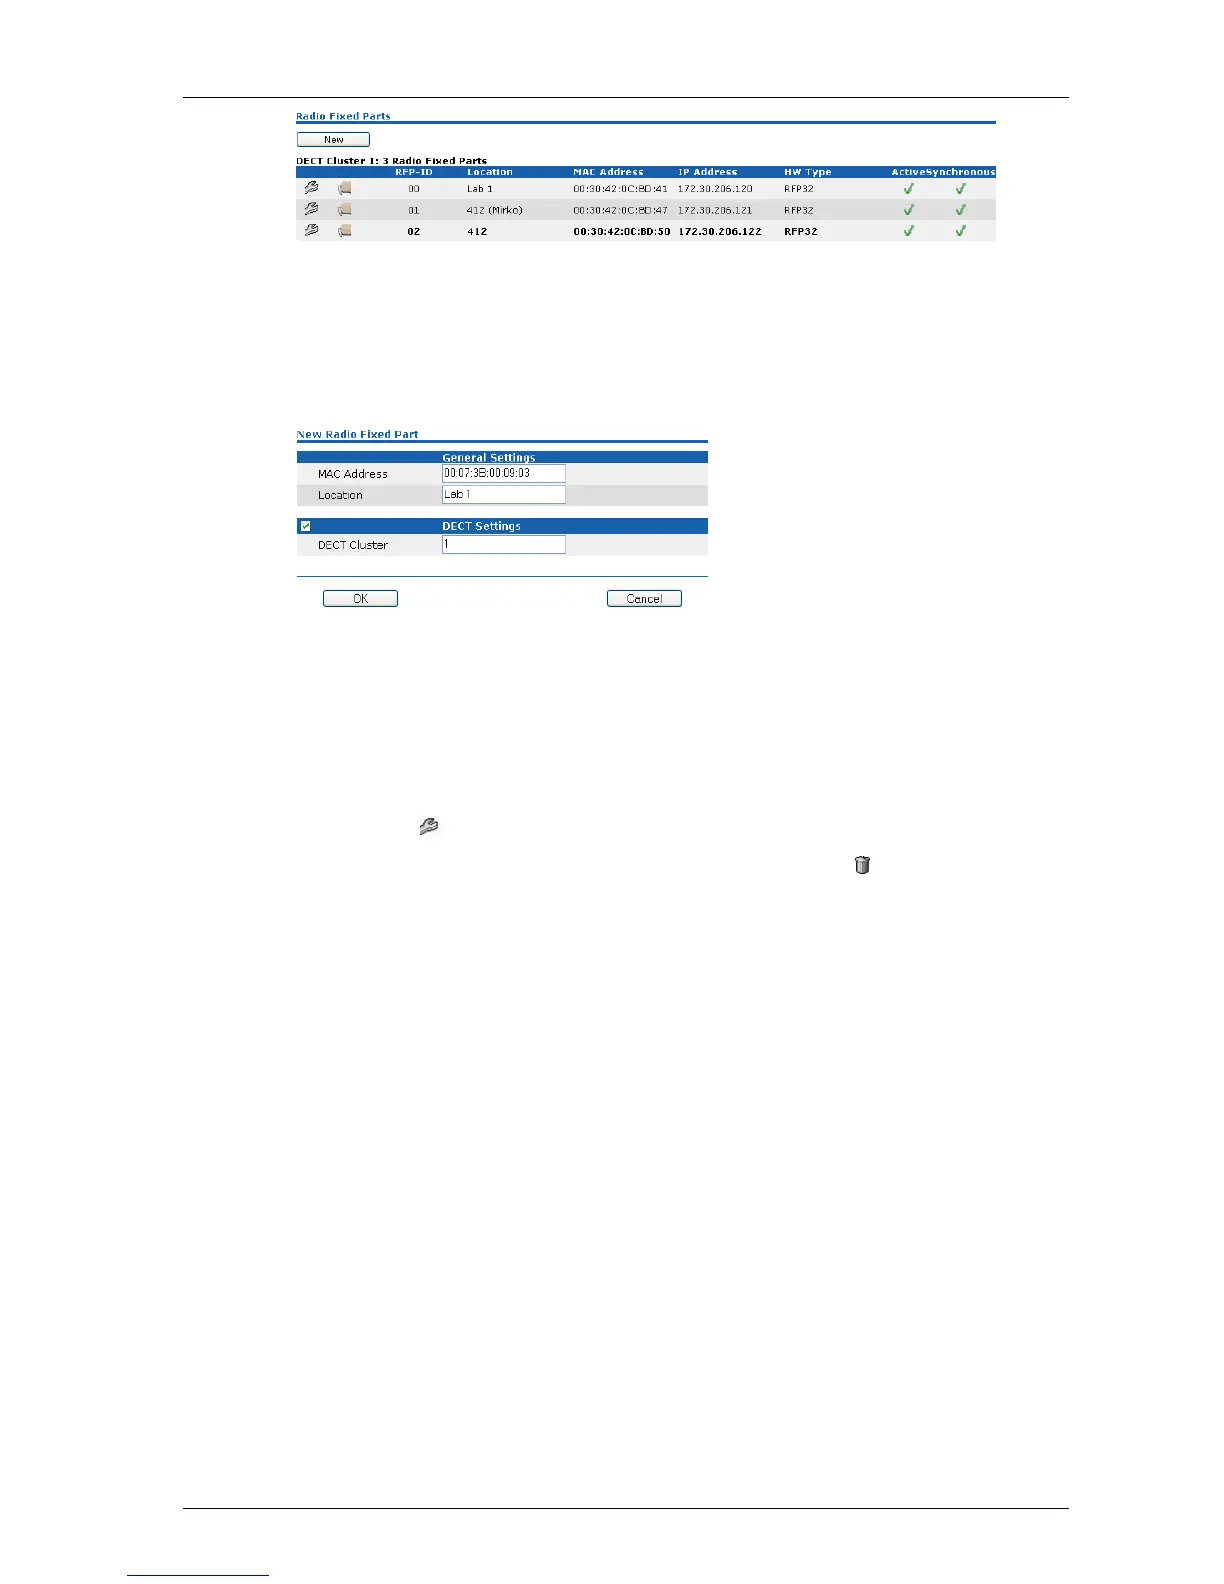
When the RFPs are connecting the OMM they submit their HW type. This
type is displayed on the RFP list web page.
New RFPs can be added to the system by pressing the “New” button. A
popup window appears providing the configuration of a new RFP.
Each RFP is identified by its MAC address (6 bytes hex format, colon
separated). The Ethernet address is unique and can be found on the back of
the chassis.
For easier administration each RFP can be associated with a location string.
The location string can hold up to 20 characters.
The same popup window could be opened for an existing RFP by pressing
the tool icon of the appropriate RFP.
An RFP could be deleted by pressing the trash can icon . A similar popup
window asks for confirmation showing the current configuration of this RFP.
Aastra Telecom Page: 35 (47)
 Loading...