4
1
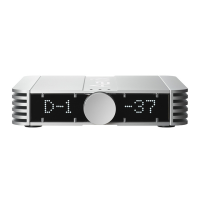
DISPLAY
During normal operation the left side of the display
shows the selected source, and the right side shows
the volume setting.
It is possible to change the source with the rotating
knob
5
and/or the up/down buttons
a
/
b
when
navigation mode is activated. When changing settings
(see “MENU FUNCTIONS” page 7), the display will
show the setting being changed.
2
STANDBY
Press the standby button
2
to place the amplifier
in standby mode, or to switch on the amplifier from
standby mode. When the amplifier is in standby mode,
the only light showing on the amplifier will be a dim
LED light in the lower left corner. When you switch on
the amplifier, the outputs will be muted, and a line will
illuminate at the bottom of the displays, starting in
the lower left corner.
During the start-up cycle, the circuits of the amp will
stabilize, and any power amp(s) connected to the pre
outs will have some time to stabilize. When using trig-
ger cables between the amplifier and power amp(s),
the power amp(s) will be switched on and off together
with the amplifier.
3
MUTE / REMOTE CONTROL PAIRING BUTTON
The mute button has multiple functions. When you
press this button briefly, it will mute the speaker
outputs of the amplifier, and also the pre outs with
the standard configuration (see “MENU FUNCTIONS”
page 7). The display will show ”Mute” instead of the
volume setting.
If you are using an Apple remote, you can pair the am-
plifier with one specific remote. In order to pair your
remote control with the amplifier, press and hold the
front panel mute button
3
for more than one second.
When the amplifier is ready to pair, the display will
flash slowly. To pair, press a button on your remote
control facing it toward the amplifier. The display will
show ”Paired”. Press the front panel mute button
3
again briefly to go back to normal operation.
You can remove the pairing, so that the amp will stop
responding to the remote again, by pressing the front
panel mute button for more than five seconds. When
the five seconds have passed, the displays will flash
fast. Press a button on the remote, to complete the
procedure. The display will show ”Unpaired”. Press the
front panel mute button
3
again briefly to go back
to normal operation.
4
NAVIGATION/MENU BUTTON
The navigation button lets you select the desired
source. Pressing the navigation button
4
briefly will
activate input selection. The display will flash, while
still showing the selected input. Turning the volume
control knob
5
either clockwise or counter-clock-
wise, or pressing the up/down buttons
a
/
b
lets you select the desired source. Press the
navigation button again to deactivate input selection
mode.
The navigation button is also used for accessing the
menu. See ”MENU FUNCTIONS” page 7.
5
VOLUME CONTROL (ROTATING KNOB)
Use the rotating knob
5
to change the volume,
source or other settings.
FRONT PANEL FUNCTIONS
 Loading...