5
Interface for Arm Applications
Before installing to mounting device, please refer to
Fig.1-2.
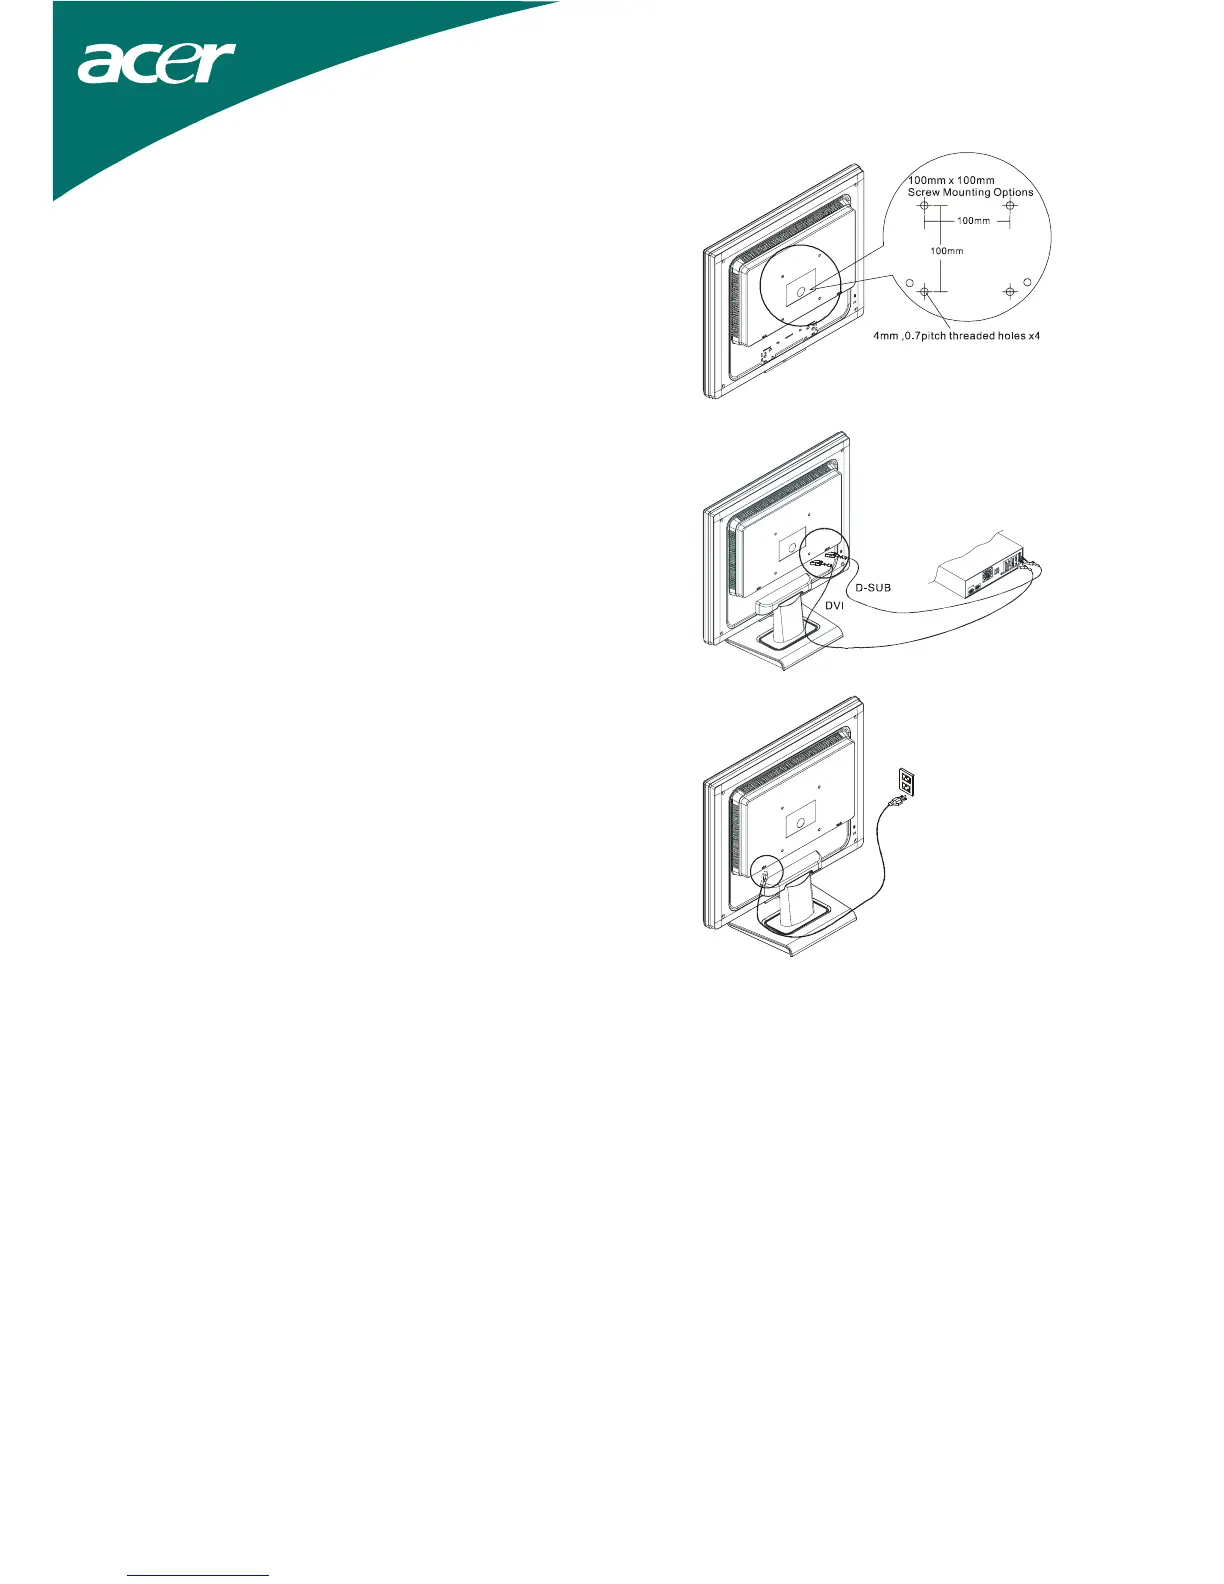
The rear of this LCD display has four integrated 4 mm, 0.7
pitches threaded nuts, as well as four 5 mm access holes in
the plastic covering as illustrated in Figure 1-3. These
specifications meet the VESA Flat Panel Monitor
Physical Mounting Interface Standard (paragraphs 2.1
and 2.1.3, version 1, dated 13 November 1997).
Figure 1-3
Connecting the Display
1. Power off your computer.
2. Connect one end of the signal cable to the LCD
Monitor’s D-SUB or DVI (option) port.(See Fig 1-4)
3. Connect the other end of the signal cable to the D-SUB
or DVI (option) port on your PC.
4. Make sure connections are secure.
Figure 1-4
Connecting the AC Power
1. Connect the power cord to the LCD Monitor.
(See Fig. 1-5)
2. Connect the power cord to an AC power source.
Figure 1-5
Power Management System
This LCD Monitor complies with the VESA DPMS (version 1.0) Power Management guidelines. The
VESA DPMS provides four power saving modes through detecting a horizontal or vertical sync. signal.
When the LCD Monitor is in power saving mode, the monitor screen will be blank and the power LED
indicator will light yellow.
 Loading...