Contents
1.
Getting
Started
Introduction
..
..
..
.
.
.
.
.
.
.
.
.
.
.
.
.
.
.
.
.
..
..
..
. 1-1
Overview .
..
..
..
.
.
.
.
.
.
.
.
.
.
.
.
.
.
.
.
.
..
..
..
..
.
.
1-2
Features
..
.
.
.
.
.
.
.
.
.
.
.
.
.
.
.
.
.
.
.
..
..
..
.
.
.
.
.
.
1-2
Accessories
Available
.
.
.
.
.
.
.
.
.
.
.
.
.
.
.
.
.
.
.
..
..
..
.
.
.
1-3
Options A
vailable .
.
.
.
.
.
.
.
.
.
.
.
.
.
.
.
.
.
.
.
..
..
..
.
.
.
1-3
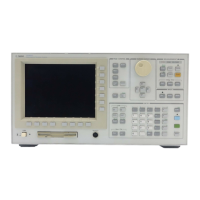
Front P
anel .
..
.
.
.
.
.
.
.
.
.
.
.
.
.
.
.
.
.
..
..
..
..
.
.
.
.
1-4
Display .
..
.
.
.
.
.
.
.
.
.
.
.
.
.
.
.
.
.
.
.
.
.
..
..
.
.
.
.
.
.
1-6
Rear
P
anel
.
.
..
.
.
.
.
.
.
.
.
.
.
.
.
.
.
.
.
.
.
.
.
.
.
.
..
.
.
.
1-7
Initial
Inspection
.
.
.
.
..
..
..
.
.
.
.
.
.
.
.
.
.
.
.
.
.
.
.
.
.
.
..
1-8
Providing
clearance
to
dissipate
heat
at
installation site
..
..
.
.
.
.
.
.
.
.
1-8
Instruction
for
Cleaning
.
.
.
..
..
..
..
.
.
.
.
.
.
.
.
.
.
.
.
.
.
.
.
1-8
P
ower
Cable
.
.
.
.
.
..
..
.
.
.
.
.
.
.
.
.
.
.
.
.
.
.
.
.
.
.
.
.
..
. 1-9
Preparation
for
Use
.
.
.
.
.
..
..
.
.
.
.
.
.
.
.
.
.
.
.
.
.
.
.
.
.
.
.
1-11
Power
Requirements .
.
.
.
.
.
.
.
.
.
.
.
.
.
.
.
.
.
.
.
.
.
..
..
.
.
1-11
Fuse
.
.
.
.
.
.
.
.
.
.
.
.
.
.
.
..
.
.
.
.
.
.
.
.
.
.
.
.
.
.
.
.
1-11
Turning
ON
the
4349B
.
.
.
.
.
.
.
.
.
.
.
.
.
.
.
..
.
.
.
.
.
.
.
.
.
.
1-12
Using
Front
P
anel
Keys
.
.
.
.
.
.
.
..
.
.
.
.
.
.
.
.
.
.
.
.
.
.
.
.
.
.
1-13
Direct
Execution
Keys
.
.
.
.
.
.
.
.
.
..
.
.
.
.
.
.
.
.
.
.
.
.
.
.
.
.
1-13
T
oggle
Keys
.
.
.
.
.
.
.
.
.
..
..
.
.
.
.
.
.
.
.
.
.
.
.
.
.
.
.
.
.
.
1-13
Selection
Keys
.
.
.
.
.
.
.
.
.
.
..
..
.
.
.
.
.
.
.
.
.
.
.
.
.
.
.
.
.
1-13
V
alue
Setup
Keys
.
.
.
.
.
.
.
.
..
..
.
.
.
.
.
.
.
.
.
.
.
.
.
.
.
.
.
1-14
Numeric
Keys
..
..
..
..
.
.
.
.
.
.
.
.
.
.
.
.
.
.
.
.
.
..
..
. 1-14
Maximum
and
Minimum
Keys
..
..
..
.
.
.
.
.
.
.
.
.
.
.
.
.
.
.
.
1-15
Left/Down
and
Right/Up
Arrow
Keys .
..
..
.
.
.
.
.
.
.
.
.
.
.
.
.
.
1-15
Back
Space
Key
.
..
..
..
..
.
.
.
.
.
.
.
.
.
.
.
.
.
.
.
.
.
..
. 1-15
If
you
have
any
problems .
..
..
..
.
.
.
.
.
.
.
.
.
.
.
.
.
.
.
.
.
..
1-16
2.
Operating
the
4349B
Introduction . . . . . . . . . . .
.... .. .. .. .... .. .. .. ..
2-1
External V
oltage Source
.... .. ..
...................
2-2
TestLeads.... .. .. ..
.... .. .. .. ... .. .. .. .... .
2-2
Specications .... .. .. .. ...
..................
2-2
Installation .
.........................
.....
2-3
Measurement Conguration
.... .
....................
2-5
To Reset the 4349B
............
................
2-5
ToPerform the OPEN Correction Function ................. 2-5
To Select a Measurement Parameter..................... 2-5
To Select the Channel ........................... 2-6
ToEnter the Voltage Value ... .. .. .. .... .. . .. .... .. . 2-6
To Select the Measurement Range . . . . . . . . . . . . . . . . . . . . . . 2-6
To Select the Measurement Time Mode ................... 2-7
To Set the Averaging Rate ......................... 2-7
Contents-1

 Loading...