Fitting type: See Fig. 11A. Plastic compression nut fitting with built-in sleeve. No teflon tape needed here.
6. Point G Stage-5 filter’s T-fitting connection:
Tubing color: Yellow tubing. Connect the YELLOW tubing to Stage-5 filter’s T-fitting.
Fitting type: See Fig. 11A. Plastic compression nut fitting with built-in sleeve. No teflon tape needed here.
7. Point Y Tank’s input & output connection:
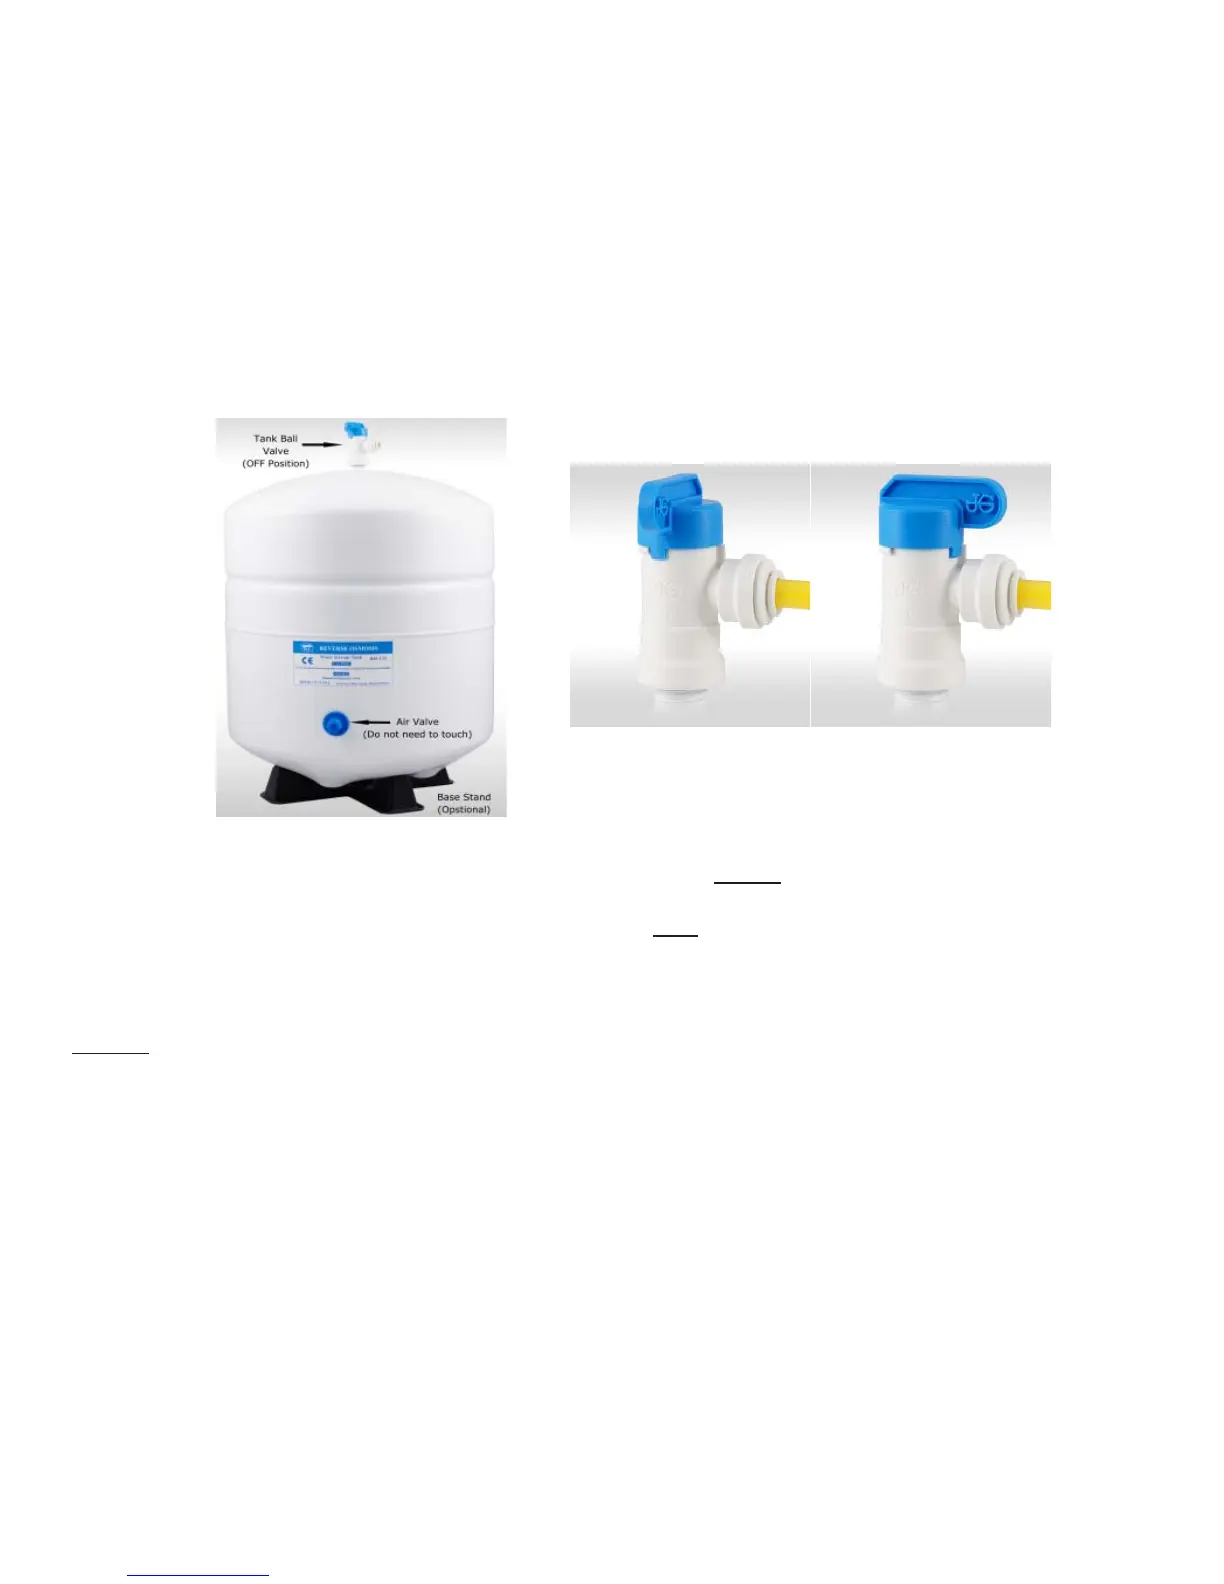
Prepare tank: See Fig. 12. Apply Teflon tape to tank’s threaded Output stem on top of tank (remove rubber
cap if there is one). Screw the tank Valve onto the Output stem.
Tubing color: Yellow tubing. Connect the YELLOW tubing from Stage-5 T-fitting to the tank’s valve.
Fitting type: Tank valve has Quick-Connect port. Simply push Yellow line into valve to hook up tank to
RO.
Option: Ice-maker Connection
If you want to connect product water from the RO to your icemaker, you will need:
• One T-fitting, preferably the quick-connect type fitting
• Extra ¼ “ tubing long enough to go from the RO system to your ice-maker
• Optional: One shut-off valve, preferably the quick-connect type.
Before connecting the product water line from Point Z to H, add a T-fitting near point H (see Fig. 10) to divert
product water to both the icemaker and the RO faucet.
Fig. 12
Standard 4-gallon Tank Diagram:
Off Position On Position
5
free drinking water.com
Using RO for Ice-maker only:
If you want the RO to feed your ice-maker (fridge) only, you should still connect the RO faucet as a 2nd outlet.
This allows you to drain the tank, flush new filters through the faucet rather than through your icemaker line. You
can hang the faucet by the system and not mount it.
 Loading...