User Manual for CD72/95/15003
Page 19
O
VERVIEW OF THE OPTIONS AVAILABLE
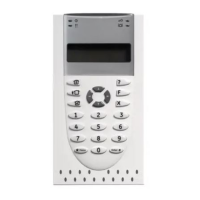
The following flowchart provides an overview of all the options available from the CD72 and CD95/150
alarm systems. It also shows the keypad keys you need to press in order to arrive at the options.
Options listed below in grey are only available for the CD95/150 alarm system. The symbols used to
represent the keys are as follows:
!
Accept X Reject
↓
Move forward
↑
Move backward
O
PTION LIST FOR THE
CD72/95/150
There are nine main menu options in this system. Depending on how the system has been
programmed, your code may not give you access to all of the options. If you want to access more
options than you currently are able to, contact your installer.
The menu options let you carry out the following operations:
Name of menu option What it lets you do
1. Arm Menu There are four sub-options, each allowing you to carry out a different
operation:
•
Normal Set Set the alarm
•
Partguard Set the alarm with zones excluded by the
installer
•
Set (No Buzzer) Set the alarm with no exit time
•
Forced Arm Set the alarm with all open zones
inhibited, except exit/entry zone(s) and access
zone(s)
•
Delay AutoArm Delay time of auto alarm
•
AADly Until
[
time
]
Set time of auto alarm
•
AA Ignore Off Ignore next auto alarm
•
Set Manager Slot Programming of an extra holiday slot
•
Previous Menu Return to menu
2. Inhibit Exclude open zones from a security area
3. Walk/Bell/Ch Test Test if detectors, internal/external bells are OK/ switch chime on or off
4. Light Menu Turn on external/internal lights
5. Unlock Unlock a door
6. E. Log/Time/Date Engineers log, listing all events in the system, print log, and changing
the standby date and time
7. Change Codes Change own code(s) (if programmed other codes and user names)
8. Operator Log Detailed list of activation and system operations. This log will be
cleared each time the system is armed
9. Finished? Exit to time and date display
 Loading...