Aruba Instant On AP25 Access Point | Installation Guide 5
The following sections provide instructions on how to use this mount bracket.
Installing the Access Point to a Ceiling Rail
1. Pull the necessary cables through a prepared hole in the ceiling tile near where the access point will be
placed.
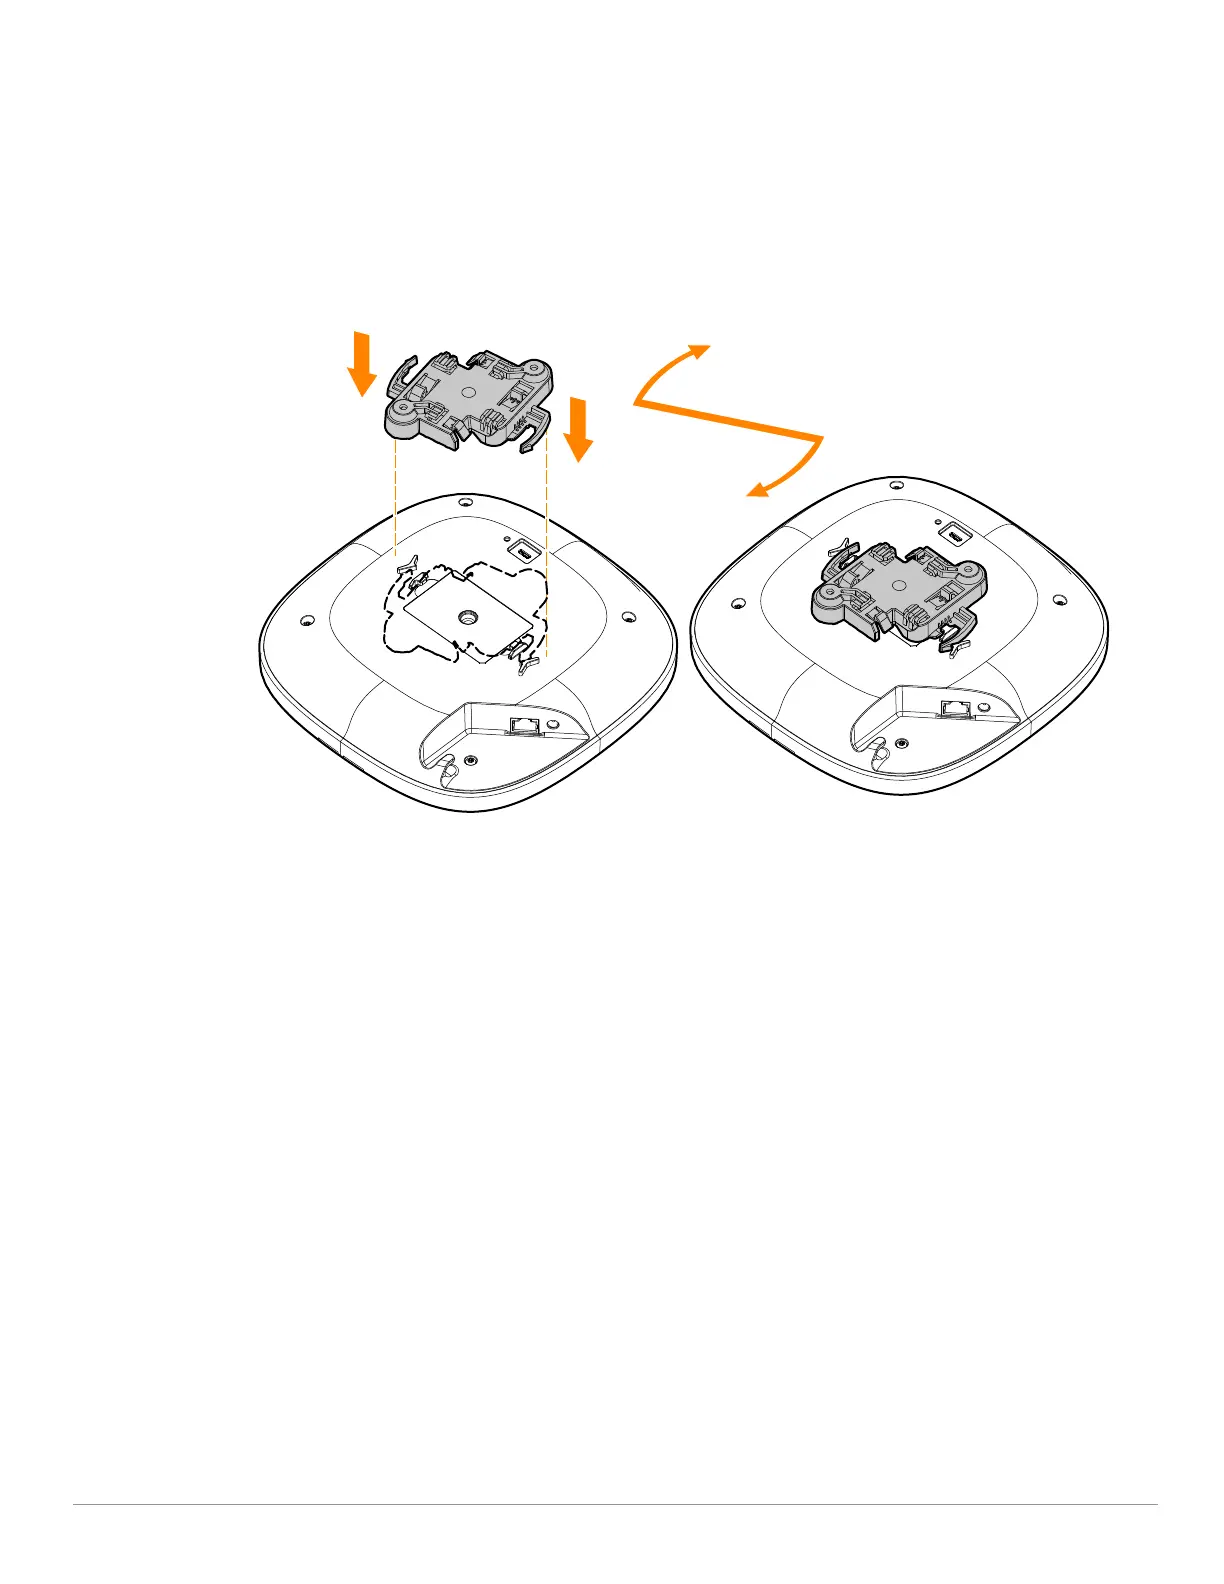
2. Place the mount bracket against the back of the access point with the mount bracket at an angle of
approximately 30 degrees to the tabs (see Figure 4).
3. Twist the mount bracket clockwise until it snaps into place in the tabs (see Figure 4).
Figure 4 Attaching the Mount Bracket to the AP
4. Hold the access point next to the ceiling rail with the mounting tabs of the mount bracket at approximately a
30-degree angle to the ceiling rail (see Figure 5 and Figure 6). Make sure that any cable slack is above the
ceiling tile.
5. Pushing toward the ceiling rail, rotate the access point clockwise until the device clicks into place on the
ceiling rail.
 Loading...