ASUS H110S2
1-1
H110S2
DDR4 SODIMM_B1 (64bit, 260-pin module)
DDR4 SODIMM_A1 (64bit, 260-pin module)
2230
SATA_PWRCON
LAN12
DC_PWR
DP
USB5_USB3_4
HDMI
MIC IN
USB3_C1
USB3_3
AUDIO
CHA_FAN
CPU_FAN
ALC
3236
14.0cm(5.5in)
14.7cm(5.8in)
LCD_BLKT_PANEL
LVDS
2280
SATA6G_1 SATA6G_2
CLRTC
VCC_PWR_SEL
BLKT_PWR_SEL
M.2(WIFI)
COM
F_PANEL
TPM
BATT_CON
LGA1151
Intel
®
H110
Intel
®
I219V
Realtek
®
8111H
Super
I/O
ASM1480
PANEL_SW
128Mb
BIOS
M2_TYPE_M
DIGI
+VRM
3 521
6
7
13141516
17
1011212 89
4
Product introduction
1
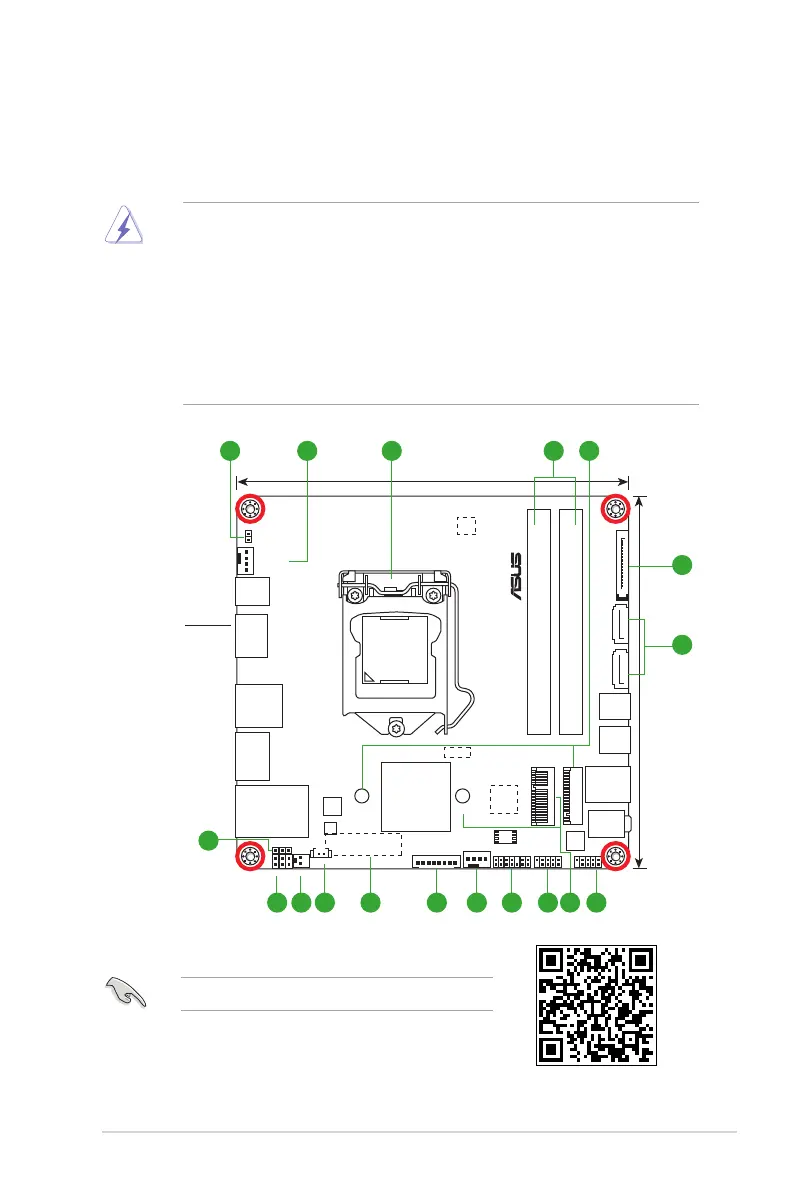
Motherboard overview
• Unplugthepowercordfromthewallsocketbeforetouchinganycomponent.
• Beforehandlingcomponents,useagroundedwriststraportouchasafelygrounded
objectorametalobject,suchasthepowersupplycase,toavoiddamagingthemdue
tostaticelectricity.
• Beforeyouinstallorremoveanycomponent,ensurethattheATXpowersupplyis
switchedofforthepowercordisdetachedfromthepowersupply.Failuretodoso
maycauseseveredamagetothemotherboard,peripherals,orcomponents.
• Unplugthepowercordbeforeinstallingorremovingthemotherboard.Failuretodoso
cancauseyouphysicalinjuryanddamagetomotherboardcomponents.
Place this
side towards
the rear of the
chassis
ScantheQRcodetogetthedetailedpindenitions.
 Loading...