EN 40
10
15
200
°C
0
:
20
H
:
M
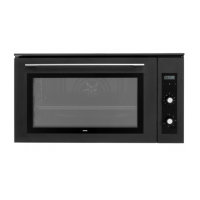
9. Confirm the setting of stage 2 using the confirm button.
1
2
3
00
:
20
200
°C
H
:
M
00
:
10
160
°C
H
:
M
00
:
30
10. If desired, tap on ‘3’ to show the stage 3 settings.
11. If necessary, change the stage 3 default values (function,
temperature and cooking time) (see points 3, 4 and 5).
12. Confirm the setting of stage 3 using the confirm button.
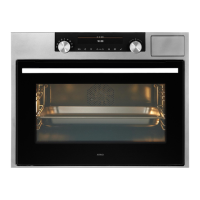
Delete a stage by tapping on the cross next to the settings. A stage can
only be deleted if it has not yet started.
13. By pressing the confirm button again, the oven starts to work
according to stage 1 (the active stage is displayed in white).
When the set time has elapsed, the following stage will be activated,
this being stage 2 and later stage 3 if this has been set.
The selected settings can be saved in ‘Favourites’. For this open the
‘ADD TO FAVOURITES’ menu from the ‘Plus’ menu (See ‘Saving a
cooking method’ in the ‘Additional functions’ chapter).
USE
 Loading...