1
1. INSTALLATION
1.1 INSTALLING A NEW THERMOSTAT
For a new installation, select a position about 5 feet (1.5 m) above the floor, where
there is good air circulation. The thermostat must be installed on an inside partition
wall.
Avoid places where there are:
a) air draughts (the top of a staircase, an air outlet,...)
b) dead air spots (behind a door,...)
c) direct sun rays
d) chimneys or hidden pipes
2
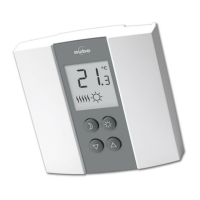
1.2 THERMOSTAT INSTALLATION AND ELECTRICAL HOOK-UP
Remove the mounting plate from the thermostat.
A) Undo the screw holding the mounting plate to the thermostat.
B) Lift the lower part of the plate to remove it from the thermostat.
C) Undo the screw holding the wire cover, and remove it.
D) Secure the mounting plate to the wall and do the appropriate connection
(refer to section 2).
A D
B
C
3
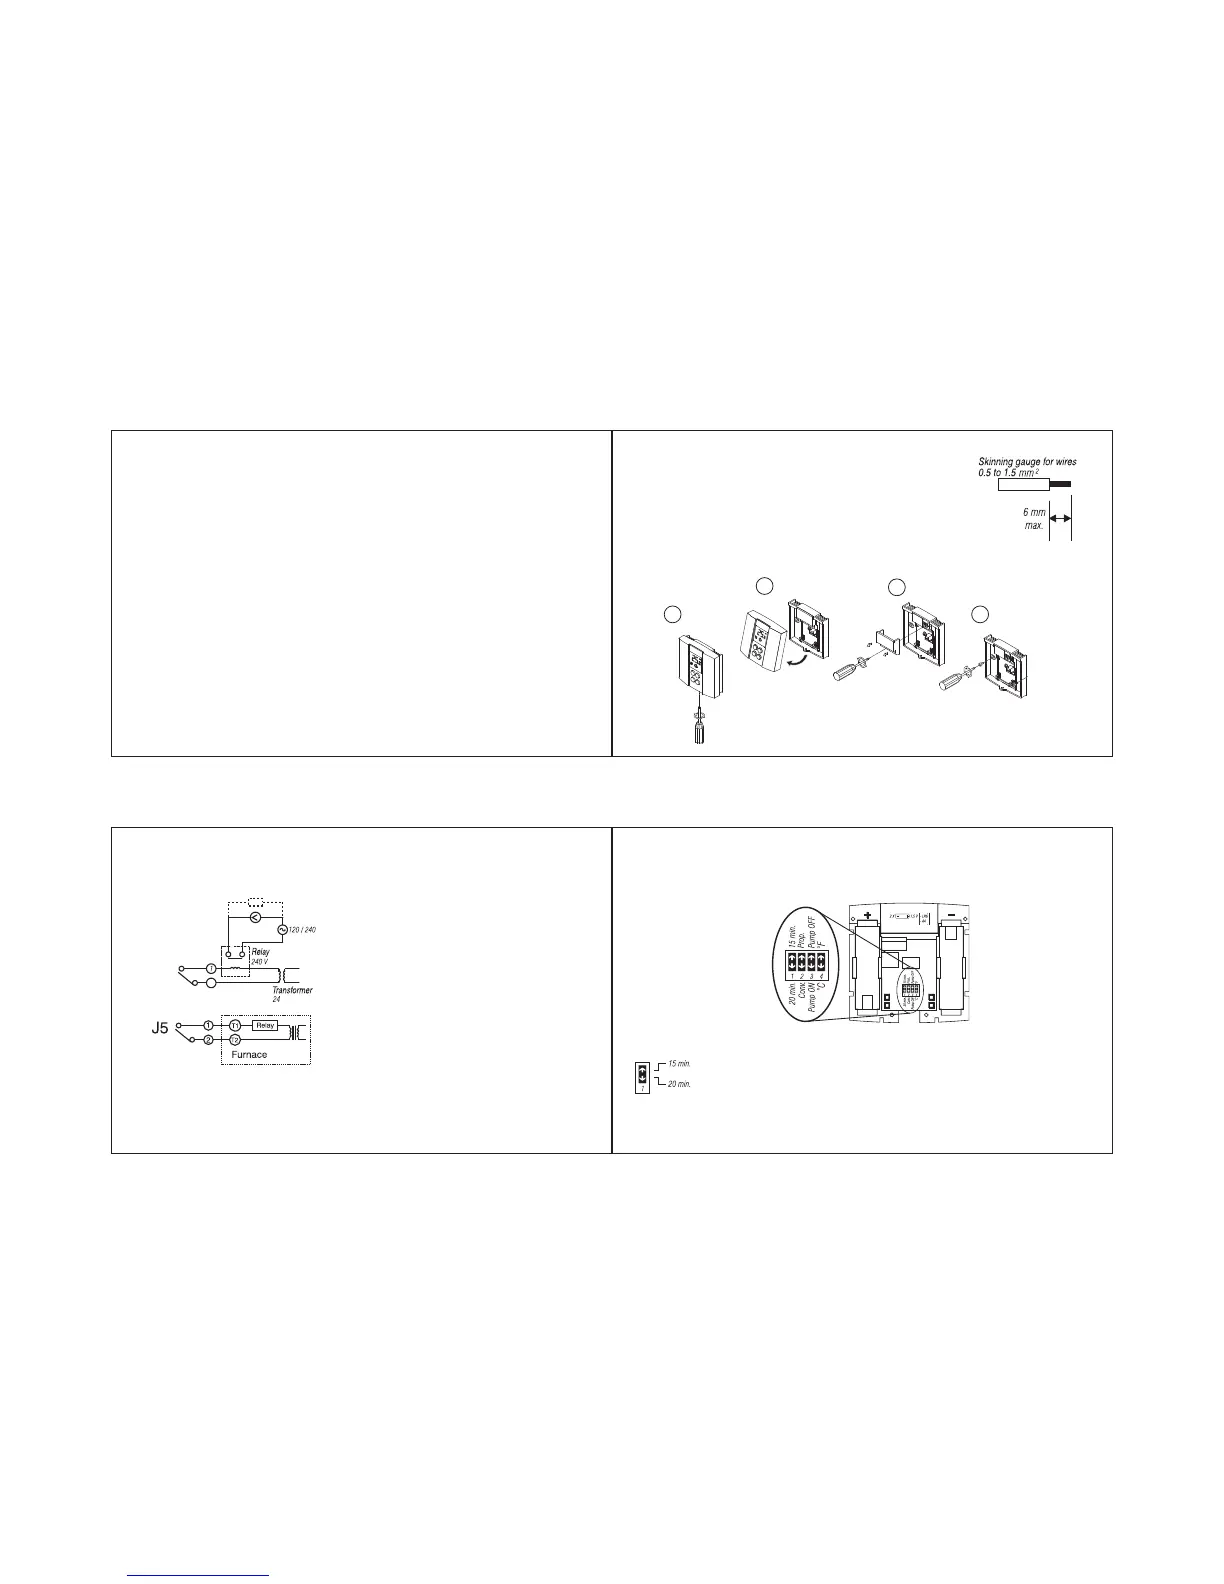
A) Refer to the diagram below for the 2-wire hook-ups. Please note that the
connection can be made on either terminal.
Note:
If you have a CT240 telephone remote control, refer to section 3.1 for hook-up.
WIRES CONNECTION
Hook-up at the furnace thermostat input for hot
water heating, or at the furnace for hot air system
B) Put the wire cover back on.
Hook-up of the circulator for a hot water system or
for a baseboard through a 24 V relay
4
1.3 THERMOSTAT CONFIGURATION
Before installing the thermostat on the wall, it must be set using the dip switches at
the back.
A) Cycles of 15 or 20 minutes
The TH135 offers you heating cycles of 15 or 20 minutes. The
shorter the cycles, the bigger your comfort. However, your system
will be solicited more often.
If you want 15 minute cycles, slide switch #1 upward. If you want
20 minute cycles, slide switch #1 downward.
 Loading...