Analog Fast Track Guide 3. Configuring the MediaPack
Version 4.8 15 March 2006
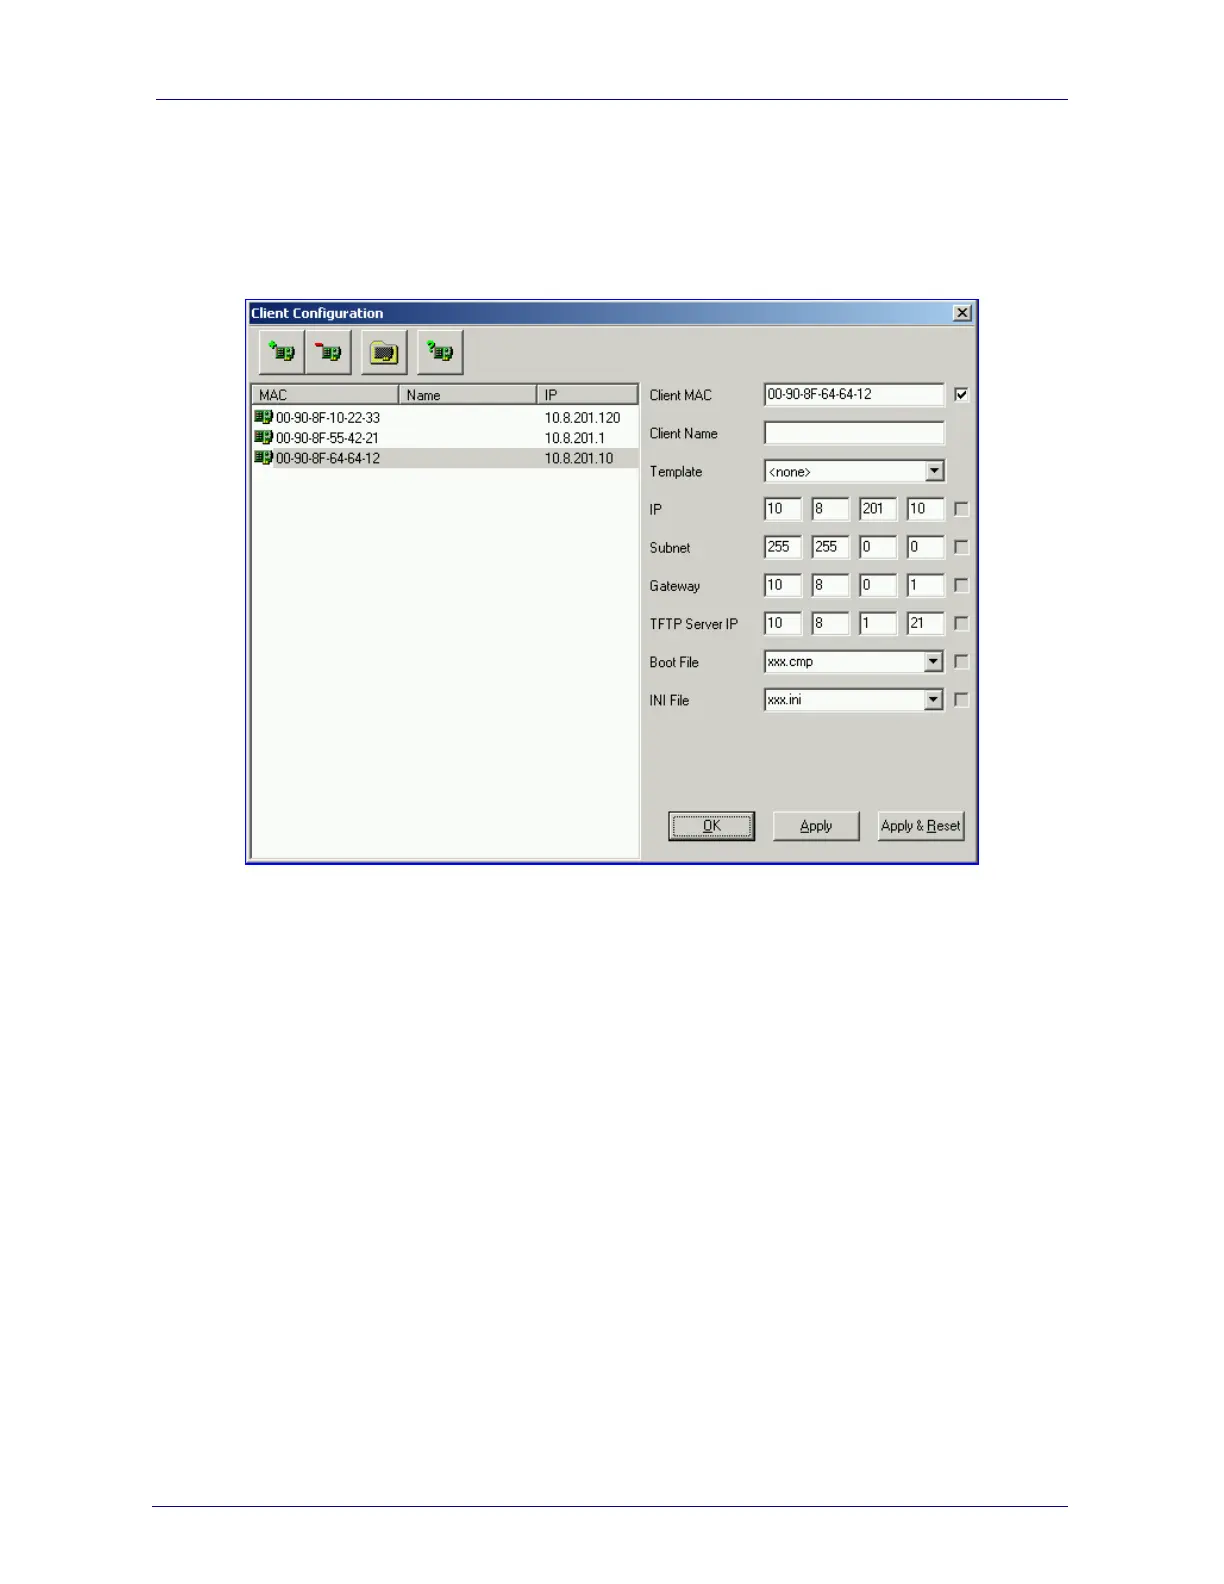
10. Click Apply to save this entry to the list of clients.
11. Click OK; the ‘Client Configuration’ screen is closed.
12. Use the reset button (located on the MediaPack rear panel) to physically reset the gateway
causing it to use BootP; the device changes its network parameters to the values provided
by the BootP.
Figure 3-1: Client Configuration Screen with Blank Parameters
3.1.3 Assigning an IP Address Using the Voice Menu Guidance
¾ To assign an IP address using the voice menu guidance, take these 7
steps:
1. Connect a telephone to one of the FXS ports. Lift the handset and dial ***12345 (three stars
followed by the digits 1, 2, 3, 4, 5).
2. Wait for the 'configuration menu' voice prompt to be played.
3. To change the IP address, press 1 followed by the pound key (#).
¾ The current IP address of the gateway is played. Press # to change it.
¾ Dial the new IP address; use the star (*) key instead of dots ("."), e.g. 192*168*0*4 and
press # to finish.
¾ Review the new IP address, and press 1 to save it.
4. To change the subnet mask, press 2 followed by the # key.
¾ The current subnet mask of the gateway is played. Press # to change it.
¾ Dial the new subnet mask; e.g. 255*255*0*0 and press # to finish.
¾ Review the new subnet mask, and press 1 to save it.

 Loading...