Dealer Development Center, Pune
50
Pulsar DTS-i 150/180 Training Notes Dealer Development Center, Pune
51
Pulsar DTS-i 150/180 Training Notes
SOP for Tubeless Tyre Removal
(Applicable for Pulsar DTS-i 180 cc only)
SOP for Fitment of Tyre :
• Place the tyre on any used old tyre and apply soap water on the
beading portion of the tyre.
• Place the wheel rim over the tyre and align it properly from all the sides
with respect to inner diameter of the tyre beading portion.
Important Note : Soap water enables smooth sliding-in of the wheel rim
inside the tyre beading portion.
Important Note :
Do not forget to align the yellow paint mark on the tyre w.r.t. Valve hole
on the wheel rim.
• Mount the wheel assly on the machine.
• Apply soap water by brush at tyre bead portion for easy fitment.
• Rotate and press the tyre gently in to the rim till tyre encompasses all
around the wheel rim.
• Carefully press the tyre bead portion with crowbar to fit the bead portion
in the wheel rim.
• Inflate the tyre to little more pressure than specification. You will hear a
noise that indicates that the bead portion has taken correct seat in rim.
• Now correct the tyre pressure as per specification.
• Dip the wheel assly into water and confirm for leakage between tyre &
rim.
Important Note :
Always ensure that tyre fitment line mark provided on tyre side wall
must be circumferentially parallel to the wheel rim circumference.
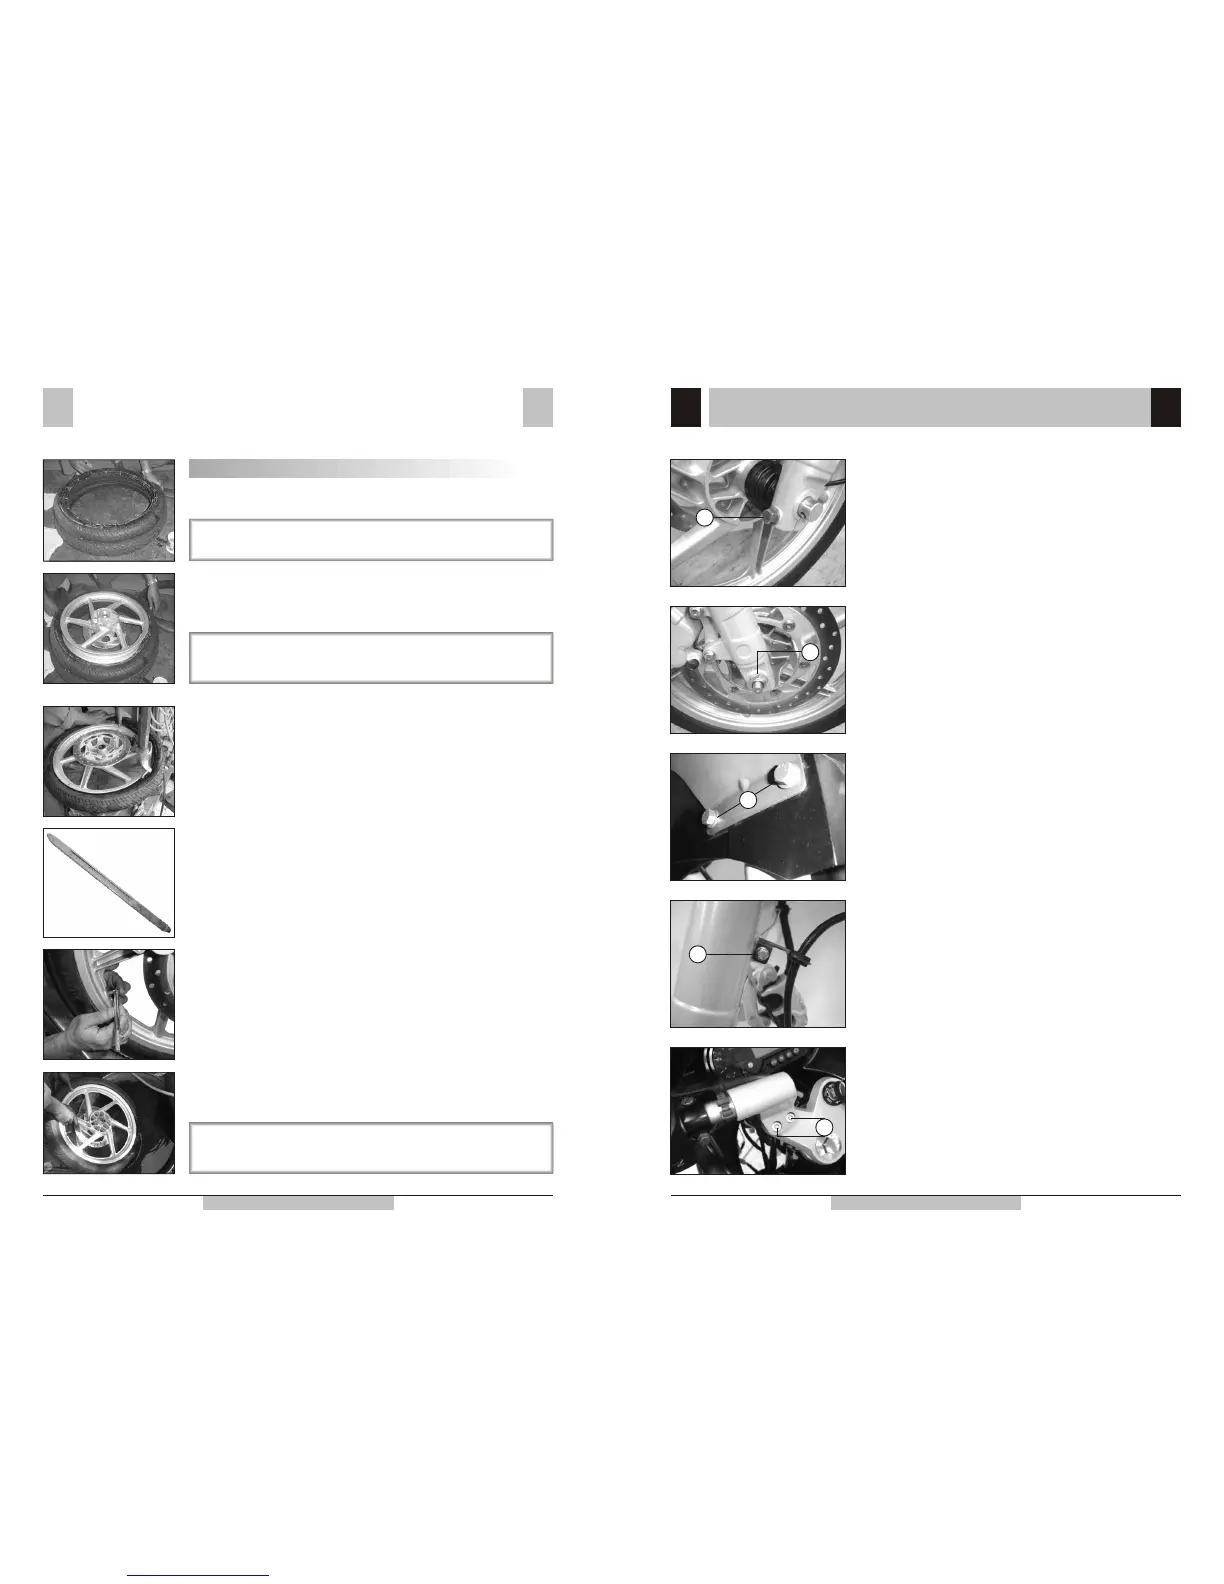
Dismantling & Assembling Front Fork
(Applicable for Pulsar DTS-i 180 cc only)
Remove :
• Pinch clamp bolt (A)
A
Remove :
• Axle Nut (A)
• Axle
• Wheel sensor case complete
• Wheel Assembly
Note :
Place a wedge between pads of front caliper assly as a percaution
A
Remove :
• 4 Bolts (A)
• Brace fender
• Mudguard
Note :
Painted parts should be handled with almost care to avoid scratches
when dismantled
A
Remove :
• Bolt (A)
• Bracket with wheel sensor case complete
• Wheel sensor harness coupler
A
Remove :
• Allen bolt (A)
• Slide aside handle bar LH
Note :
Painted parts should be handled with almost care to avoid scratche
when dismantled.
A
 Loading...