R5906113 /09 UDX56
4.10 Installation of an input board
WARNING: The procedures below may only be performed by Barco trained and qualified
technicians.
CAUTION: Always wear a wrist band which is connected to the ground while handling the
electrostatic discharge (ESD) sensitive parts.
The procedure below is applicable to all the input modules of the Input & Communication Unit of the
projector.
Required tools
Phillips screwdriver PH1
How to install
1. Switch off the projector and unplug the power cord of the projector.
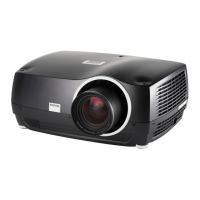
2. Push the input module in the Input & Communication module using the handles. Make sure the module seats
in its sliders (2).
Pull in the module until the contacts (3) are fully inserted into the connectors.
Image 4-18
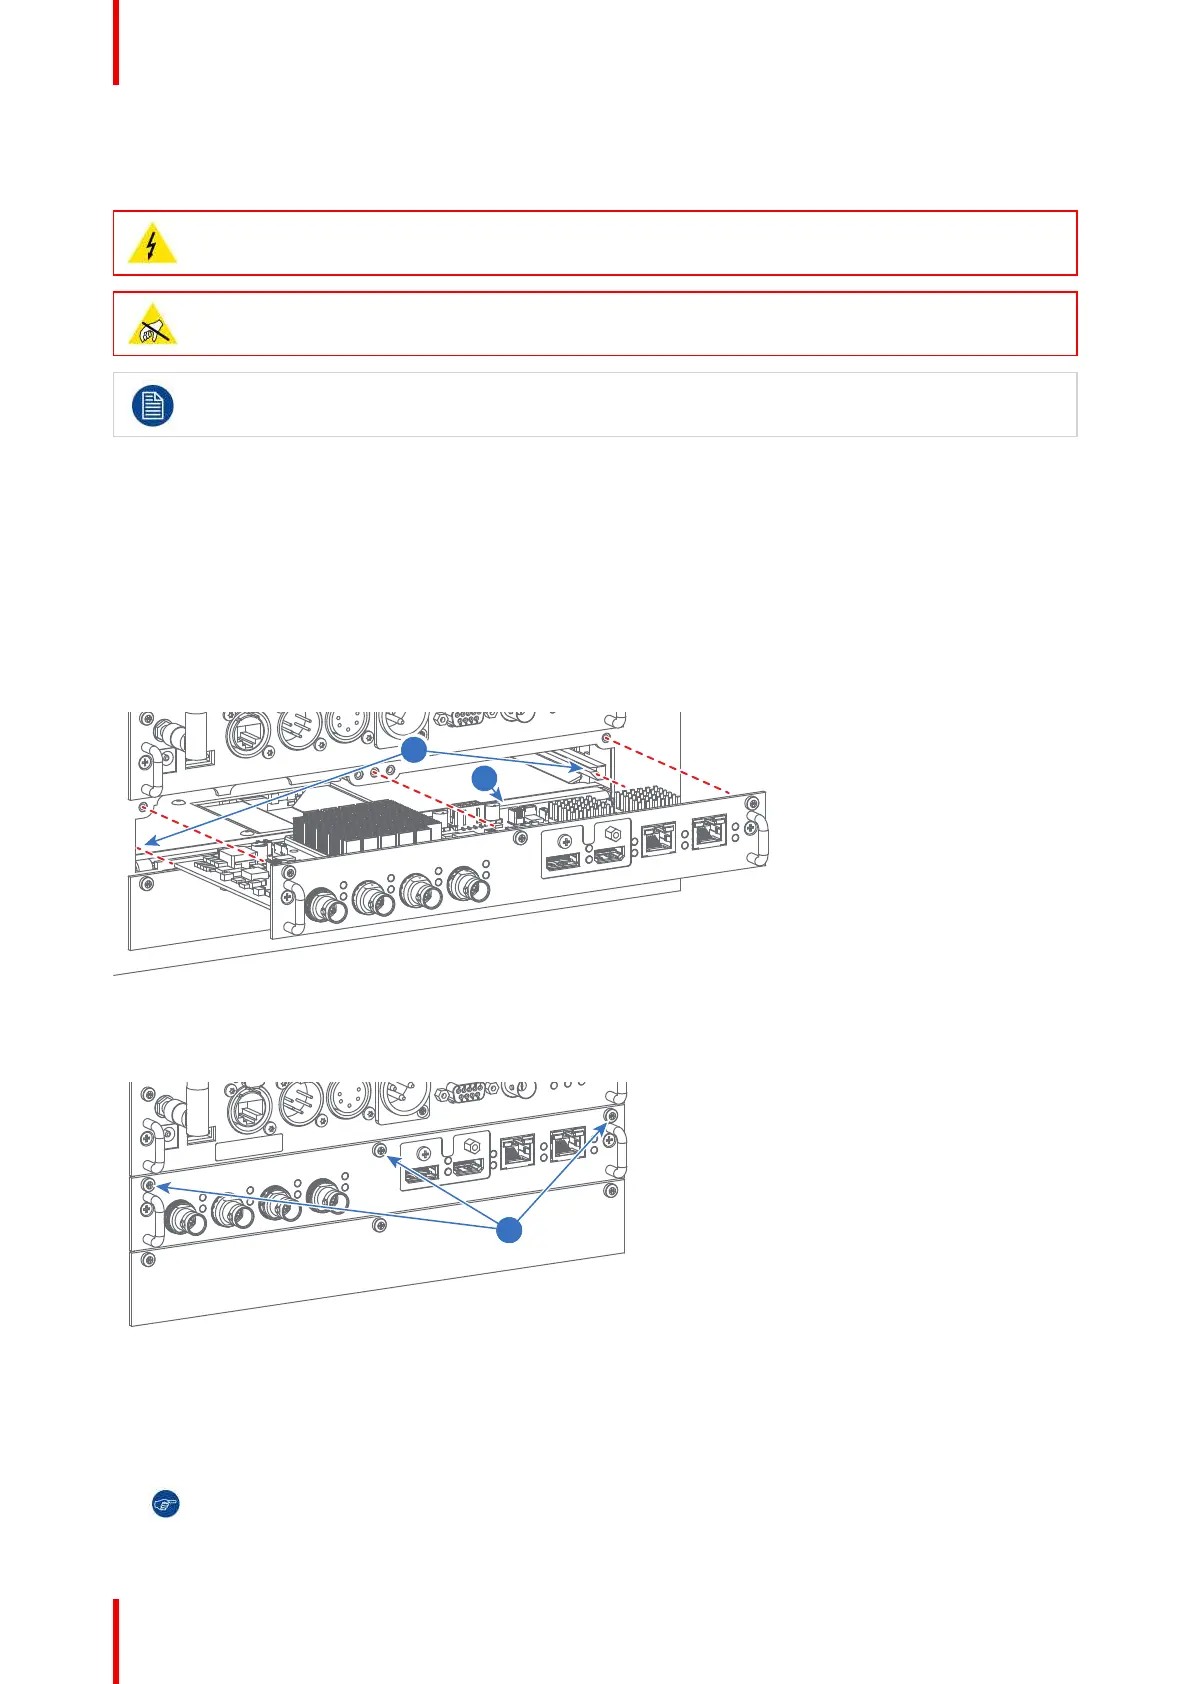
3. Tighten the captive screws of the input module.
Image 4-19
4. Plug in the power cord of the projector.
5. IMPORTANT LAST STEP — Update the firmware of the installed module. Use the complete software
package to install the firmware via Projector Toolset or USB stick.
Tip: When a complete new software image is placed on the projector, all programmable components
will be updated with the latest version.
Installation procedures
 Loading...