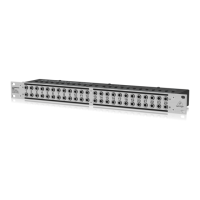
Outputs from the mixer sends can be taken from jack A without disabling the connection to the returns (pos. (2)). The
mixer returns can be used as external line inputs,
by patching cables to jack B (pos. (3)). External effects or processors can be inserted into the send-return loop by
connecting their inputs & outputs to jacks A & B (pos. (4)).
The main left & right outputs of the mixer are connected, in this example configuration, to a mini-disc recorder.
However, they can also be connected in parallel to another recorder (pos. (2)). The mini-disc recorder can record
other sources when they are connected to jack B of channels 15 and 16 (pos. (4))
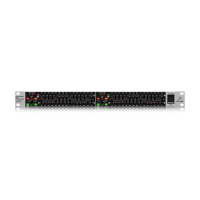
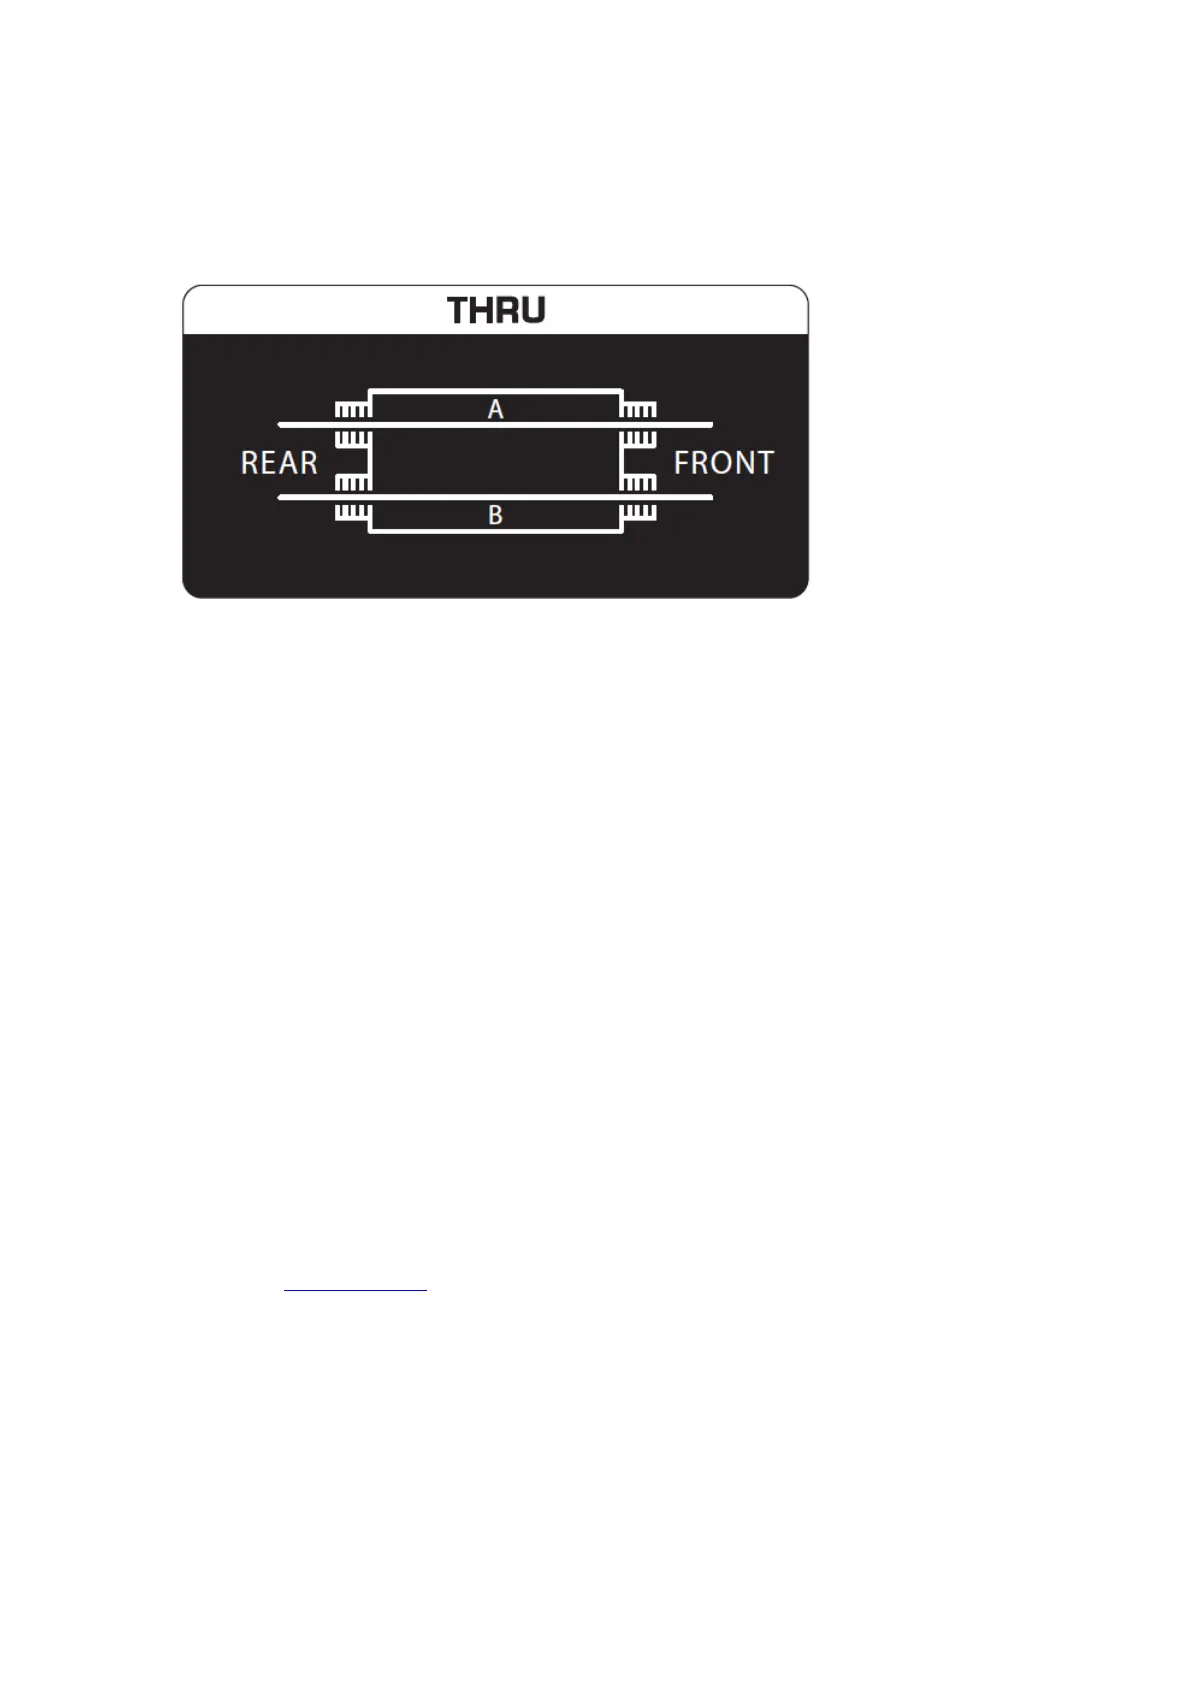
THRU MODE
This mode is for sound modules or playback devices (e.g. CD players) that only have output signals. You can save
space by routing the left and right outputs to one channel (jacks A & B) of the patchbay. A more typical setup is to
connect the left and right outputs to adjacent channels (jacks A & A) and then connect another device to jacks B & B
of the same channels. This configuration also allows you to position the inputs and outputs of effects devices,
compressors, equalizers, etc. directly above each other.
In the example configuration above, the outputs of the playback devices (CD and mini-disc) plus the four individual
outputs of a sampler are connected to channels 17 to 20, while channels 21 to 24 are used for the inputs & outputs
of a compressor and an EQ, which are usually connected to the inserts of a mixer.
Specifications
Connectors: 1/4″ TRS, balanced
Dimensions (H x W x D): approx. 93 x 44.5 x 482.6 mm (3.7 x 1.8 x 19″)
Weight: approx. 1.8 kg (4 lbs)
Important information
1. Register online: Please register your new MUSIC Tribe equipment right after you purchase it by visiting
behringer.com. Registering your purchase using our simple online form helps us to process your repair claims
more quickly and efficiently. Also, read the terms and conditions of our warranty, if applicable.
2. Malfunction: Should your MUSIC Tribe Authorized Reseller not be located in your vicinity, you may contact the
MUSIC Tribe Authorized Fulfiller for your country listed under “Support” at behringer.com. Should your country
not be listed, please check if your problem can be dealt with by our “Online Support” which may also be found
under “Support” at behringer.com. Alternatively, please submit an online warranty claim at behringer.com
BEFORE returning the product.
3. Power Connections: Before plugging the unit into a power socket, please make sure you are using the correct
mains voltage for your particular model. Faulty fuses must be replaced with fuses of the same type and rating
without exception.
LEGAL DISCLAIMER
MUSIC Tribe accepts no liability for any loss which may be suffered by any person who relies either wholly or in part
upon any description, photograph, or statement contained herein. Technical specifications, appearances and other
information are subject to change without notice. All trademarks are the property of their respective owners. MIDAS,
KLARK TEKNIK, LAB GRUPPEN, LAKE, TANNOY, TURBOSOUND, TC ELECTRONIC, TC HELICON,
BEHRINGER, BUGERA and COOLAUDIO are trademarks or registered trademarks of MUSIC Tribe Global Brands
Ltd. © MUSIC Tribe Global Brands Ltd. 2018 All rights reserved.
 Loading...