10
Router Table Assembly
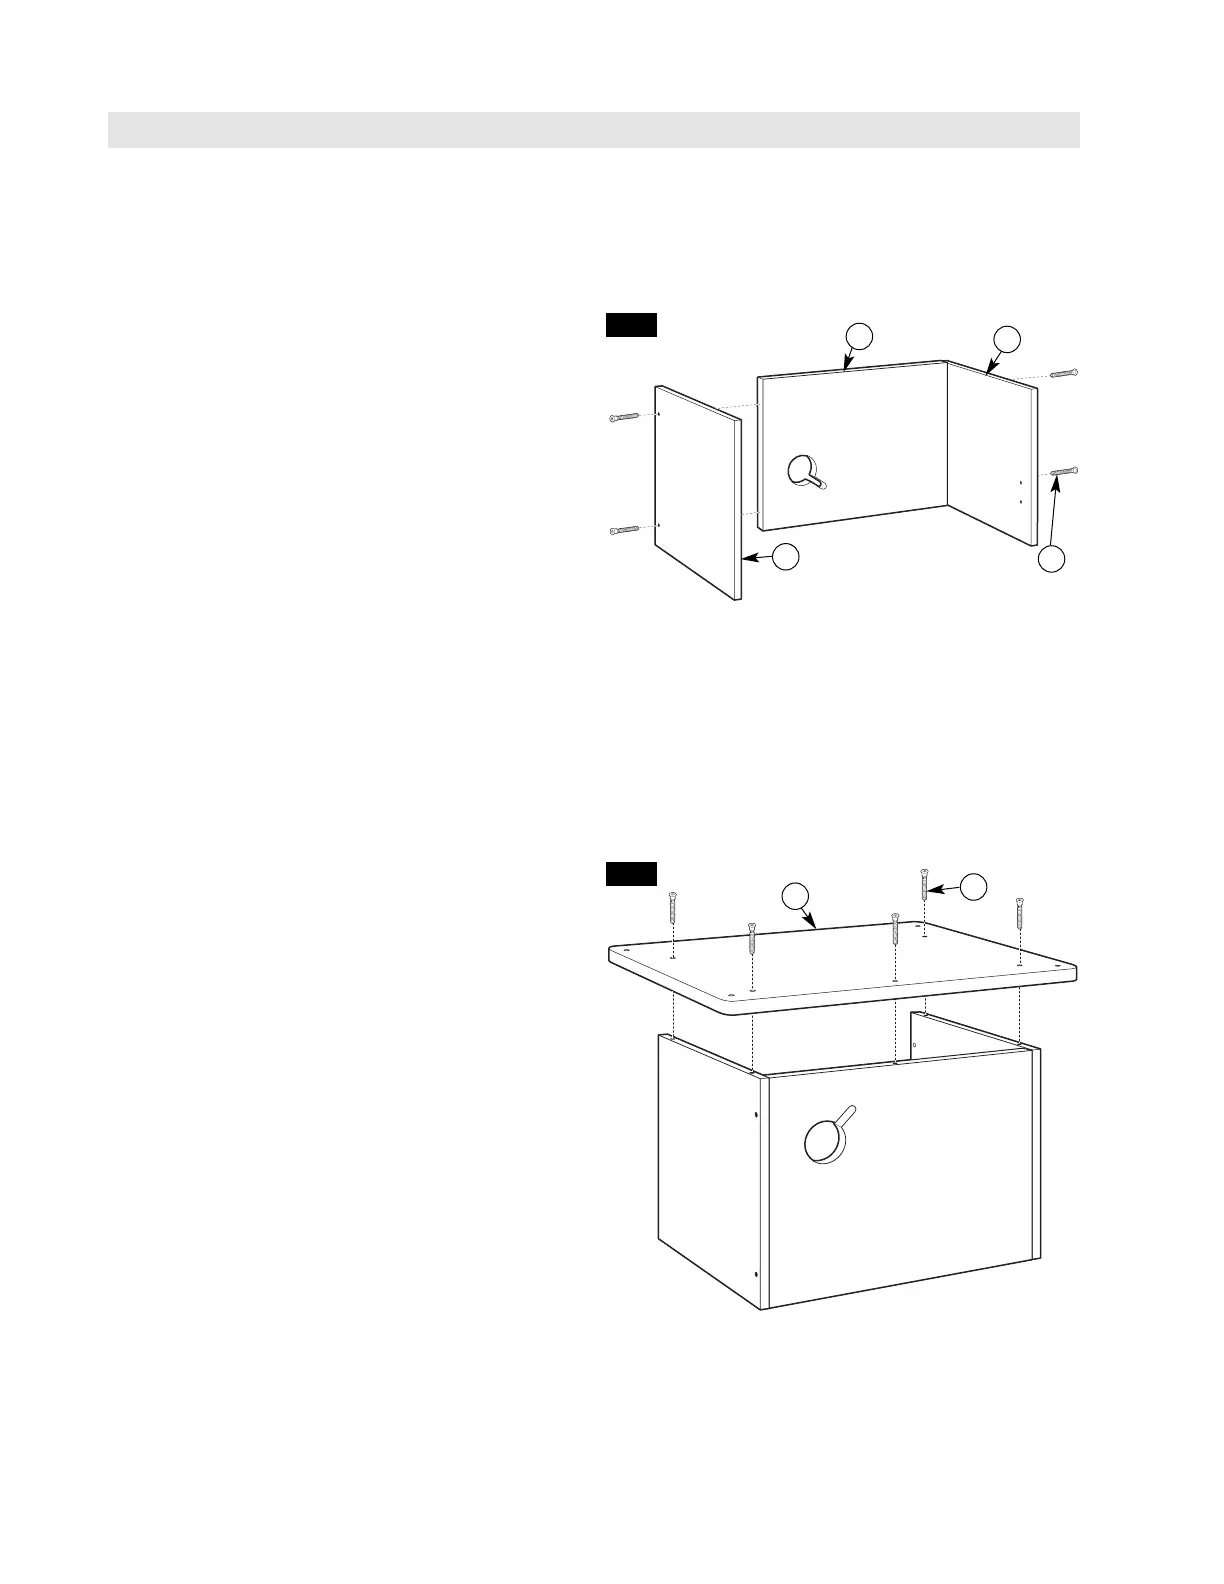
ATTACHING THE BASE (Fig. 2)
1.Turn the sides/back assembly upside down, and
position the base (7), with countersunk holes on
the base facing out, on the sides/back.
2.Align the holes in the base with the holes in the sides
and back, and attach using five Allen-head connector
screws (38) (Fig. 2).
3.Tighten all fasteners securely with the 4mm hex key
(43). The screw head should be in the counterbore,
below the panel surface. DO NOT OVERTIGHTEN!
FIG. 2
ASSEMBLING THE ROUTER TABLE
TOOLS REQUIRED
• #1 and #2 Phillips screwdrivers (not included)
• 3/8″ wrench or nutdriver (not included)
• 4mm hex key (included)
HINT: Applying bar soap or bees wax to the screw
threads (35 and 38) will make them easier to install
into the panels.
ASSEMBLE SIDES TO BACK (Fig. 1)
NOTE: The mounting holes for the left and right panels
are spaced so that the panel will only fit on the correct
end of the back. Before attaching the panels, make
sure that the predrilled holes for the hinges and door
catch are on the INSIDE surface of the panel.
1.Holding the back panel (6) upright, with the cord
cutout on the left (see Fig. 1), attach the left side
panel (4) to the back panel using two Allen-head
connector screws (38).
2.Attach the right side panel (5) to the back panel using
two Allen-head connector screws (38).
3.Tighten all fasteners securely with the 4mm hex key
(43). The screw head will stand slightly above the
panel surface. DO NOT OVERTIGHTEN!
6
38
4
5
FIG. 1
38
7