Document: - page 12 (Black)
Screen angle and frequency: 45.0000, 120.0000
12
MAINTENANCE
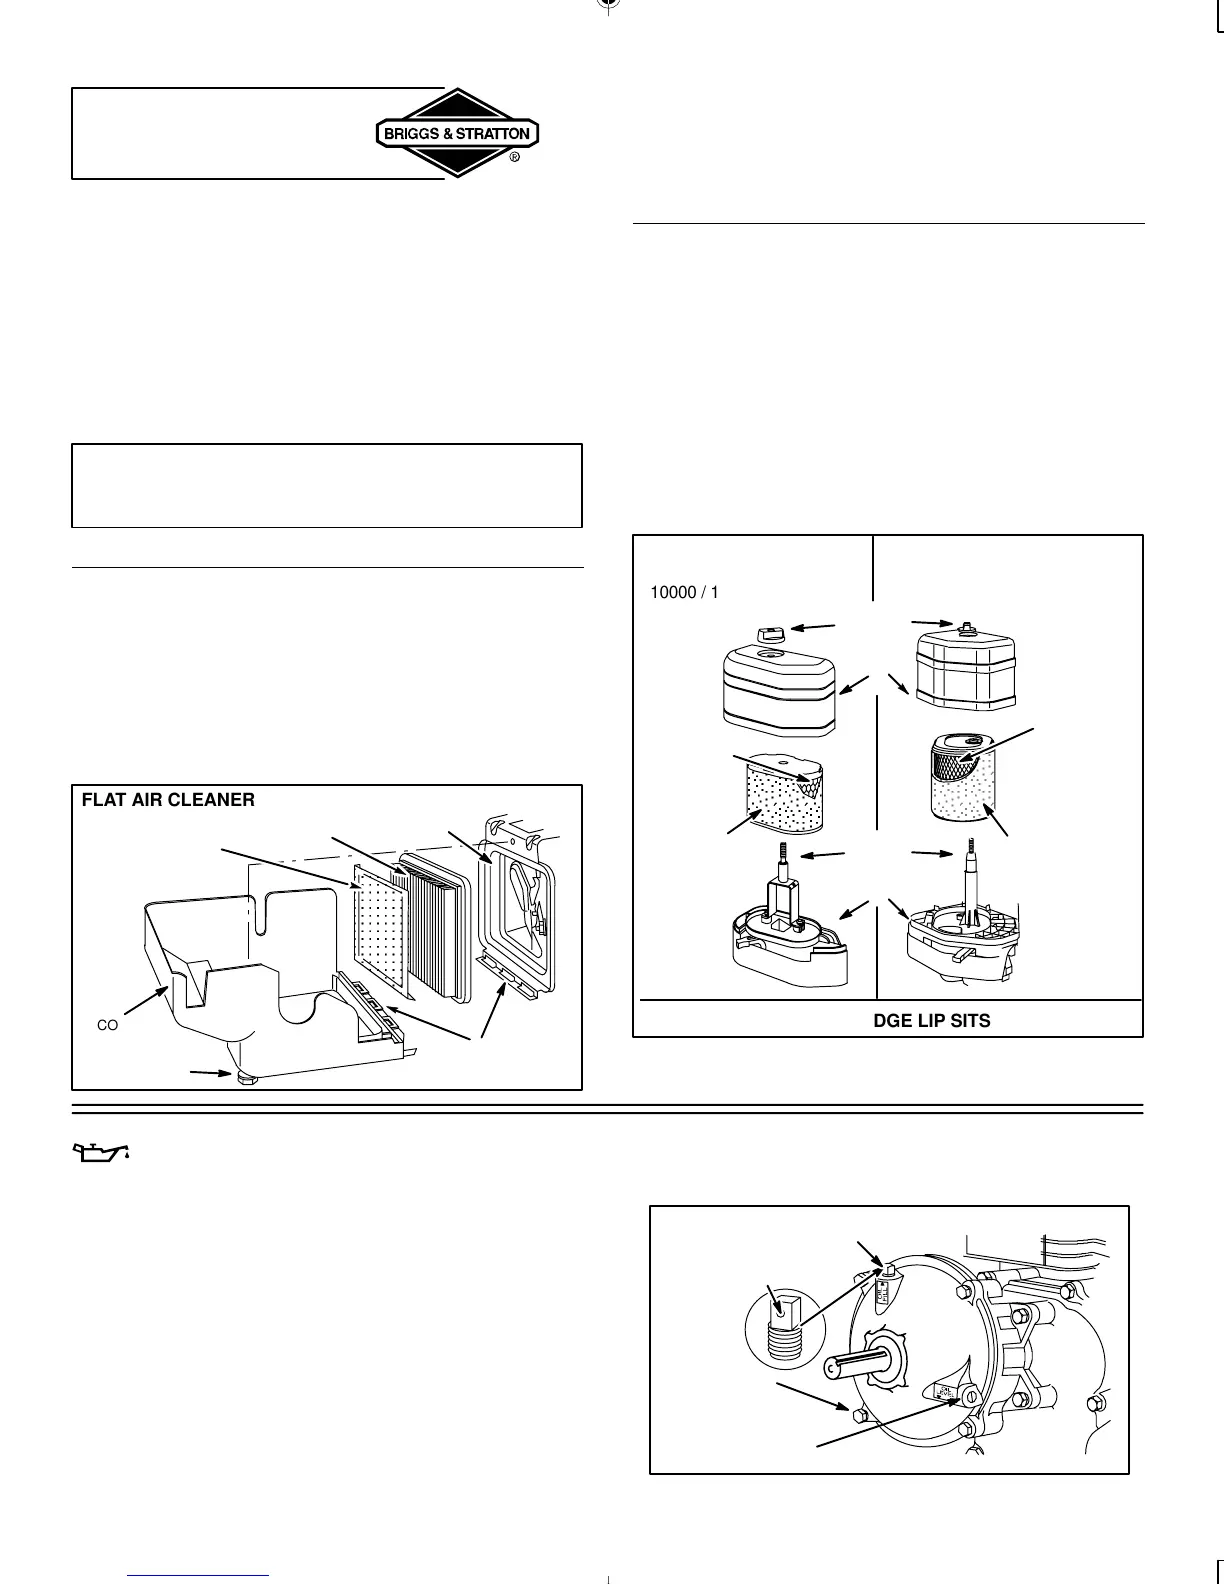
AIR CLEANER
All engines have an air cleaner cartridge. The cartridge is
either flat or oval (see illustrations). In addition, some
engines have a pre-cleaner.
Pre-cleaner
To clean pre-cleaner (if equipped), separate it from
cartridge and wash in liquid detergent and water. Air dry
thoroughly. Do not oil pre-cleaner. Re-assemble dry
pre-cleaner on clean cartridge.
CAUTION: Do not use pressurized air or solvents to
clean cartridge. Pressurized air can damage
cartridge; solvents will dissolve cartridge.
REMOVING and INSTALLING FLAT AIR CLEANER
[1] Loosen screw, tilt cover down and remove air cleaner.
[2] Install clean (or new) air cleaner assembly inside
cover. If equipped with pre-cleaner, install with arrows
up and lip of pre-cleaner at bottom of cartridge pleats.
[3] Insert cover’s tabs into slots in bottom of base.
[4] Tilt cover up into place and tighten screw.
FLAT AIR CLEANER
COVER
PRE-CLEANER
P/N 493537
CARTRIDGE
P/N 491588
BASE
SLOTS AND
TABS
SCREW
REMOVING and INSTALLING OVAL AIR CLEANER
[1] Remove knob and cover.
[2] Lift air cleaner assembly (pre-cleaner, if equipped,
and cartridge) off stud.
[3] Push clean (or new) air cleaner assembly in base firmly
down on stud. Air cleaner must fit securely in base.
[4] Push cover squarely onto base.
[5] Tighten knob.
ASSEMBLE SO CARTRIDGE LIP SITS INSIDE BASE
COVER
PRE-CLEANER
P/N 273356
STUD
CARTRIDGE
P/N 690610
BASE
KNOB
OVAL AIR CLEANER
MODEL SERIES
110000 / 120000
OVAL AIR CLEANER
MODEL SERIES
200000 / 210000
PRE-CLEANER
P/N 695303
CARTRIDGE
P/N 695302
CHANGING OIL IN GEAR REDUCTION
(if equipped)
Change oil in gear reduction after every 100 hours.
[1] To drain oil, loosen 4 gear case cover screws and drain
oil into appropriate receptacle.
[2] After draining, torque 4 screws to 85 in-lbs.
[3] To refill, pour SAE 30 oil into oil fill hole until it runs out
level check hole.
[4] Replace both oil plugs.
Note: Oil filler plug has a vent hole and must be installed on
top of gear case cover.
OIL FILLER PLUG
OIL LEVEL
PLUG
VENT HOLE
4 GEAR CASE
COVER SCREWS
 Loading...