In the USA and Canada, a 24 hour hot line, 1-800-233-3723, has a menu of pre-recorded messages offering you engine maintenance information.
6
Maintenance
See Maintenance Schedule, page 8. Follow the hourly or calendar intervals, whichever occur first.
Note that more frequent service is required when operating in adverse conditions.
To prevent accidental starting,
remove spark plug wire from spark
plug and disconnect battery at nega-
tive terminal, if equipped, when
servicing engine or equipment.
WIRE
TAB
Oil
Check oil level regularly.
Be sure correct oil level is maintained. Check every 5 hours or
daily, before starting engine. See check oil level on page 3.
Change oil (Follow Maintenance Schedule.)
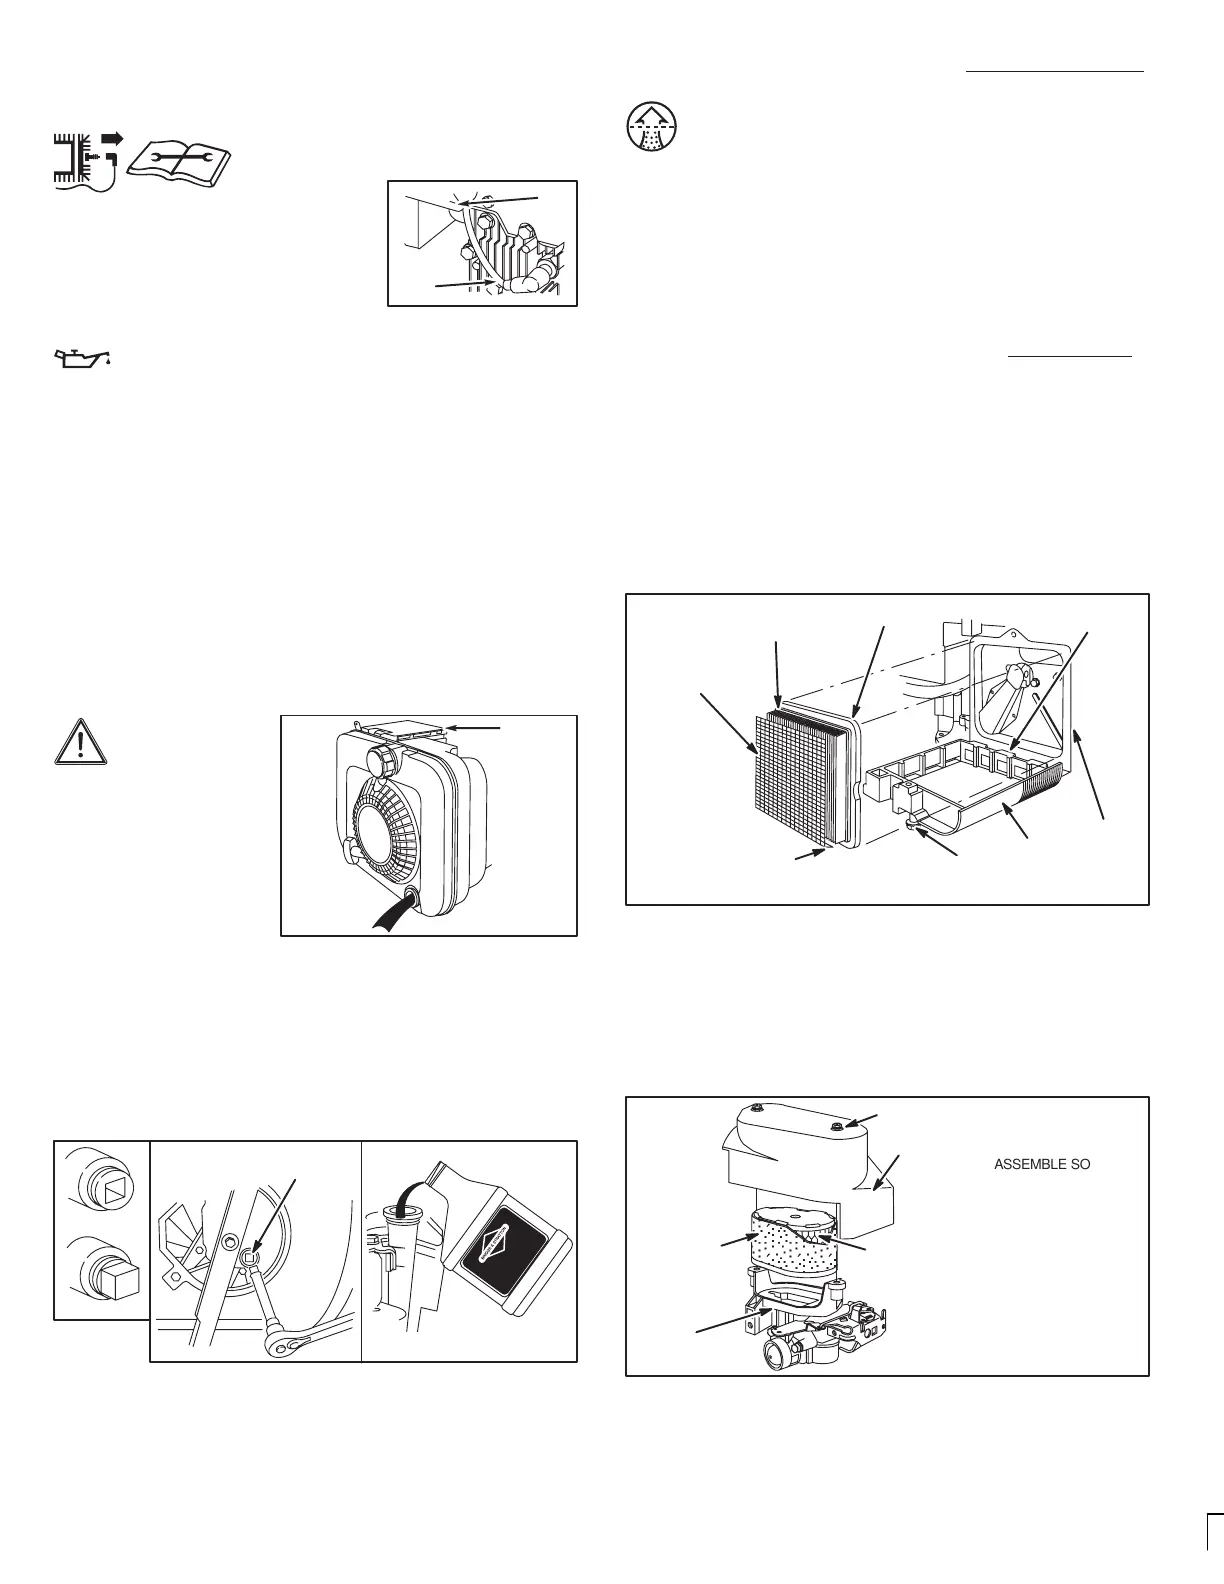
Change oil after first 5 hours of operation. Change oil while
engine is warm. Preferably drain oil from top of engine as illus-
trated below. Drain oil with air cleaner side up. Oil can be
drained from engine bottom if necessary.
Top oil drain
Before tipping en-
gine or equip-
ment to drain oil,
drain fuel from
tank by running
engine until fuel
tank is empty.
AIR
CLEANER
Remove drain plug and drain oil. Replace drain plug. Remove
dipstick and refill with new oil of recommended grade (see chart
on page 3). Start and run engine at idle for 30 seconds. Stop
engine. Wait 30 seconds and re-check oil level. If required, add
oil to bring level to FULL mark on dipstick.
Typical
drain
plugs
Bottom oil drain
PIPE
3/8” SQUARE
OIL DRAIN
PLUG
Oil fill
Dual Element Air cleaner
Note: Depending on engine Type Number, this engine may
not be equipped with a pre-cleaner.
To service pre-cleaner, wash in liquid detergent and water.
Allow to dry thoroughly before using. Do not oil pre-cleaner.
Replace if very dirty or damaged.
To service cartridge, clean by tapping gently on a flat surface.
Do not oil cartridge. Replace if very dirty or damaged.
Note: Do not use petroleum solvents, e.g., kerosene, which will
cause the cartridge to deteriorate. Do not use pressurized air
to
clean cartridge. Pressurized air can damage the cartridge.
Square dual element
1. Loosen screw and tilt cover down. Carefully remove pre-
cleaner (if equipped) and cartridge assembly from cover.
2. After servicing pre-cleaner and cartridge, place pre-clean-
er, if equipped, over cartridge pleats with arrows in direc-
tion shown (pre-cleaner lip will be at bottom of pleats).
3. Install pre-cleaner and cartridge assembly in cover.
4. Insert tabs on cover into slots in bottom of base.
5. Tilt cover up and tighten screw securely to base.
Square dual element air cleaner
SCREW
COVER
BASE
PRE-CLEANER
P/N 493537
CARTRIDGE
P/N 491588
or P/N 5043
CARTRIDGE
LIP
ASSEMBLE SO CARTRIDGE LIP TOUCHES
BASE IN DIRECTION SHOWN
PRE-CLEANER LIP
TABS AND
SLOTS
Oval dual element
1. Loosen screws and lift cover. Then carefully remove
pre-cleaner, if equipped, and cartridge assembly.
2. After servicing pre-cleaner and cartridge, place
pre-cleaner on cartridge.
3. Install air cleaner assembly in base. Then install cover on
air cleaner and tighten screws securely to base.
Oval dual element air cleaner
ASSEMBLE SO THAT
CARTRIDGE LIP
SITS INSIDE BASE
2 SCREWS
COVER
BASE
CARTRIDGE
P/N 497725
 Loading...