43
3
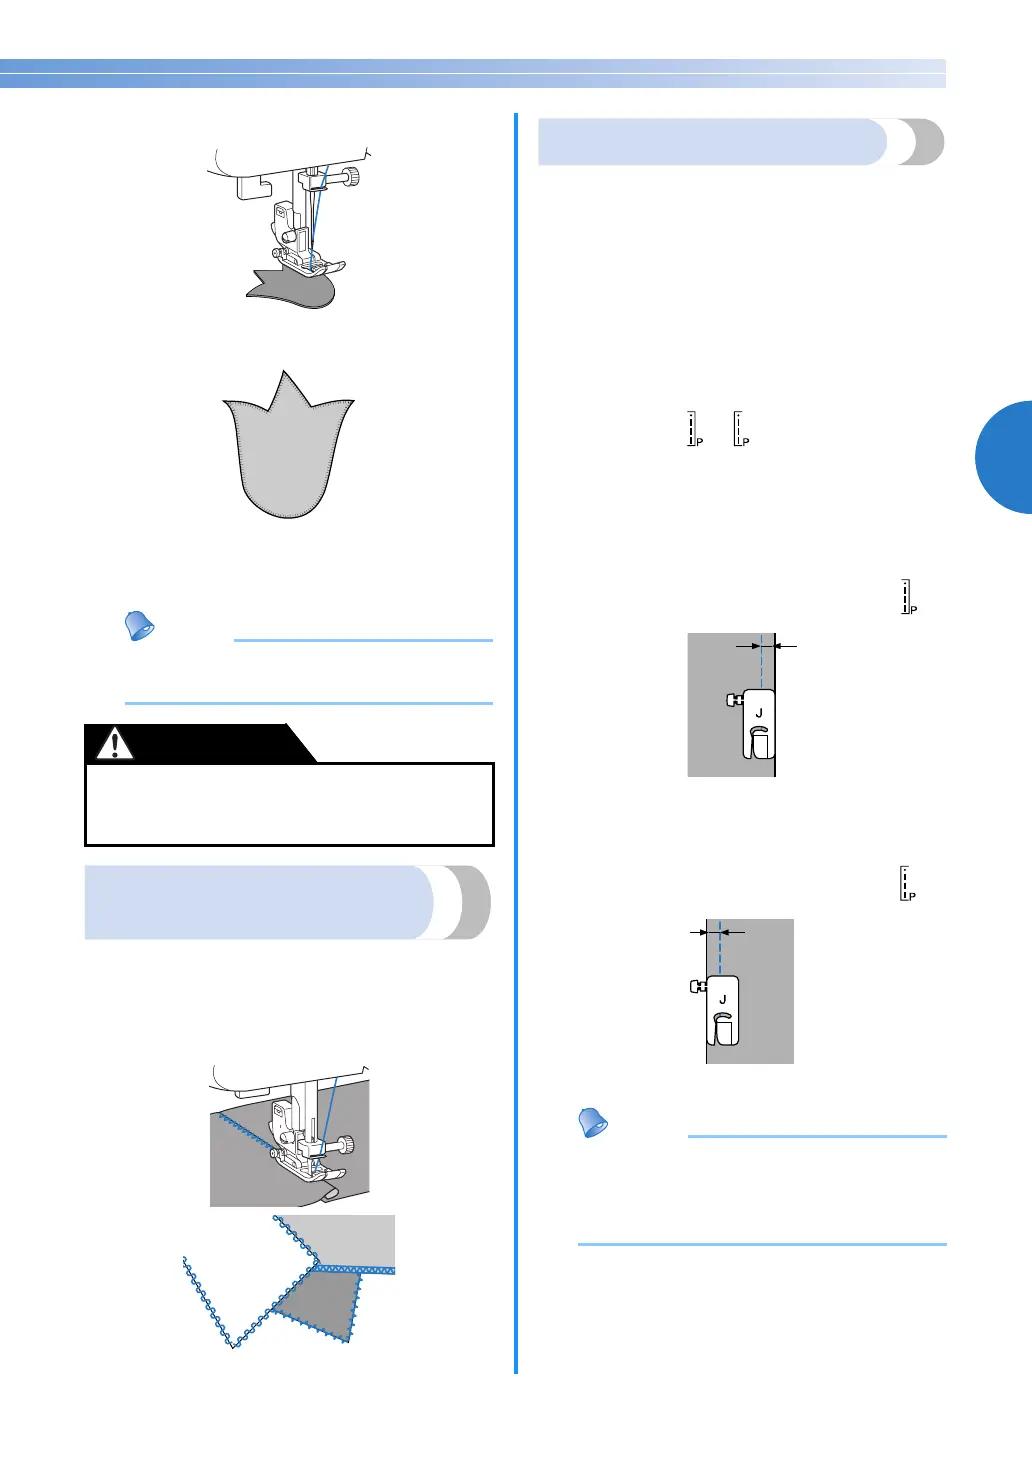
d
Carefully sew around the edge of the design.
e
Cut away any fabric that is left outside the stitching.
f
Remove the basting, if necessary.
Memo
● Make reinforcing straight stitches at the
beginning and the end of stitching.
Patchwork (crazy quilt)
stitching
a
Fold the edge of the top piece of fabric and
place it over the lower piece.
b
Sew the two pieces of fabric together so the
pattern spans both pieces.
Piecing
Sewing together two pieces of fabric is called
“piecing”. The fabric pieces should be cut with a
6.5 mm (1/4 inch) seam allowance.
Sew a piecing straight stitch 6.5 mm (1/4 inch) from
either the right side or the left side of the presser foot.
a
Baste or pin along the seam allowance of the
fabric that you wish to piece together.
b
Attach zigzag foot “J”.
c
Select stitch or
.
d
Sew with the side of the presser foot aligned
with the edge of the fabric.
■ For a seam allowance on the right side
Align the right side of the presser foot with the
edge of the fabric, and sew using stitch .
a 6.5 mm (1/4 inch)
■ For a seam allowance on the left side
Align the left side of the presser foot with the
edge of the fabric, and sew using stitch .
a 6.5 mm (1/4 inch)
Memo
● To change the width of the seam allowance
(the needle position), adjust the stitch width.
For details, refer to “Changing the needle
position” (page 33).
● Be careful that the needle does not hit a pin
during sewing, as the needle can break. You
may also be injured.
CAUTION
1
1
 Loading...