Using the Optional Cap Frame 185
7
■ For the advanced cap frame
2
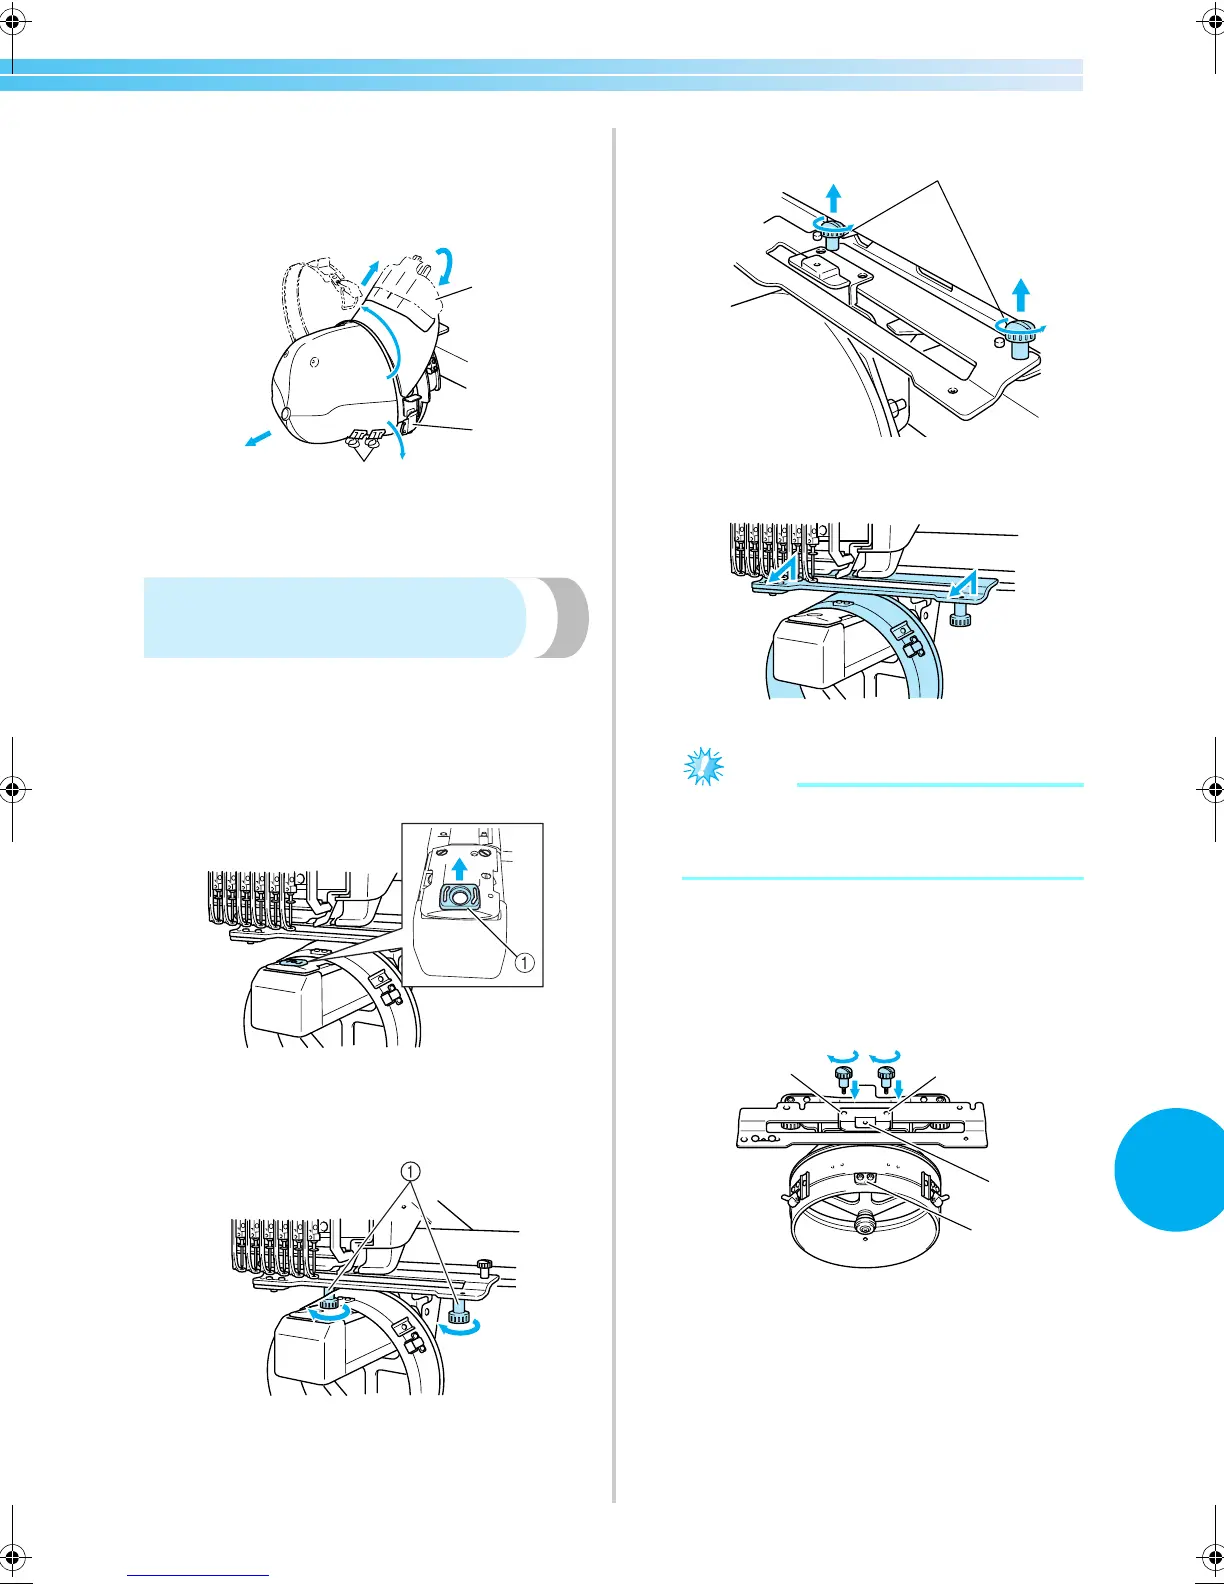
After removing the brim holder, unlock the
snap lock of the cap frame, remove the clips,
and then remove the cap.
1 Brim holder
2 Snap lock
3 Clips
Installing the embroidery
frame holder
After embroidering using the cap embroidery frame
is finished, remove the needle plate spacer and cap
frame driver, and then re-attach the embroidery
frame holder.
1
Remove the needle plate spacer.
1 Needle plate spacer
2
Loosen the two lower thumb screws.
1 Thumb screws
3
Remove the two upper thumb screws
1 Thumb screws
4
Remove the cap frame driver.
Note
● Be careful that the cap frame driver does not
hit any nearby parts, such as the presser
foot.
5
With the hole on the sweat guard holder
aligned with the centerline of the guiding
plate, insert the two thumb screws removed in
step
3 into the holes at the top, and then
tighten the thumb screws.
1 Hole on the sweat guard holder
2 Centerline of guiding plate
3 Holes on the top
• Insert the thumb screws into the holes where
the cap frame driver that was originally
installed (holes that the thumb screws were
removed from in step
2 on page 171).
X The movable section of the cap frame driver
is secured.
2
1
3
1
2
1
3
3
Sapphire_chapt7.fm Page 185 Friday, November 18, 2005 12:10 PM
 Loading...


