7
5
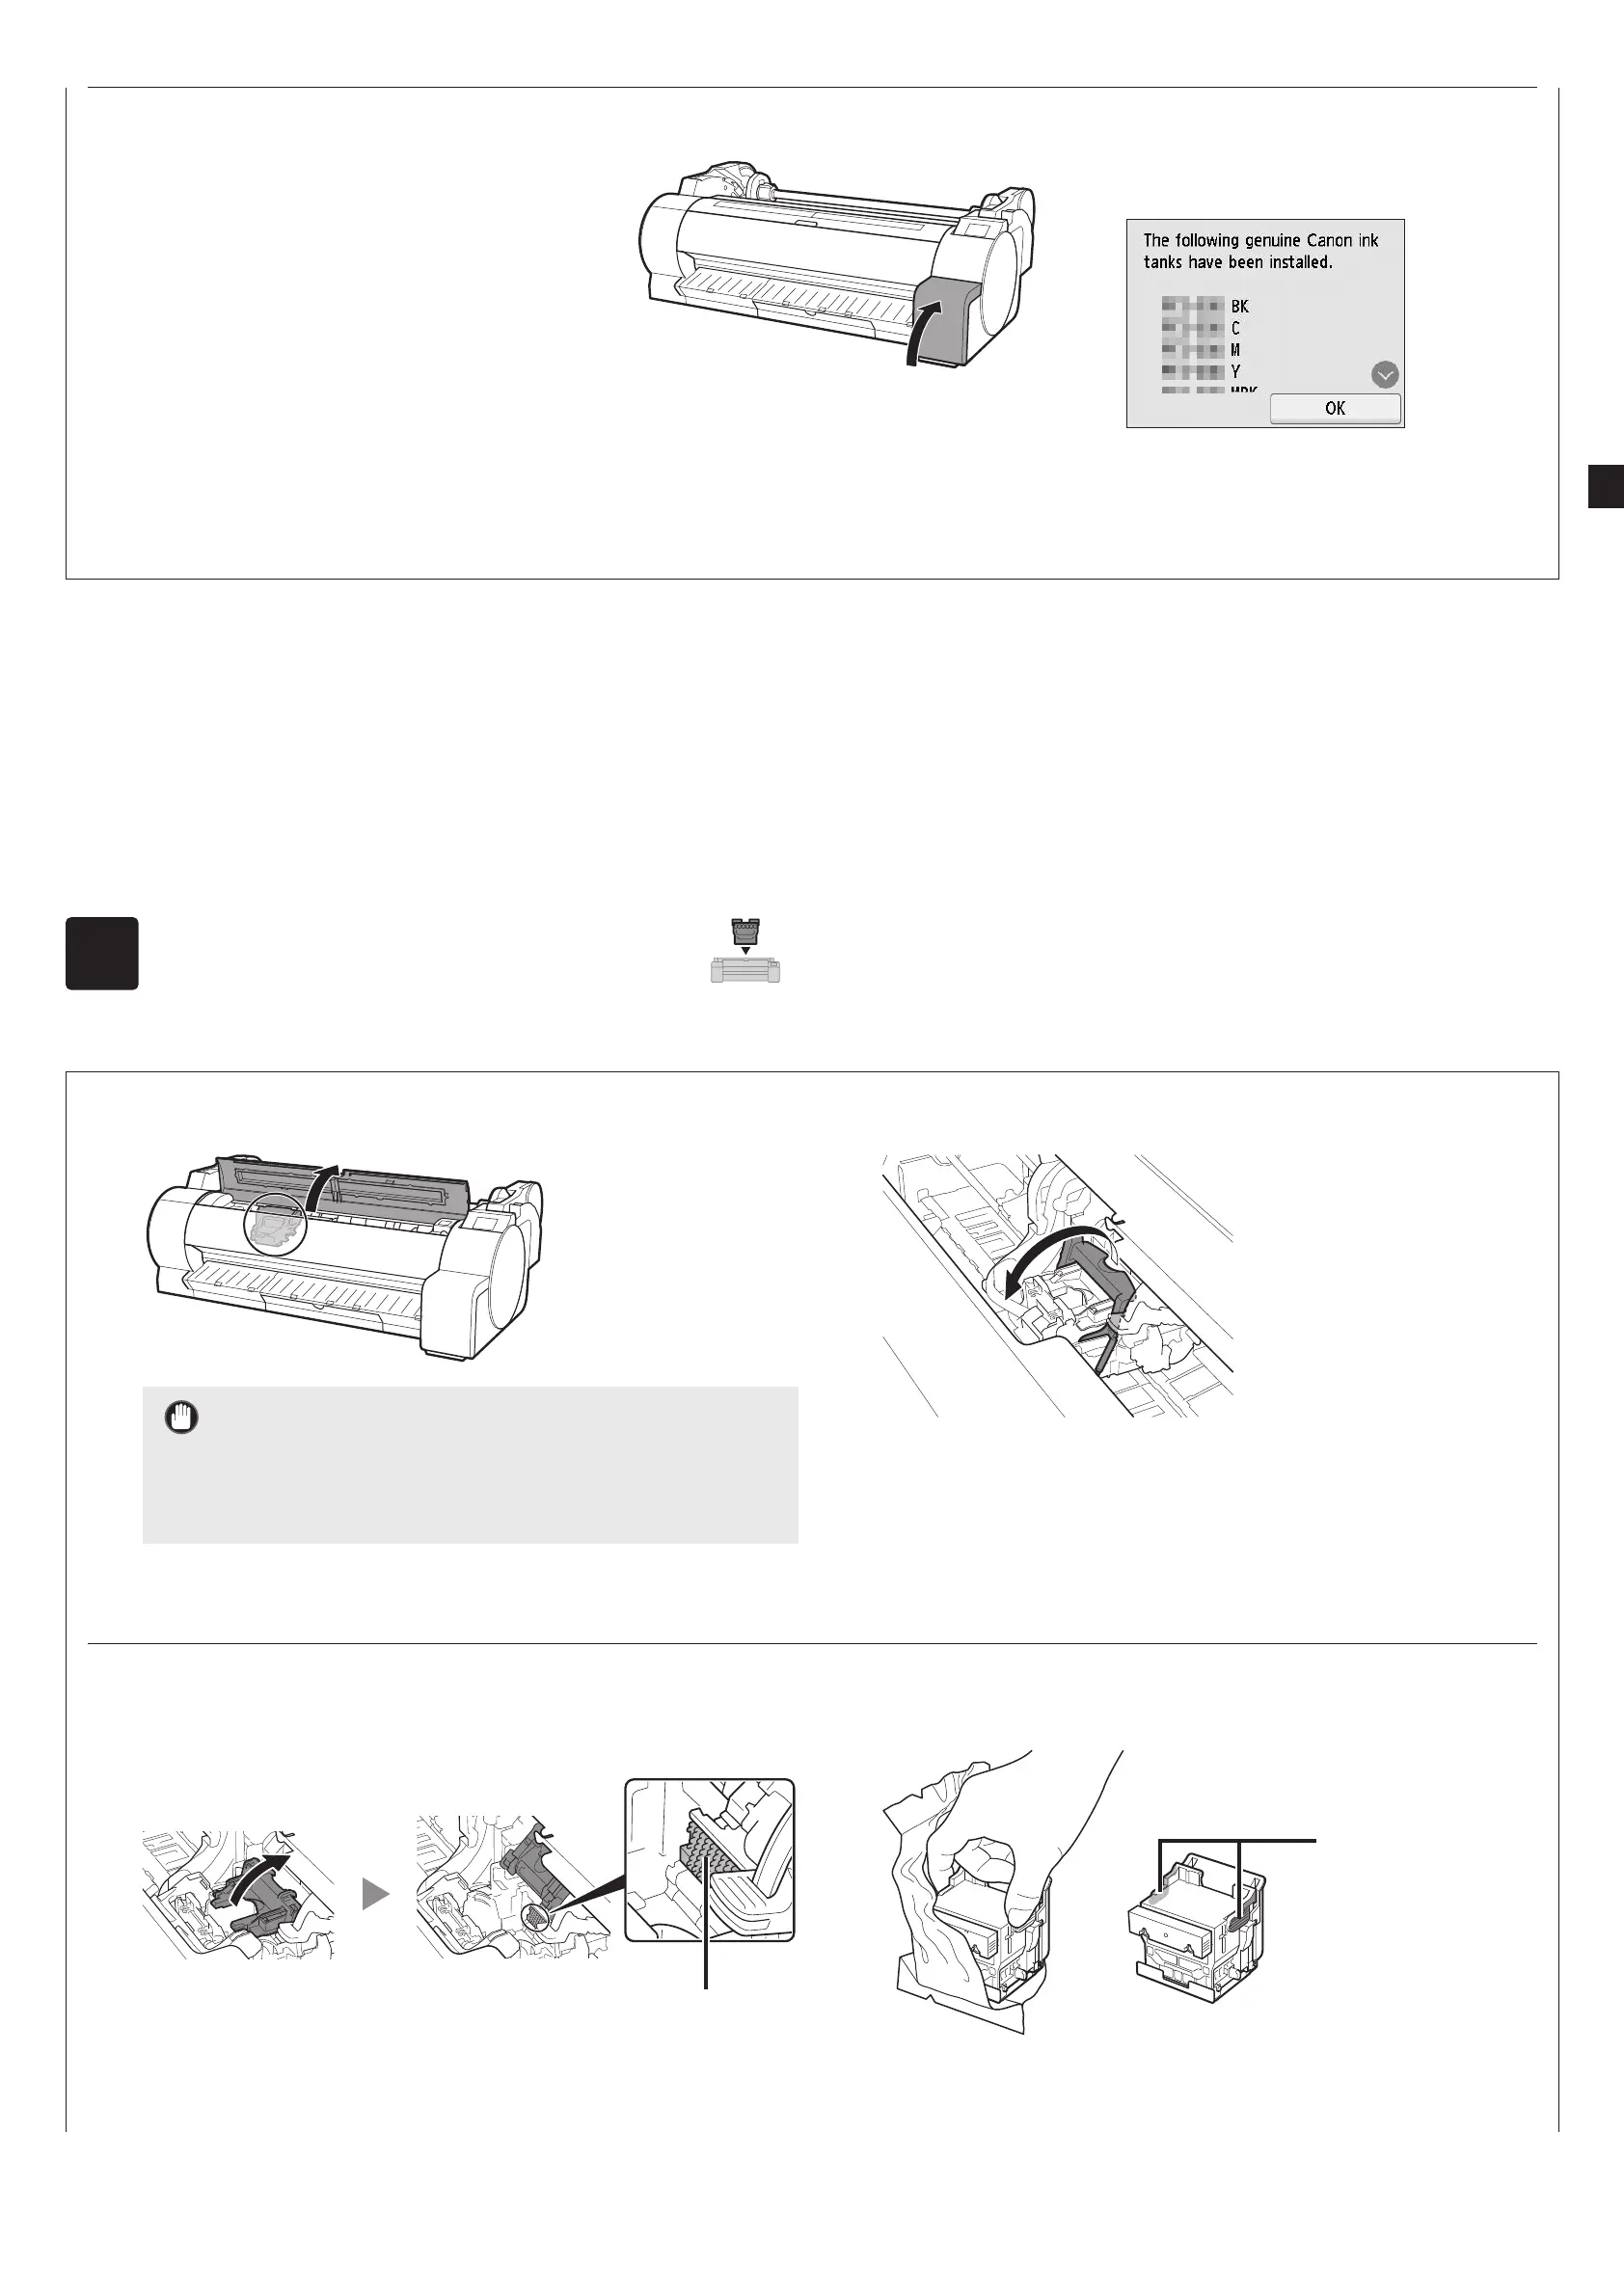
Installing the Print Head
Instructions are now shown on the touch screen regarding print head installation. Install the print head by following the instructions.
1
Open the top cover.
Important
● Do not move the carriage (the area enclosed by a circle in the
diagram). If you accidentally move it, temporarily close the top
cover and it will return to its original position.
2
Tilt the print head lock lever towards you.
3
Open the print head locking cover and select OK on the
touch screen. At this time, check that there is no dirt on the
electrical contacts of the carriage.
Contacts on the carriage
4
Grasp the print head as shown in the diagram and remove
it from the bag.
Hold here
7
Repeat steps 2 to 6 to install each of
the ink tanks.
8
Close the ink tank covers.
9
Check that the color of the ink tank
that was set is displayed on the
touch screen, and select OK.
 Loading...