,KXCAUTION
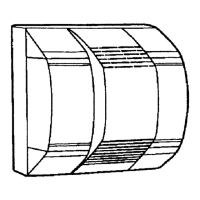
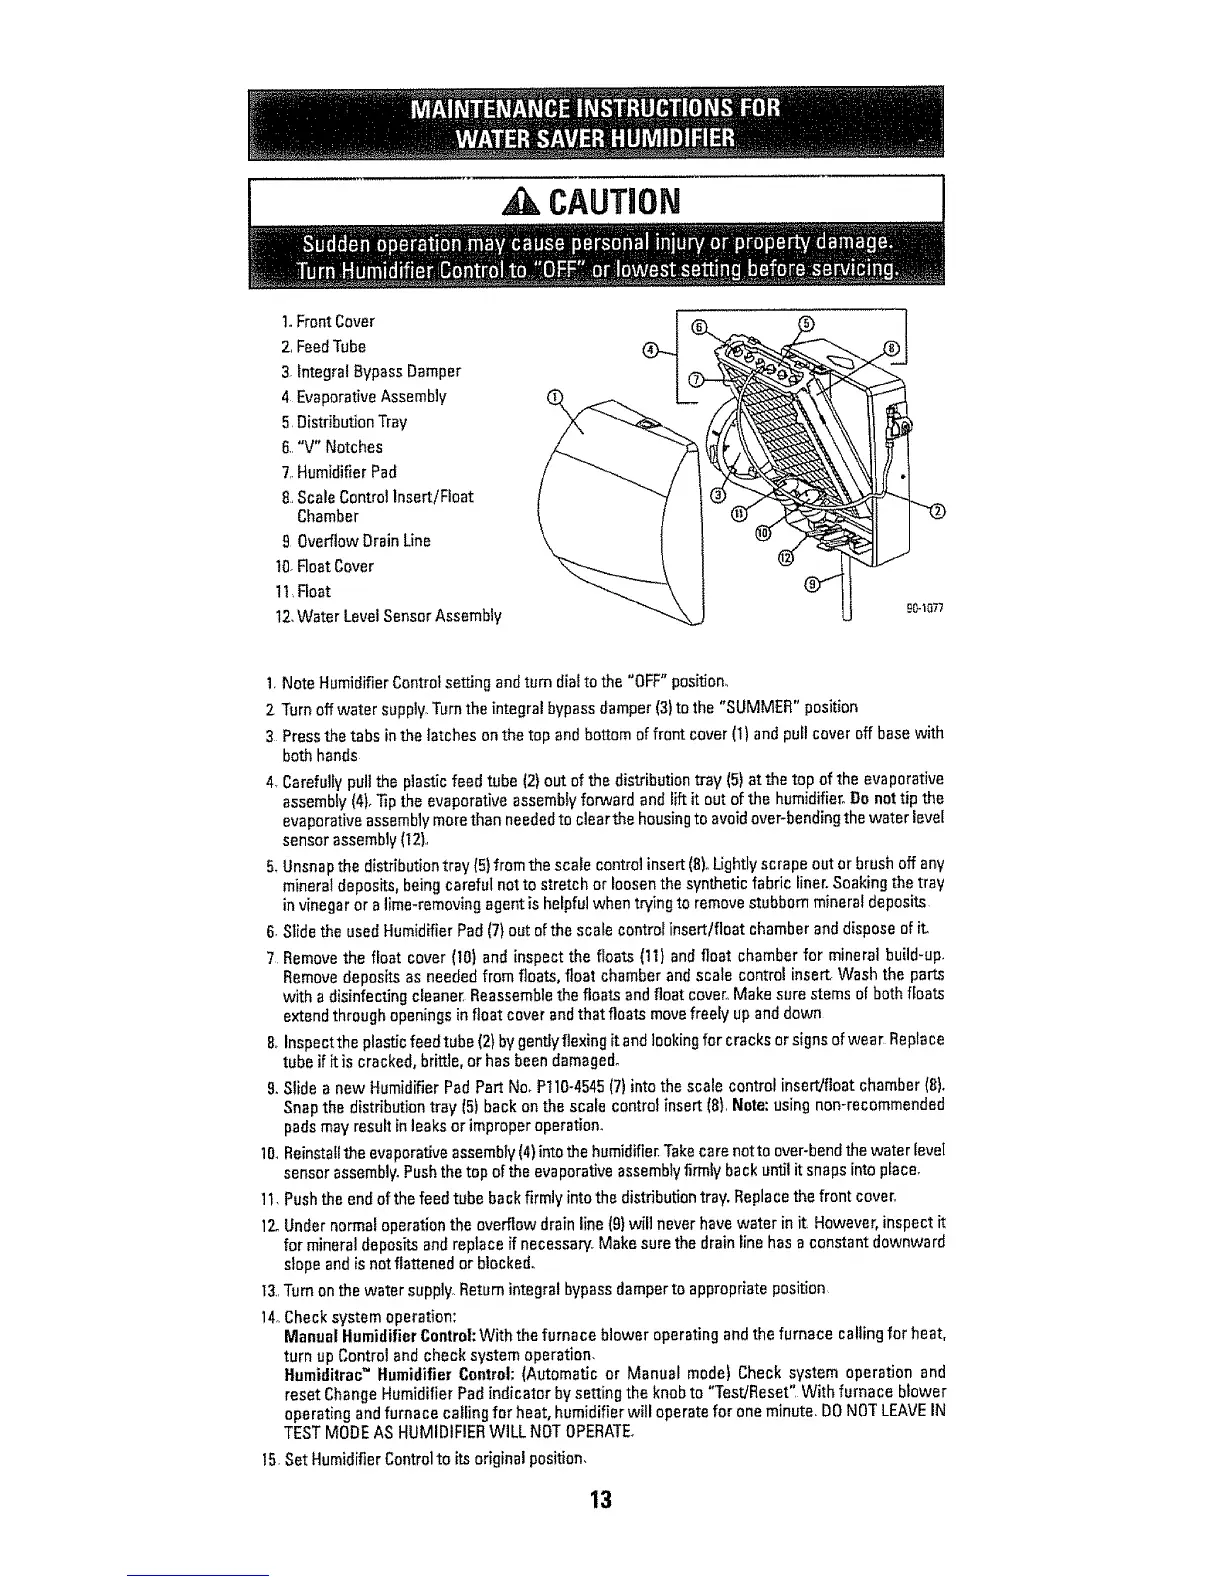
t. Front Cover
2 FeedTube
3.Integral BypassDamper
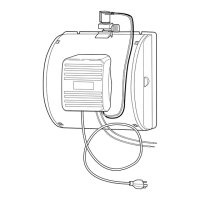
4 EvaporativeAssembly
5 DistributionTray
6 "V" Notches
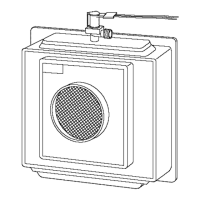
7,.HumidifierPad
8.,ScaleControlInsertlFloat
Chamber
9 OverflowDrain Line
10.FloatCover
1t, Float
12.Water Level SensorAssembly
t. Note HumidifierControlsetting andturn dia!to the "OFF"position_
2 Turnoff water supply Turnthe integral bypassdamper (3)to the "SUMMER" position
3 Pressthe tabs in thelatches on the top and bottom of front cover (1! and pull cover off base with
both hands
4_Carefullypull the plastic feed tube (2) out of the distribution tray (5)at the top of the evaporative
assembly(4).Tipthe evaporative assembly forward and lift it out of the humidifier°Do not tip the
evaporativeassemblymerethan neededto clear the housingto avoidover-bendingthe water level
sensor assembly(t2)
5_Unsnapthe distributiontray 15}from the scale control insert(8)°Ughtlyscrape out or brushoff any
mineraldeposits, being careful not to stretch or loosenthe synthetic fabric liner. Soakingthe tray
invinegar or a lime-removingagent is helpful when trying to removestubborn mineral deposits
6 Slidethe used HumidifierPad(7)out ofthe scale control insert/float chamberand dispose of it.
7 Removethe float cover(10) and inspect the floats (11}and float chamberfor mineral build-up.
Removedeposits as needed from floats, float chamberand scale controlinsert Wash the parts
with a disinfecting cleaner. Reassemblethe floats and float cover.Make sure stemsof both floats
extendthrough openingsin float coverandthat floats movefreely up and down
8,Inspectthe plastic feed tube (2}by gentlyflexing it and lookingfor cracksorsignsof wear Repiece
tube if it is cracked, brittle,or has been damaged°
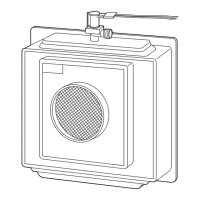
9.Slide a new Humidifier PadPart No. P110-4545(7)into the scale control inseWfloat chamber (8).
Snapthe distribution tray I5) back onthe scale controlinsert (8) Note: using non-recommended
padsmay result in leaksor improper operation.
10.Reinstallthe evaporativeassembly(4)into thehumidifier Takecare notto over-bendthe water level
sensorassembly.Pushthe top of the evaporative assemblyfirmly back until it snaps into pface_
tl. Pushthe end of the feedtube backfirmly intothe distributiontray. Replacethe front cover
12.Under normaloperation the overflow drain line (9)will neverhave water in it However.inspect it
for mineraldeposits and replace if necessa_ Makesure the drainline hase constantdownward
slope and is not flattened or blocked_
13_,Turnon the water supply, Returnintegral bypassdamperto appropriate position,
14,Checksystemoperation:
Manual Humidifier Control: With the furnace blower operating and the furnace callingfor heat,
turn up Control and check system operation.
Ftumiditrac"Humidifier Control: (Automatic or Manual mode) Check system operation and
reset ChangeHumidifier Pad indicator by setting the knob to "Test/Reset" With furnace blower
operating and furnace calling far heat. humidifier will operate for one minute. DONOTLEAVEIN
TESTMODEAS HUMIDIFIERWILL NOTOPERATE_
15 Set HumidifierControlto its original position.
13
 Loading...