1840-7
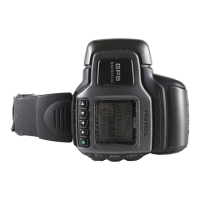
To add a new landmark by manually entering position data
1. While the LMK list is on the display,
press ● to display the LMK list editing
menu.
• Note that you cannot edit or delete a
landmark what is also defined as a
waypoint in the WAY PT. List. Because of
this, the LMK List Editing Menu does not
appear if you press ● while such a
landmark is highlighted in the LMK List.
2. Use L and K to move the highlighting
to NEW and then press ● to display the
Landmark Input Screen.
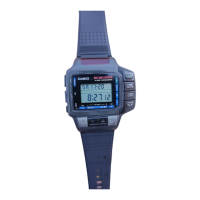
3. Input the name you want to assign to the
landmark.
• See “To input text”.
4. After the name is the way you want,
press ● to advance to the Latitude and
Longitude Input Screen.
• See “To input the latitude”.
5. Input the latitude of the position and then press ● to move the cursor to
the longitude.
• See “To input the longitude”.
6. Input the longitude and then press ● to save the landmark data.
Editing and Deleting Landmarks
Use the following procedures to edit and delete landmarks.
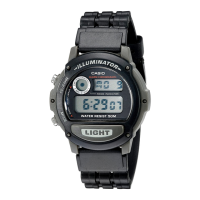
To edit a landmark
1. On the LMK list, use L and K to
highlight the landmark you want to edit.
2. Press ● to display the LMK list editing
menu.
• Note that you cannot edit or delete a
landmark what is also defined as a
waypoint in the WAY PT. List. Because of
this, the LMK List Editing Menu does not
appear if you press ● while such a
landmark is highlighted in the LMK List.
3. Use L and K to move the highlighting
to EDIT and then press ● to display the
Landmark Editing Input Screen.
4. Use the procedures under “Inputting Data” to edit the landmark name,
latitude, and longitude.
5. After you are finished editing the landmark, press ● the required number
of times to return to the Location Screen in step 1.
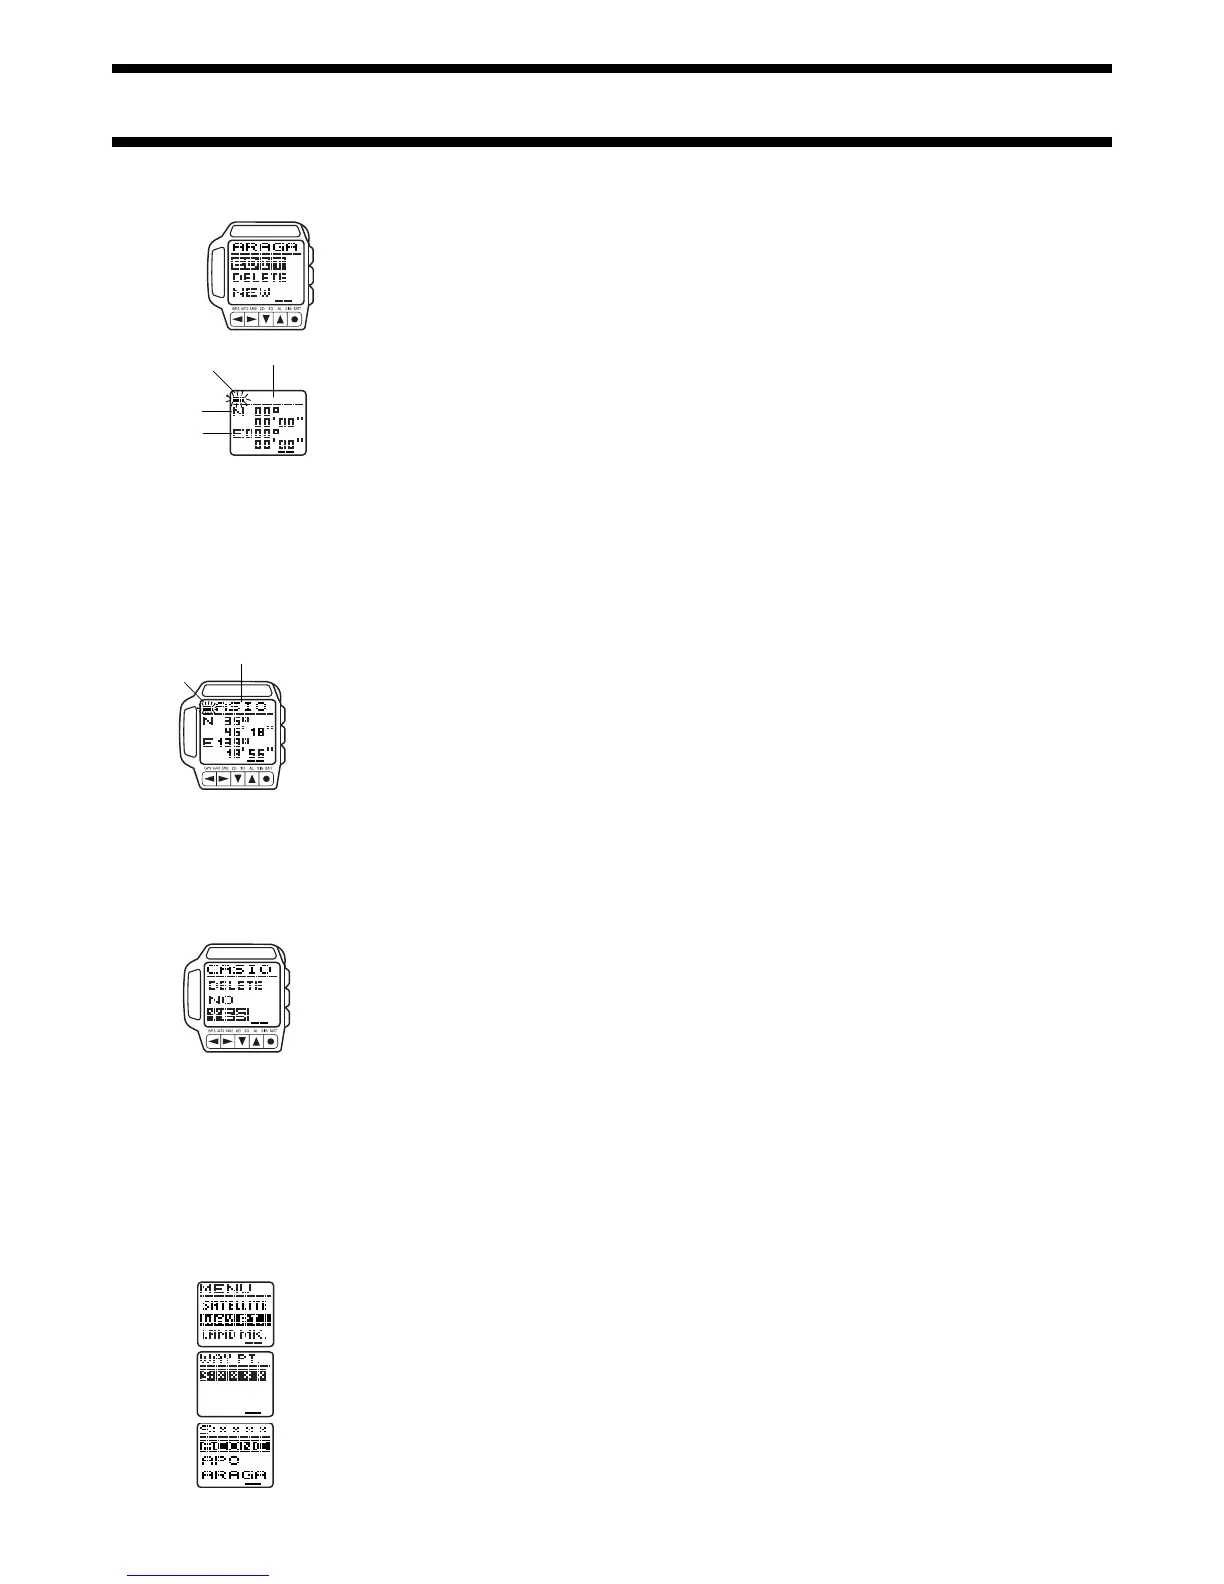
To delete a landmark
1. On the LMK list, use L and K to
highlight the landmark you want to
delete.
2. Press ● to display the LMK list editing
menu.
• Note that you cannot edit or delete a
landmark what is also defined as a
waypoint in the WAY PT. List. Because of
this, the LMK List Editing Menu does not
appear if you press ● while such a
landmark is highlighted in the LMK List.
3. Use L and K to move the highlighting to DELETE and then press ●.
4. Use L and K to highlight YES (if you really want to delete the landmark)
or NO (if you want to exit the delete operation without deleting anything),
and then press ●.
Cursor
Latitude
Longitude
Landmark
name area
Cursor
Landmark name area
Using Waypoints
Waypoints are the points you pass through while travelling. They include your
initial start point, your final destination, and points you pass along the way.
Waypoints are required to produce readings on the Plot Screens, the
Graphical Navigator Screens, and the Direction and Speed Screens. You can
define up to 9 waypoints by selecting them from the LMK (landmark) list.
To define a set of waypoints
1. In any mode, press the MENU button to
display the Menu Screen.
2. Use L and K to highlight WAY PT., and
then press ● to display the WAY PT. list.
• This is the list of currently defined
waypoints.
• S: indicates the start point. If there is no
start point currently set, the start point
name appears as S:xxxx.
3. Press ● to display the list of currently
registered landmarks.
• Landmarks are listed in alphabetical
order, according to their names.
4. Use L and K to move the highlighting
to the landmark you want to select as
your start point.
5. Press ● to select the highlighted landmark as your start point, and return
to the WAY PT. list.
6. To define the next waypoint, use L to move the highlighting to 1:
(waypoint number 1).
7. Repeat steps 3 through 6 to define all the waypoints you want.
8. After you are finished defining waypoints, press the MENU button to return
to the Menu Screen.
To add waypoints
1. In any mode, press the MENU button to display the Menu Screen.
2. Use L and K to highlight WAY PT., and then press ● to display the WAY
PT. list.
3. Use L to move the highlighting to the bottom of the list.
4. Press ● to display the list of landmarks.
5. Use L and K to move the highlighting to the landmark you want to add,
and then press ●.
6. Repeat steps 3 and 5 to add more waypoints if you want.
7. After you are finished adding waypoints, press the MENU button to return
to the Menu Screen.
To insert waypoints
1. On the WAY PT. list, use L and K to move the highlighting to waypoint
above which you want to insert a new waypoint.
2. Press ●.
3. On the menu of options that appears, use L and K to move the
highlighting to INSERT, and then press ● to display the list of landmarks.
4. Use L and K to move the highlighting to the landmark you want to
insert, and then press ●.
5. In response to the INSERT? message that appears, use L and K to
highlight YES (if you really want to insert the waypoint) or NO (if you want
to exit the operation without inserting anything), and then press ●.
To change an existing waypoint
1. On the WAY PT. list, use L and K to move the highlighting to waypoint
you want to change.
2. Press ●.
3. On the menu of options that appears, use L and K to move the
highlighting to CHANGE, and then press ● to display the list of landmarks.
4. Use L and K to move the highlighting to the landmark to which you want
to change, and then press ●.
5. In response to the CHANGE? message that appears, use L and K to
highlight YES (if you really want to change the waypoint) or NO (if you
want to exit the operation without changing anything), and then press ●.
To delete a waypoint
1. On the WAY PT. list, use L and K to move the highlighting to waypoint
you want to delete.
2. Press ●.
3. On the menu of options that appears, use L and K to move the
highlighting to DELETE, and then press ●.
4. In response to the DELETE? message that appears, use L and K to
highlight YES (if you really want to delete the waypoint) or NO (if you want
to exit the operation without deleting anything), and then press ●.
Track Memory
Track point data is automatically stored into track memory when you perform
a GPS position measurement. Track memory can hold up to 100 track point
data records, each of which contains a record number, track position (latitude
and longitude), measurement date, and measurement time. Track point data
is used as the basis for the tracks that are plotted on the GPS Mode Plot
Screens. You can also recall track memory records and view the data
contained in each.
• After the track memory becomes full with 100 track point data records, each
new measurement causes the oldest record in memory to be deleted to
make room for the new data.
When track point data is stored
The following describes the timing when track point data is stored into track
memory.
• Quick Mode/One-Shot Mode
Track point data is stored each time a GPS measurement is successful.
• Auto Mode/Continuous Mode
Track point data is stored every 10 minutes.
 Loading...