— 12 —
2. How to use ADJ Tool when replacing Lens unit
Make sure to perform the following procedure after replacing the lens.
A floppy disk with the lens data is bundled in the spare parts of the lens unit.
1 Enter the TEST mode.
1. Turn the power on while pressing both "MENU" and "DISP" buttons.
2. Press "RIGHT" button, "RIGHT" button and "MENU" button while the
program version is displayed.
3. Select "3.USB TCC TEST", and press "SET" button.
4. Select "1. USB TCC ON", and press "SET" button.
5. Turn the power OFF.
2 Connect the camera to the computer by the USB cable.
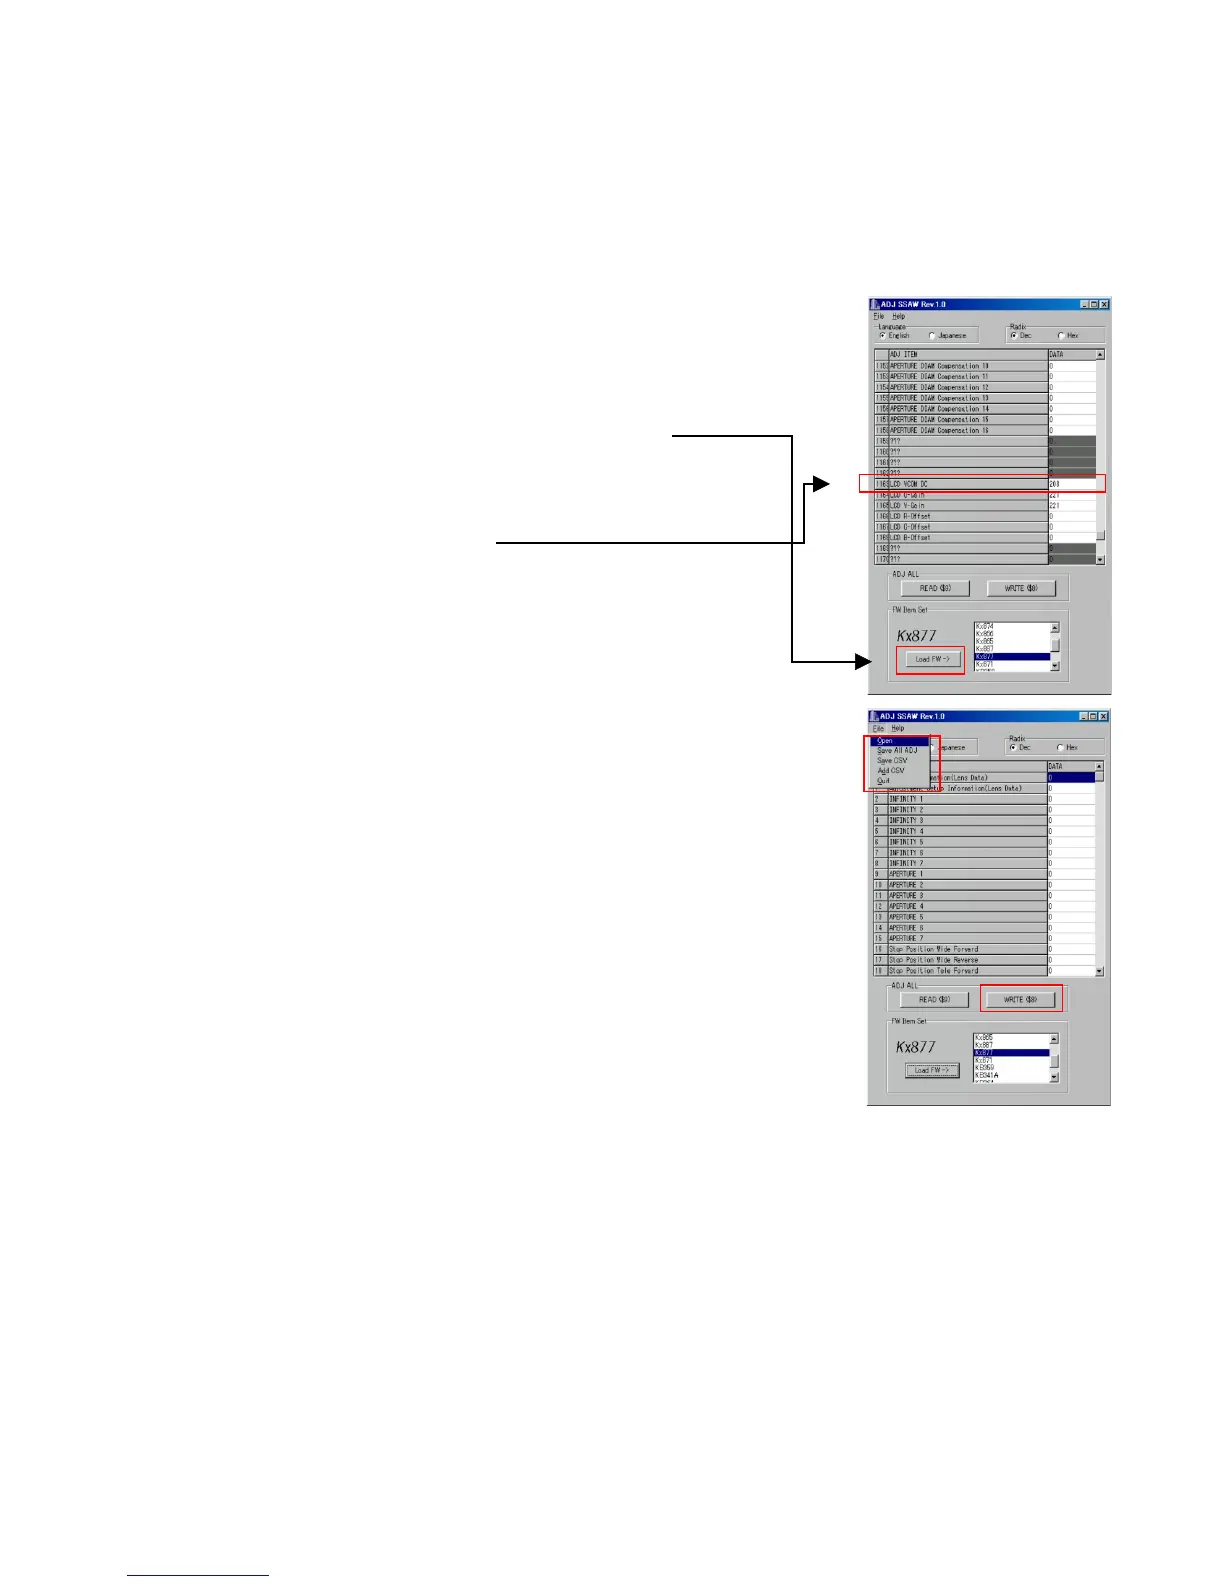
3 Boot "adj03ssaw" .
4 Select the model name and click "Load FW " Key.
• EX-Z30 앶앸 Kx877
• EX-Z40 앶앸 Kx871
5 Click "ADJ ALL READ", and display the data on the "adj03ssaw".
6 Find the No.1163, "V-COM DC".
7 Write down this value(data).
8 Replace the Lens unit.
9 Perform the above 1 to 3.
0 Select the model name and click "Load FW " Key.
• EX-Z30 앶앸 Kx877
• EX-Z40 앶앸 Kx871
A From "File/Open", open the bundled floppy disk, and transfer the data to
the "adj03ssaw".
B Find the No.1163,"V-COM DC"
C Change the data to the former value.(Refer to 7).
D Click "WRITE" button of "ADJ ALL".
E After adjustment, change "1. USB TCC ON" to "2. USB TCC OFF".
A
D
4
6
 Loading...