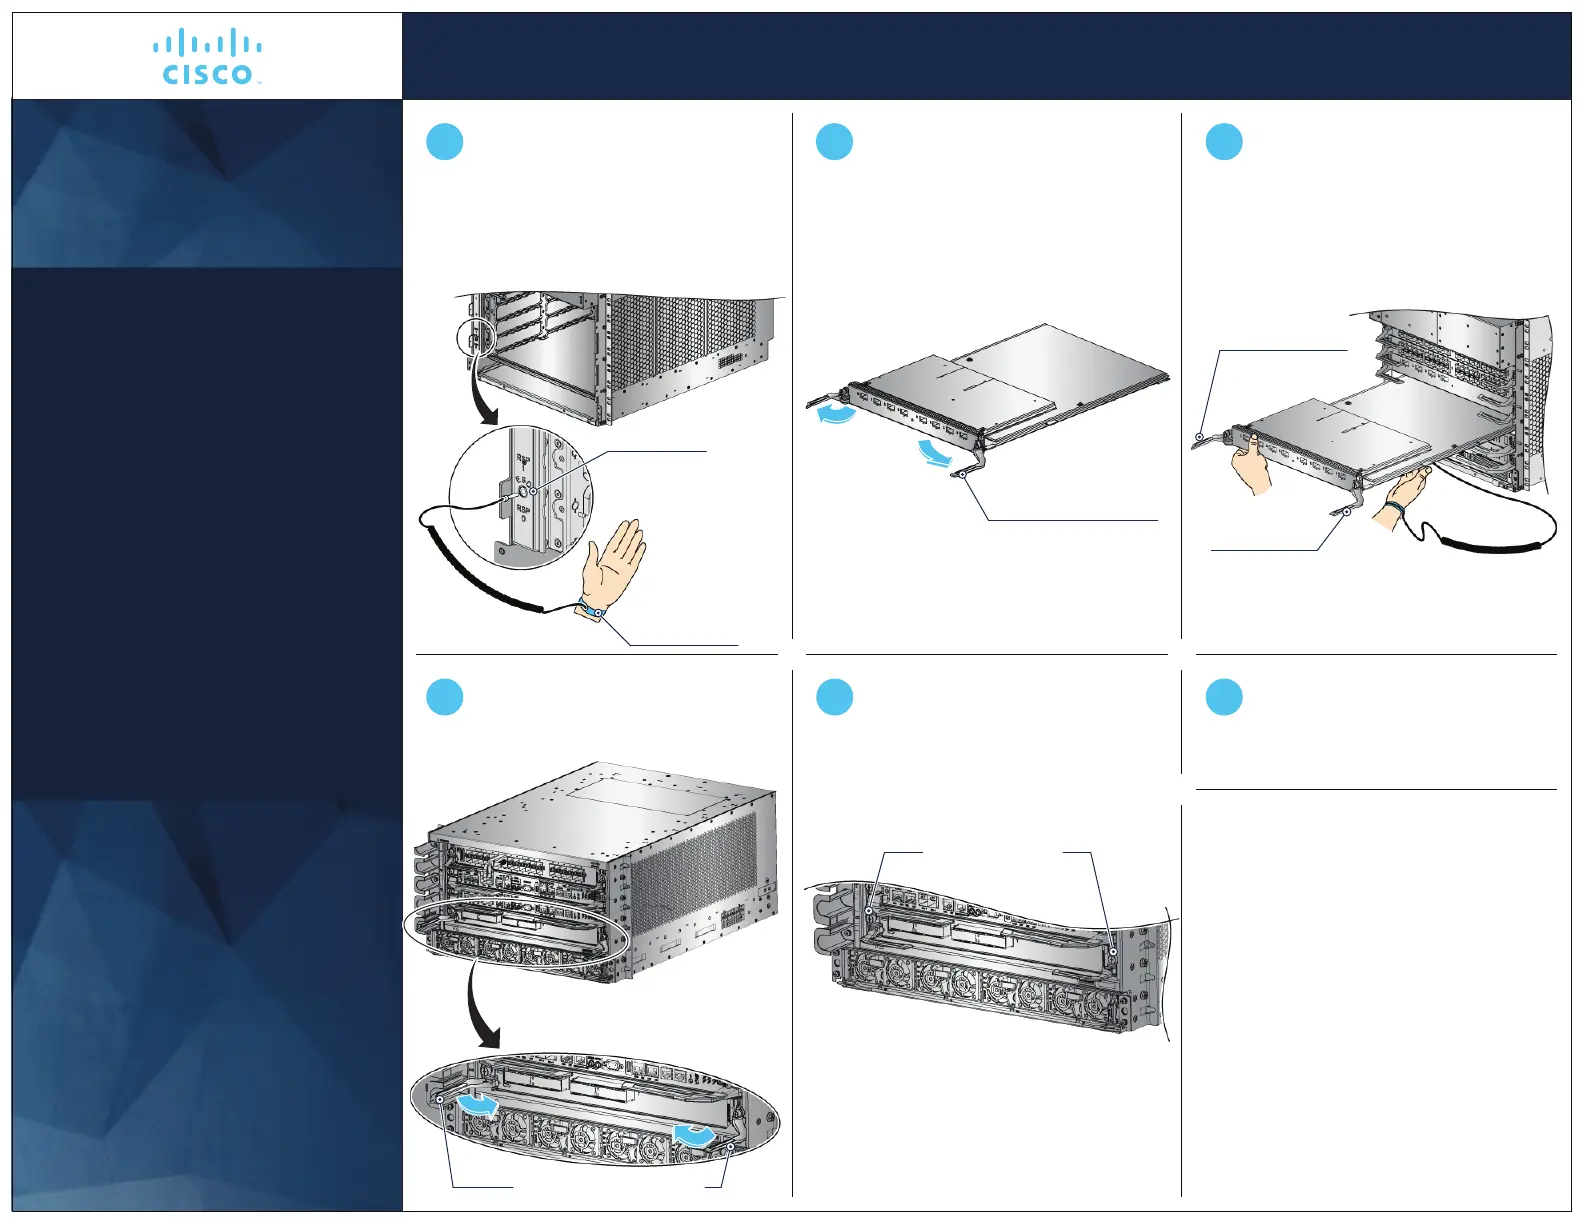
Installing the Line Card
Caution!
.
For convenience and safety purposes,
two persons should handle the line card.
.
Never carry the line card by holding it by
the ejector levers or put pressure on the
captive screws.
.
To avoid damage, place the line card
horizontally on a at antistatic surface.
The outer packaging box contains an
antistatic pink roller foam that can be used
for this purpose.
.
Retain the dust caps on the line card
throughout the installation procedure.
Also, use dust caps on unused ports in the
line card.
Cisco ASR 9000 Series
Line Card
Open the ejector levers on either
side of the line card.
Carry the line card and slide the card
into the slot to connect with the
backplane connector. Start with the
lowest numbered line card slot.
Attach an antistatic wrist strap to your
wrist and to the ESD socket of the
chassis, or to a bare metal surface on
the chassis or frame.
1 2 3
Pivot the ejector levers to seat the
card into the backplane connector.
4
Repeat Step 2 through Step 5 to
install another line card.
To uninstall a line card, perform the steps in
the reverse order.
For manual OIR (online insertion and removal)
of cards, disengage the line card from the
backplane connector, and partially pull out
the line card. Reseat the card to
establish the connection again.
65
Tighten the captive screws on either
side of the line card to a torque of
10 1 in-lb.
This procedure explains installing the line
card in the horizontal position.
To install the line card in the vertical
position, follow the same steps but
hold the card vertically.
+
-
3
© 2020 Cisco Systems, Inc. All rights reserved.
Captive screws
Ejector lever (closed)
Ejector lever (open)
Ejector lever
Captive screws
Antistatic
wrist band
Ensure to verify the eectiveness of
ESD wrist strap before handling the
hardware.
ESD socket
 Loading...


