10
Catalyst 3750-X and 3560-X Switch Getting Started Guide
OL-19590-01
Installing the Switch
Ethernet Console Port
1. Connect a Category 5 Ethernet cable to the PC Ethernet port. Connect the other end of the cable to
the Ethernet console port on the switch rear panel.
2. Start a terminal-emulation program on the PC.
3. Configure the PC terminal emulation software for 9600 baud, 8 data bits, no parity, 1 stop bit, and
no flow control.
4. Use the CLI to configure the switch. See the software configuration guide and the command
reference.
Management Port
1. Connect a Category 5 Ethernet cable to the PC Ethernet port. Connect the other end of the cable to
the management port on the switch rear panel.
2. Start a Telnet session on the PC.
3. Enter the switch IP address that you assigned using Express Setup.
4. Use the CLI to configure the switch. See the software configuration guide and the command
reference.
Other Management Options
You can use SNMP management applications such as CiscoWorks Small Network Management Solution
(SNMS) and HP OpenView to configure and manage the switch. You can manage it from an
SNMP-compatible workstation that is running platforms such as HP OpenView or SunNet Manager.
The Cisco IE2100 Series Configuration Registrar is a network management device that works with
embedded Cisco Networking Services (CNS) agents in the switch software. You can use the Registrar to
automate initial configurations and configuration updates.
See the “Accessing Help Online” section on page 20 for supporting documentation.
Installing the Switch
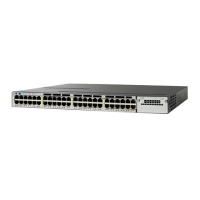
This section covers basic 19-inch rack-mounting. The illustrations show the Catalyst 3750X-48P switch.
You can install and connect other Catalyst 3750-X and 3560-X switches as shown. See the hardware
installation guide on Cisco.com.
Equipment That You Need
• Phillips screwdriver to rack-mount the switch
• Ratcheting torque screwdriver capable of 5-inch pound of torque to connect the StackWise cable
 Loading...