4 Cisco 250 Series Smart Switches
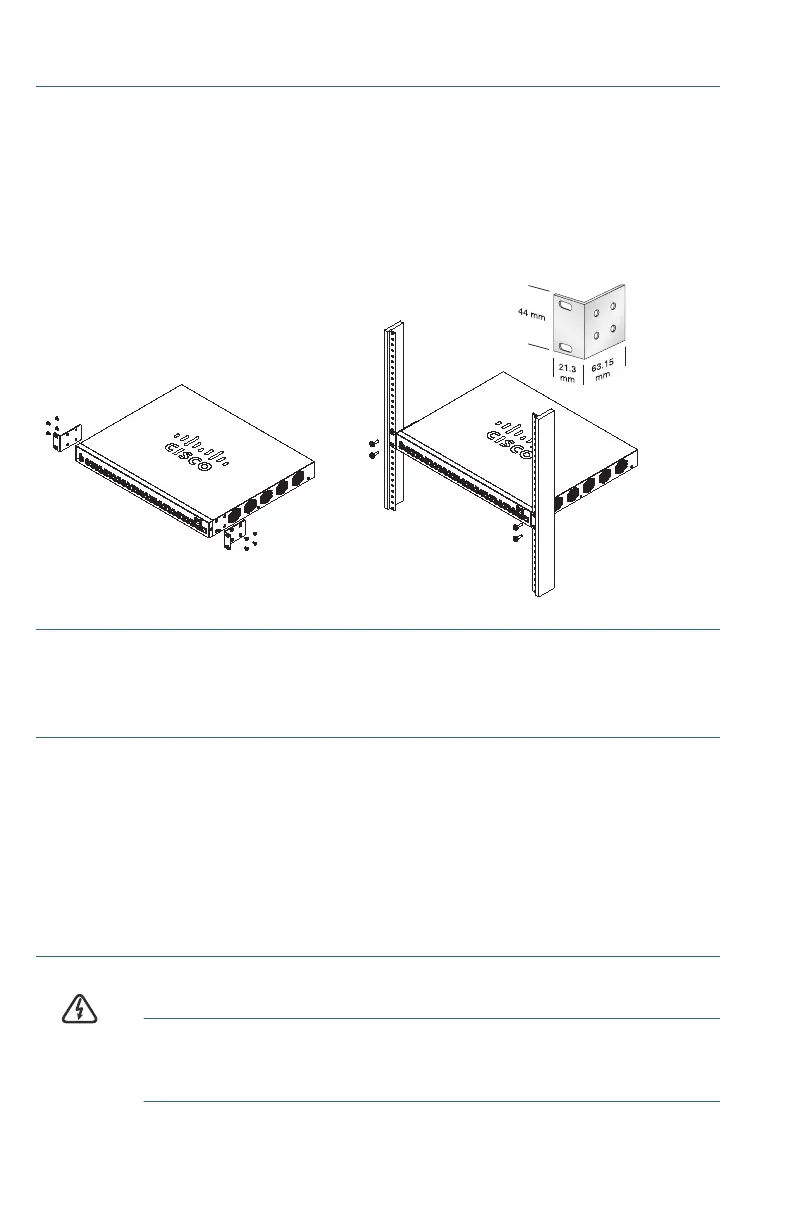
To install the switch into a 19-inch standard chassis:
STEP 1 Place one of the supplied brackets on the side of the switch so that
the four holes of the brackets align to the screw holes, and then use
the four supplied screws to secure it.
STEP 2 Repeat the previous step to attach the other bracket to the opposite
side of the switch.
STEP 3 After the brackets are securely attached, the switch is now ready to
be installed into a standard 19-inch rack.
Wall Mounting
To mount the Cisco 250 Series Smart Switches to a wall:
STEP 1 Determine where you want to mount the device. Verify that the
surface is smooth, flat, dry, and sturdy.
STEP 2 Drill two pilot holes into the surface of the wall 94 mm apart.
STEP 3 Insert a screw into each hole, leaving a gap between the surface
and the base of the screw head.
STEP 4 Place the bottom of the switch over the screws and slide the
switch down until the screws fit snugly into the slots.
WARNING Insecure mounting may damage the device or cause injury.
Cisco is not responsible for damages incurred by insecure wall
or ceiling mounting.
 Loading...