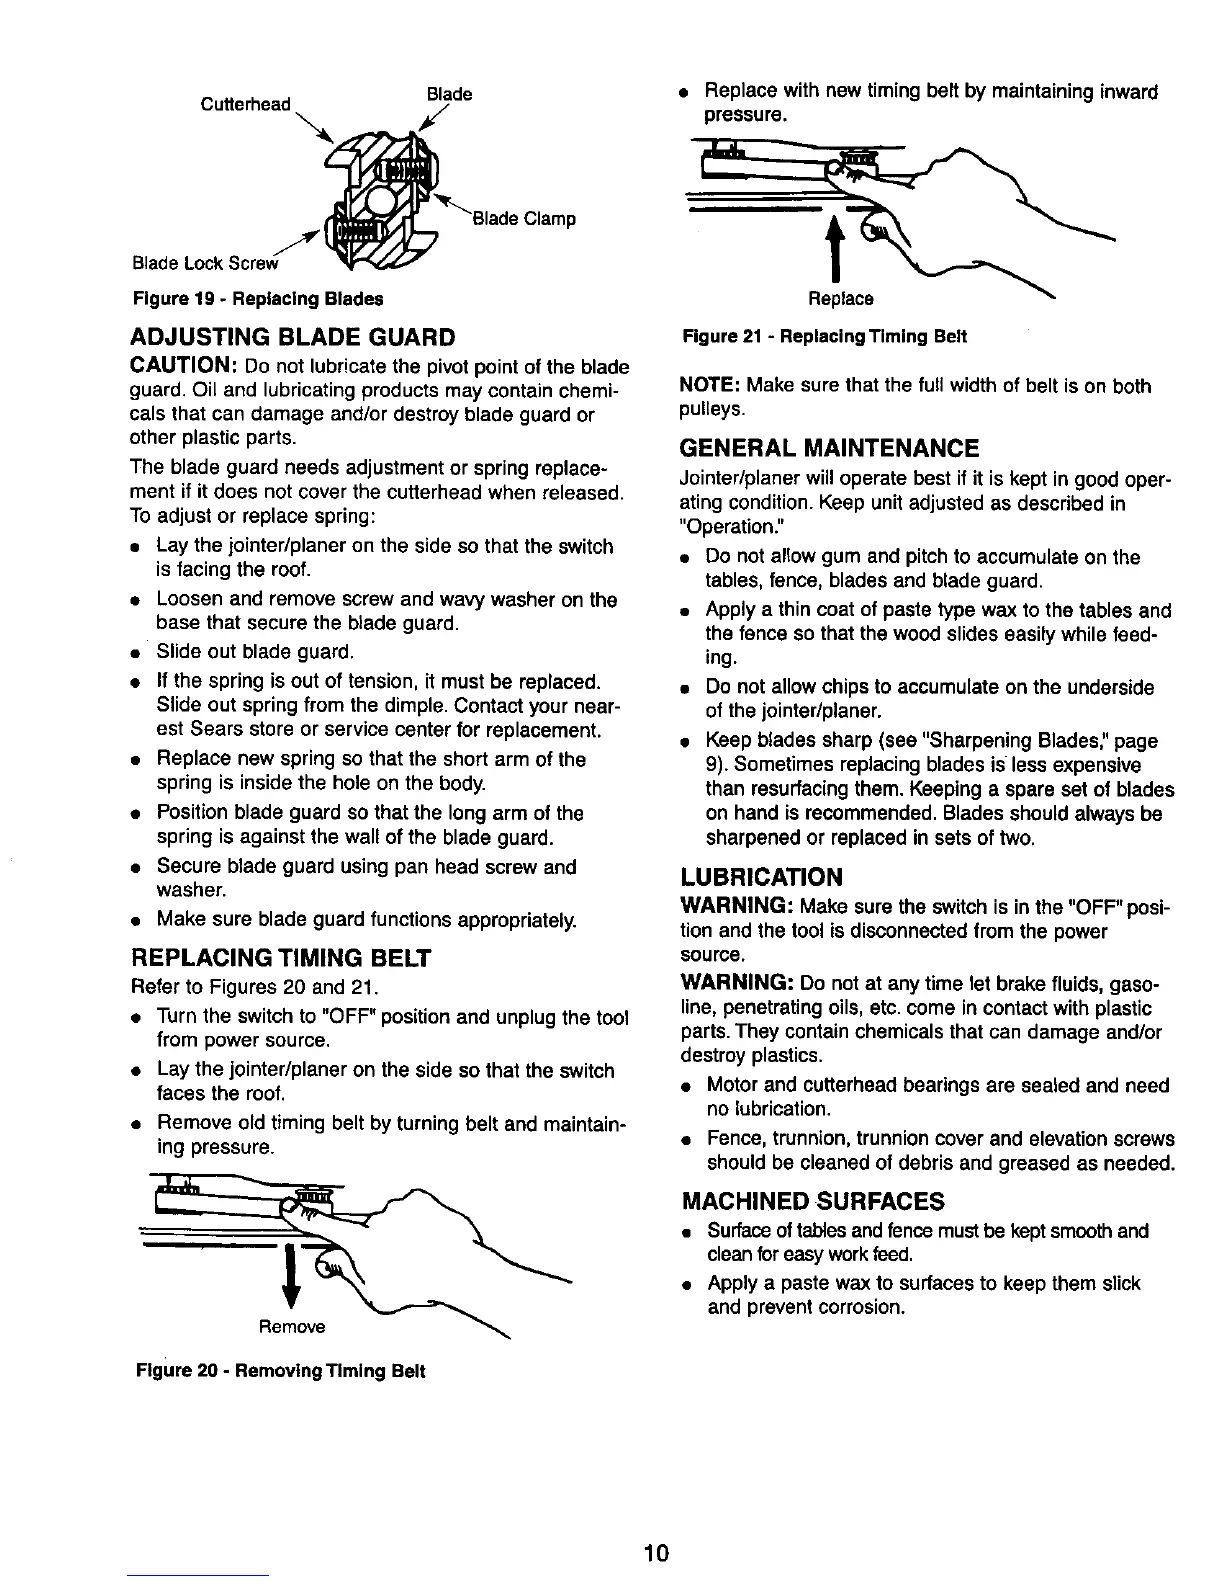
Blade
Cutterhead
Blade Lock Screw
Figure 19 - Replacing Blades
ADJUSTING BLADE GUARD
CAUTION: Do not lubricate the pivot point of the blade
guard. Oil and lubricating products may contain chemi-
cals that can damage and/or destroy blade guard or
other plastic parts.
The blade guard needs adjustment or spring replace-
ment if it does not cover the cutterhead when released.
To adjust or replace spring:
• Lay the jointer/planer on the side so that the switch
is facing the roof.
• Loosen and remove screw and wavy washer on the
base that secure the blade guard.
• Slide out blade guard.
• If the spring is out of tension, it must be replaced.
Slide out spring from the dimple. Contact your near-
est Sears store or service center for replacement.
• Replace new spring so that the short arm of the
spring is inside the hole on the body.
• Position blade guard so that the long arm of the
spring is against the wall of the blade guard.
• Secure blade guard using pan head screw and
washer.
• Make sure blade guard functions appropriately.
REPLACING TIMING BELT
Refer to Figures 20 and 21.
• Turn the switch to "OFF" position and unplug the tool
from power source.
• Lay the jointer/planer on the side so that the switch
faces the roof.
• Remove old timing belt by turning belt and maintain-
ing pressure.
__ I
' " Re
Figure 20 - Removing Timing Belt
• Replace with new timing belt by maintaining inward
pressure.
Replace "_
Figure 21 - Replacing Timing Belt
NOTE: Make sure that the full width of belt is on both
pulleys.
GENERAL MAINTENANCE
Jointer/planer will operate best if it is kept in good oper-
ating condition. Keep unit adjusted as described in
"Operation."
• Do not allow gum and pitch to accumulate on the
tables, fence, blades and blade guard.
• Apply a thin coat of paste type wax to the tables and
the fence so that the wood slides easily while feed-
ing.
• Do not allow chips to accumulate on the underside
of the jointer/planer.
• Keep blades sharp (see "Sharpening Blades;' page
9). Sometimes replacing blades is less expensive
than resurfacing them. Keeping a spare set of blades
on hand is recommended. Blades should always be
sharpened or replaced in sets of two.
LUBRICATION
WARNING: Make sure the switch is in the "OFF" posi-
tion and the tool is disconnected from the power
source.
WARNING: Do not at any time let brake fluids, gaso-
line, penetrating oils, etc. come in contact with plastic
parts. They contain chemicals that can damage and/or
destroy plastics.
• Motor and cutterhead bearings are sealed and need
no lubrication.
• Fence, trunnion, trunnion cover and elevation screws
should be cleaned of debris and greased as needed.
MACHINED SURFACES
• Surface oftablesand fence must be keptsmoothand
clean for easy workfeed.
• Apply a paste wax to surfaces to keep them slick
and prevent corrosion.
10
 Loading...