• Use quality lumber. Blades last longer and cuts are
smoother with good quality wood.
• Do not perform jointing/planing operations on materi-
al shorter than 8'!,", narrower than _/,",or _essthan
_/4"thick
• Never make jointing cut deeper than '/,".
• Always keep cutterhead and blade guards in proper
working condition.
• Maintain the proper relationships of infeed and out-
feed table surfaces and cuttarhead blade path.
• Do not back the work toward the infeed table.
• Support the workpiece adequately at all times during
operation; maintain control of the workpiece.
• Use hold-down/push blocks for jointing material nar-
rower than 3" or planing material thinner than 3".
• Take precautions against kickback. Do not permit any-
one to stand or cross in line of cutterheadis rotation.
Kickback or thrown debris will travel in this direction.
• Turn switch off and disconnect power whenever
jointer/planer is not in use.
• Replace or sharpen blades as they become damaged
or dull.
• Do not attempt to perform an abnormal or little used
operation without study and the use of adequate hold-
down/push blocks, jigs, fixtures, stops and the like.
• Keep jointer/planer maintained. Follow maintenance
instructions (see pages 9-10).
DEPTH OF CUT
Refer to Figure 7.
The depth of cut is adjusted by the relative positioning
of the infeed table with respect to the cutterhead. Infeed
table can be raised or lowered using the handwheel.
Turning the handwheel counterclockwise will lower the
infeed table causing more wood to be removed from
workpiece. Turning the handwheel clockwise will raise
the infeed table causing less wood to be removed from
workpiece.
Do not make jointing or planing cuts deeper than '/,".
InfeedTable
Depth of Cut
Hand Knob
Figure 7 - Depth of Cut
CHECK DEPTH OF CUT
Refer to Figure 8.
• Place a straight edge on the outfeed table extending
over the infeed table.
• Measure from the surfaceof the infeedtable tothe bot-
tom of the straightedge.This will be the depth of cut.
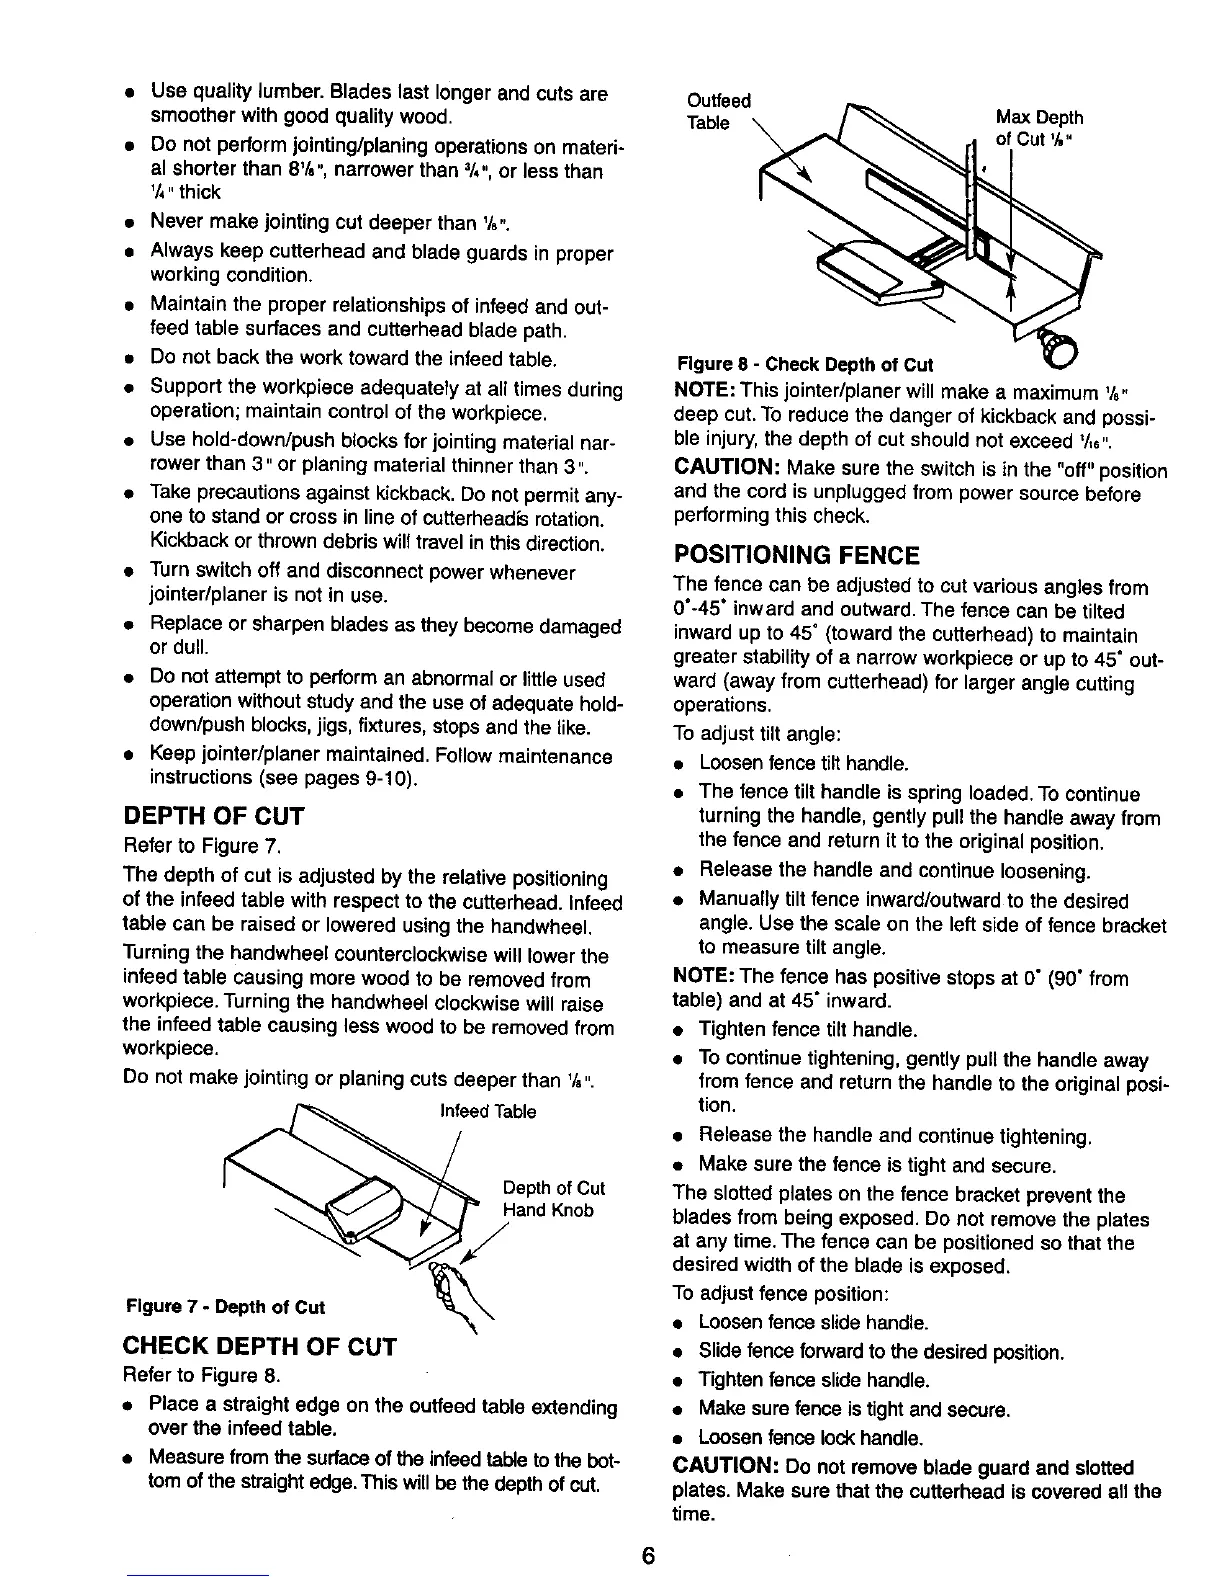
Outteed
Table
Max Depth
of Cut %"
Figure 8 - Check Depth of Cut
NOTE: This jointer/planer will make a maximum %"
deep cut. To reduce the danger of kickback and possi-
ble injury, the depth of cut should not exceed '/,6".
CAUTION: Make sure the switch is in the "off" position
and the cord is unplugged from power source before
performing this check.
POSITIONING FENCE
The fence can be adjusted to cut various angles from
0"-45" inward and outward. The fence can be tilted
inward up to 45" (toward the cutterhead) to maintain
greater stability of a narrow workpiece or up to 45° out-
ward (away from cutterhead) for larger angle cutting
operations.
To adjust tilt angle:
• Loosen fence tilt handle.
• The fence tilt handle is spring loaded. To continue
turning the handle, gently pull the handle away from
the fence and return it to the original position.
• Release the handle and continue loosening.
• Manually tilt fence inward/outward to the desired
angle. Use the scale on the left side of fence bracket
to measure tilt angle.
NOTE: The fence has positive stops at 0" (90" from
table) and at 45" inward.
• Tighten fence tilt handle.
• To continue tightening, gently pull the handle away
from fence and return the handle to the original posi-
tion.
• Release the handle and continue tightening.
• Make sure the fence is tight and secure.
The slotted plates on the fence bracket prevent the
blades from being exposed. Do not remove the plates
at any time. The fence can be positioned so that the
desired width of the blade is exposed.
To adjust fence position:
• Loosen fence slide handle.
• Slide fence forward to the desired position.
• Tighten fence slide handle.
• Make sure fence is tight and secure.
• Loosen fence lock handle.
CAUTION: Do not remove blade guard and slotted
plates. Make sure that the cutterhead is covered all the
time.
6
 Loading...