For installation of the indoor units, refer to the installation manual which was provided with the units.
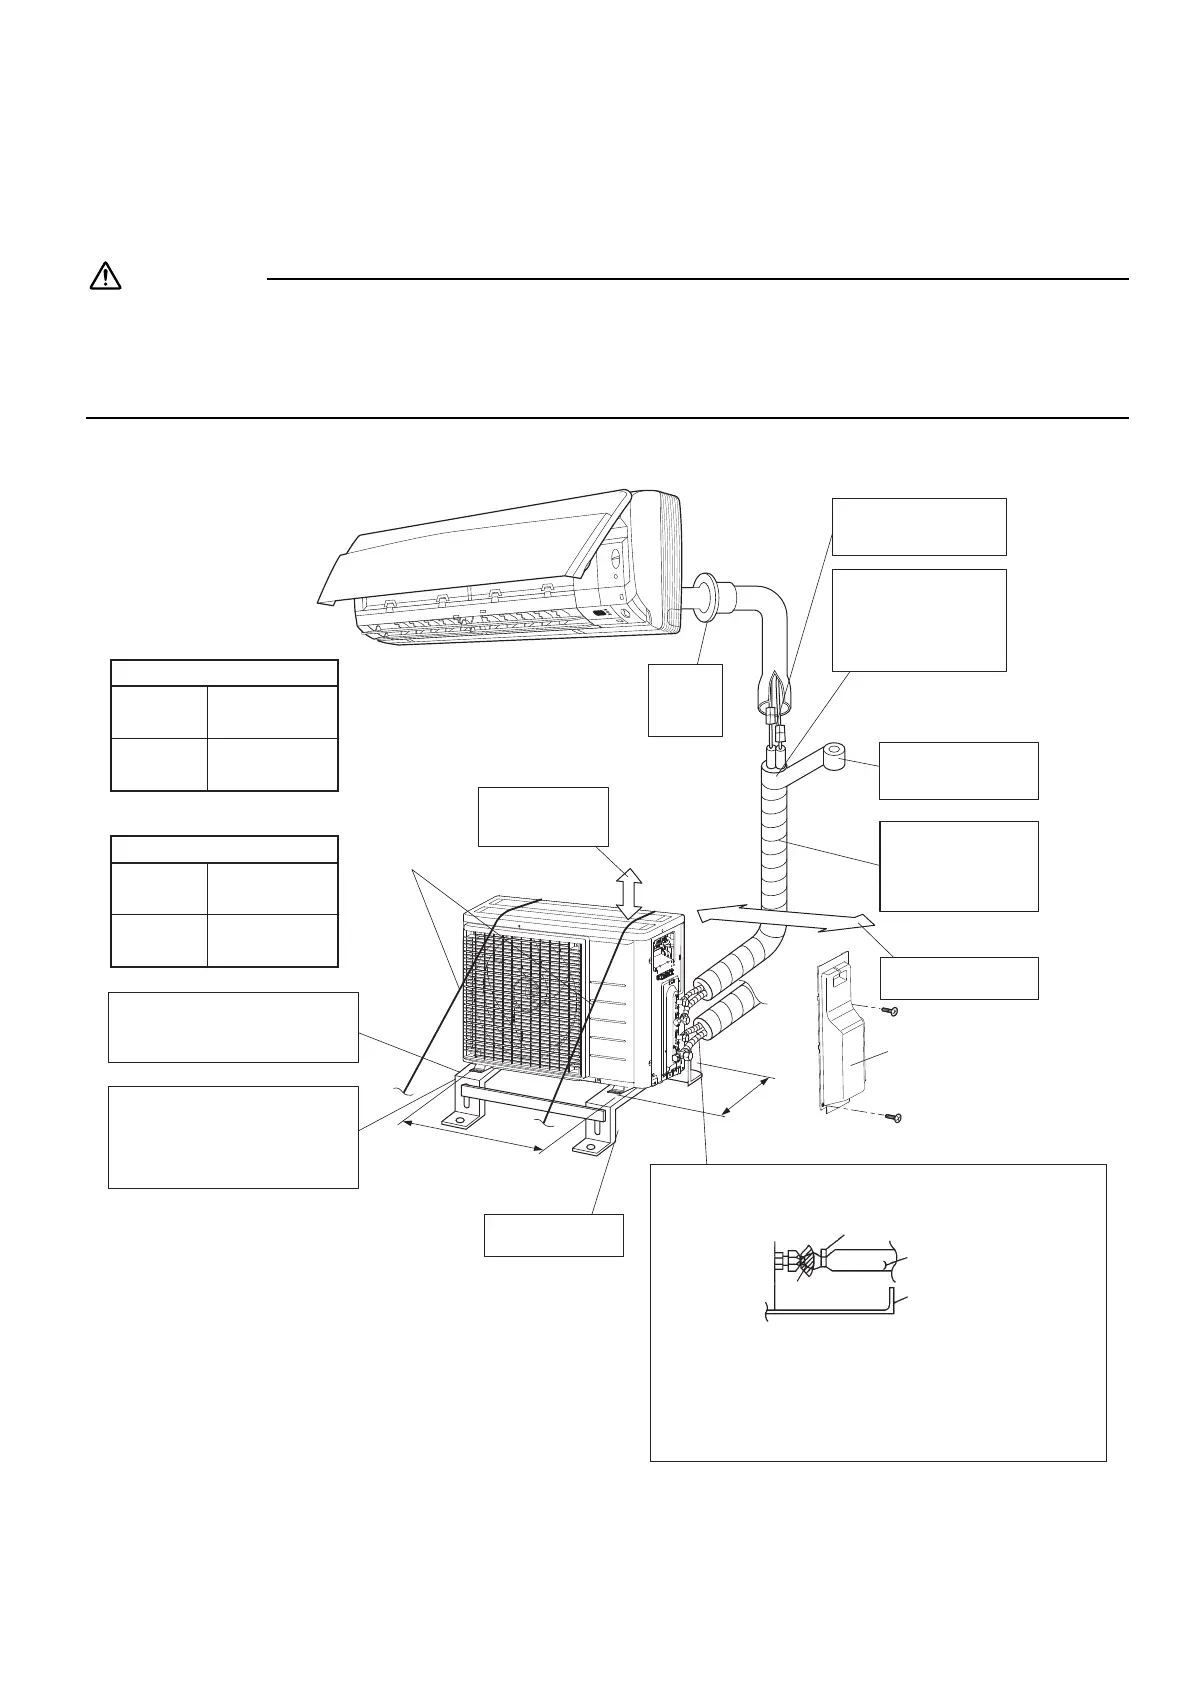
Make sure no dirt or moisture gets into either side of the embedded branch piping.
(Hole pitch of foot bolts)
574
(Hole pitch of
foot bolts)
311
250mm from wall
Allow space for piping
and electrical servicing.
Level mounting
base (optional parts)
Clamping material
Insulation tube
Service lid
Tape
Also insulate the connection on the outdoor unit.
Use tape or insulating material on all connections
to prevent air from getting in between the copper
piping and the insulation tube.
Be sure to do this if the outdoor unit is installed
above.
Cut thermal insulation
pipe to an appropriate
length and wrap it with
tape, making sure that no
gap is left in the insulation
pipe’s cut line.
The flare connection
should be installed
outdoors.
Wrap the insulation
pipe with the finishing
tape from bottom to top.
Refrigerant piping must
be protected from
physical damage.
Install a plastic cover or
equivalent.
Caulk
pipe hole
gap
with putty.
Allow 300mm of
work space below
the ceiling surface.
If there is the danger of the unit falling
or overturning, fix the unit with
foundation bolts, or with wire or other
means.
If the location does not have good
drainage, place the unit on a level
mounting base (or a plastic pedestal).
Install the outdoor unit in a level
position. Failure to do so may result in
water leakage or accumulation.
Stop valve cover
Wire
unit: mm
Max. allowable refrigerant charge amount
2MXM40
1.08kg
2AMXM40
2MXM50
1.350kg
2AMXM50
Refrigerant piping must be kept to
a minimum.
2MXM40
1.20m
2
2AMXM40
2MXM50
1.80m
2
2AMXM50
Minimum floor area for installation