11 Installation
Installation and operation manual
8
BRC1H519W+K+S
Wired remote controller
4P511630-1B – 2018.03
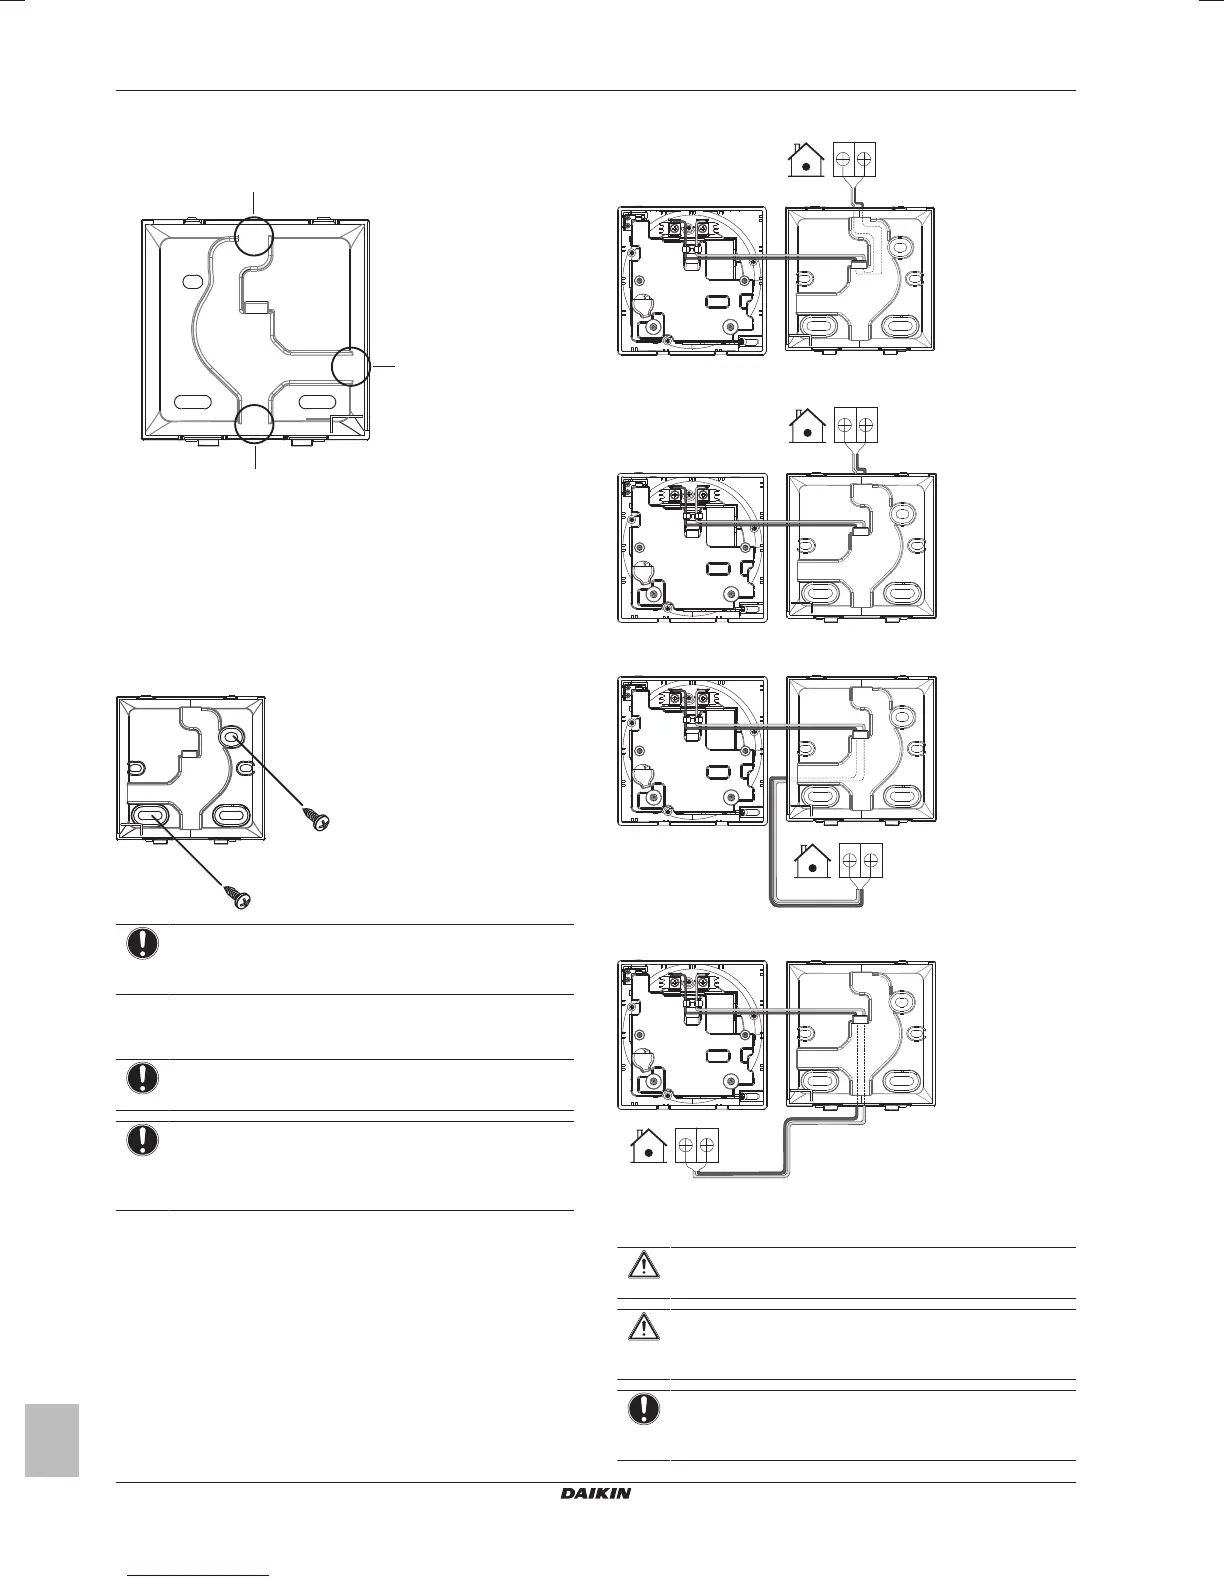
The wiring can be routed from the top, the rear, the left, or the
bottom. Remove a piece of the rear casing according to the
illustration:
a Wiring from the top
b Wiring from the left
c Wiring from the bottom
In case you are routing the wiring from the rear, you don't have to
remove anything.
11.1.1 To mount the controller
1 Take the screws and plugs from the accessory bag.
2 Mount the rear casing to a flat surface.
NOTICE
Be careful not to distort the rear casing by overtightening
the mounting screws.
11.2 Connecting the electrical wiring
NOTICE
The wiring for connection is NOT included.
NOTICE
When wiring, run the wiring away from the power supply
wiring in order to avoid receiving electric noise (external
noise).
11.2.1 To connect the electrical wiring
Connect controller terminals P1/P2 to indoor unit terminals P1/P2.
From the top
From the rear
From the left
From the bottom
11.3 Closing the controller
CAUTION
Never touch the internal parts of the controller.
CAUTION
When closing the controller, be careful not to pinch the
wiring.
NOTICE
To prevent damage, make sure the front of the controller is
clicked into the rear casing securely.