INSTALLING REMOTE SENSOR 1 & 2
10
0
10 0
1
0
10 0
1
0
23 6
1
0
23 6
2
02
02
23 6
23 6
Step 1
Step 2
Step 3
Step 4
Step 5
Step 6
Blinking
Blinking
BlinkingBlinking
BlinkingBlinking
BlinkingBlinking
BlinkingBlinking
KRCSO1-1
Step 1.
Using Daikin option KRCSO1-1 cut plug off lead. (Fig.7)
Step 2.
Carefully strip the insulation of the leads exposing the core wire. Insert
the 2 stripped wires into the two terminal holes of terminal block TN1.
Repeat the process using terminal block TN2 if a second sensor is
required.
Step 3.
Carefully tighten the terminal screws, be careful not to over tighten the
screws. (When connecting 1 sensor use terminal block TN1) Please
refer to note 4. (Page 7 or 9) Ensure cables are secured by the 2 cable
ties provided. Do not allow KRCSO1-1 cables to come in contact
with live power or PCB’s.
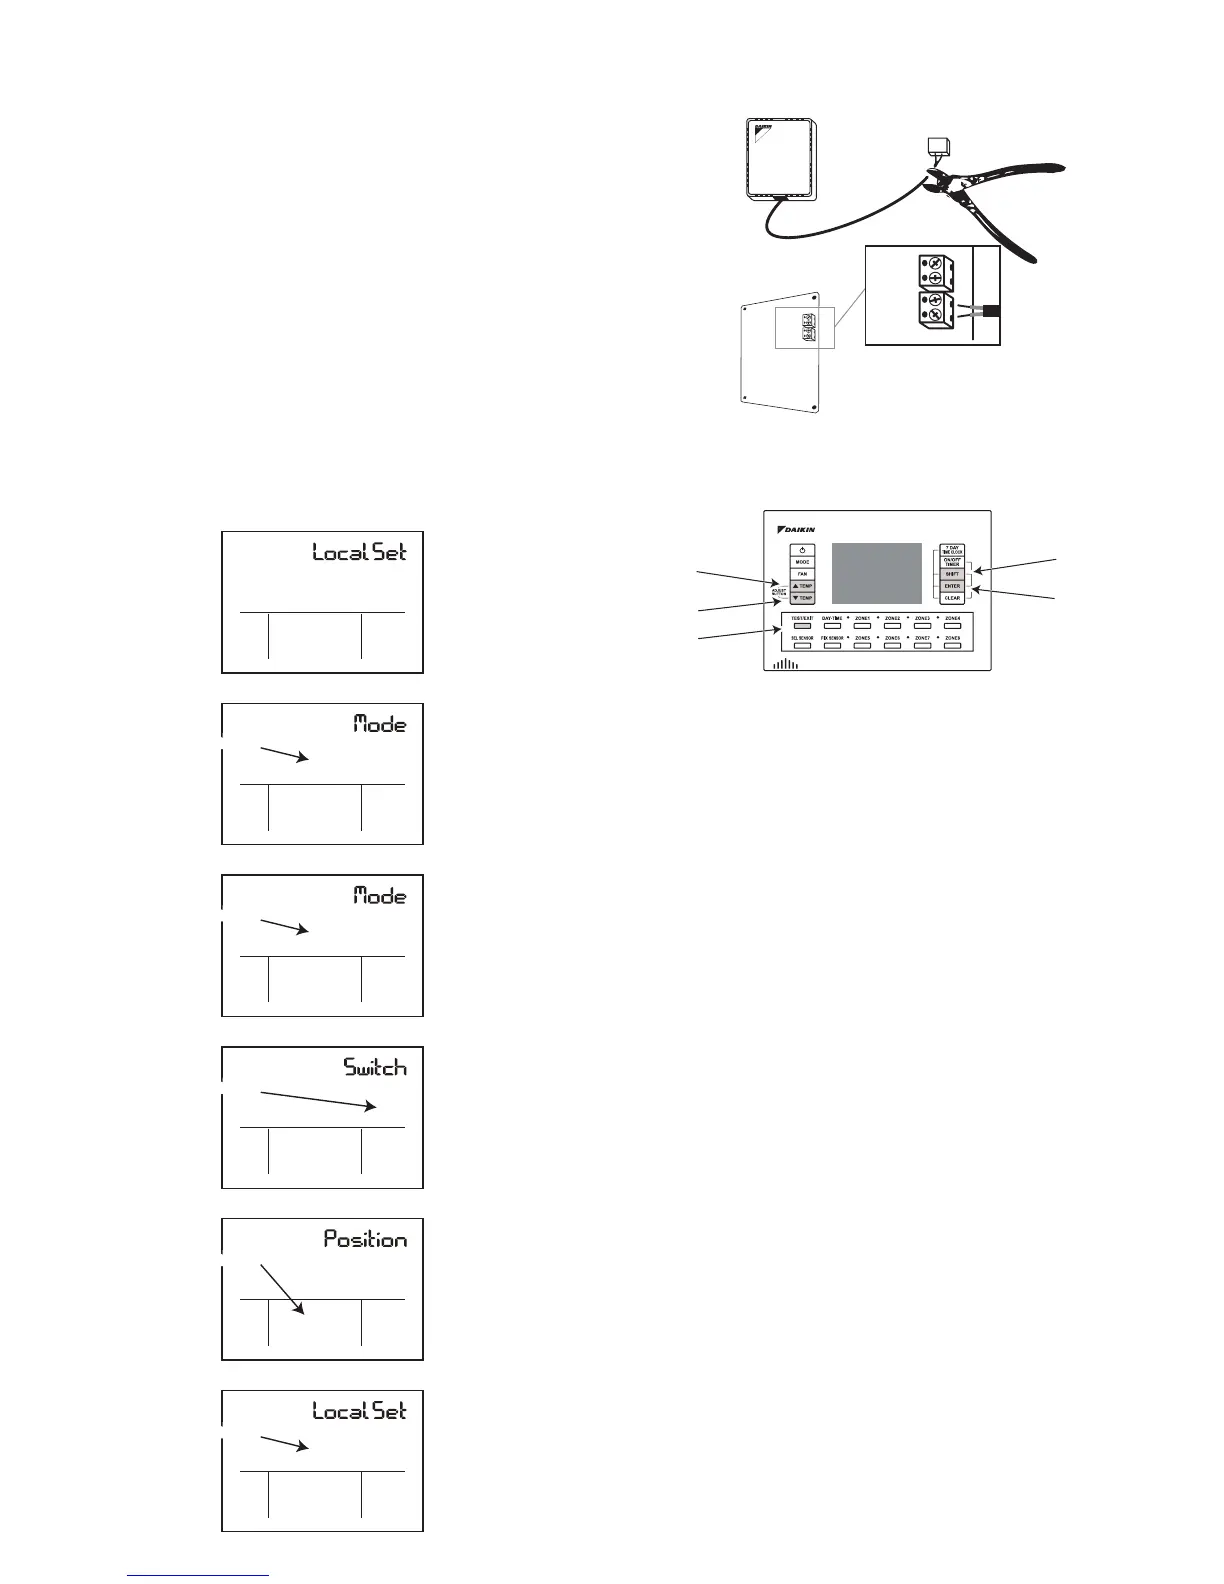
FIELD SETTINGS
TEMP UP
TEMP DOWN
SHIFT
ENTER
EST / ENTER
Example. How to set Field Setting 23-6-02 (High Static
Fan)
Step 1.
Press and hold the test button for approximately 4
seconds or until the “Local Set” screen is displayed.
(Note 1: If you do not continue to hold the test button
the inspection screen will be displayed, if the inspection
screen appears press the test button twice and the
screen will resume normal display.)
Step 2.
Press the “Shift” button once, “Mode” and the first digit
will be displayed. The first digit of the Field code
number will start to flash.
Step 3.
Choose the Field setting number you wish to set by
using the “Temperature up or down” buttons. Eg. 23
Step 4.
Press the “Shift” button once, “Switch” will be displayed
and the second digit will start to flash. By using the
“Temperature up” button change the second digit if
required. Eg. 6 (Note 2: Wait for the second digit to
appear before adjusting.)
Step 5.
Press the “Shift” button once, “Position” will be
displayed and the third digit will start to flash. By using
the “Temperature up” button change the third digit if
required. Eg. 02
Step 6.
Press the “Enter” button once, “Local Set” will be
displayed.
Step 7.
Press the “Test” button once. 88 may display for a few
seconds, normal display will resume once 88
disappears.
Fig.7
*Required for system set up. If field settings are not
entered the system will operate in the default
condition. (Pg.11)
TN1
PCB
(GREEN)
TN2
 Loading...