8 Finishing the indoor unit installation
Installation manual
9
CTXM15+FTXM20~42+ATXM20~35R2/5V1B +
FTXM50~71R2V1B + ATXM50R2V1B
Daikin room air conditioner
3P482320-11R – 2020.06
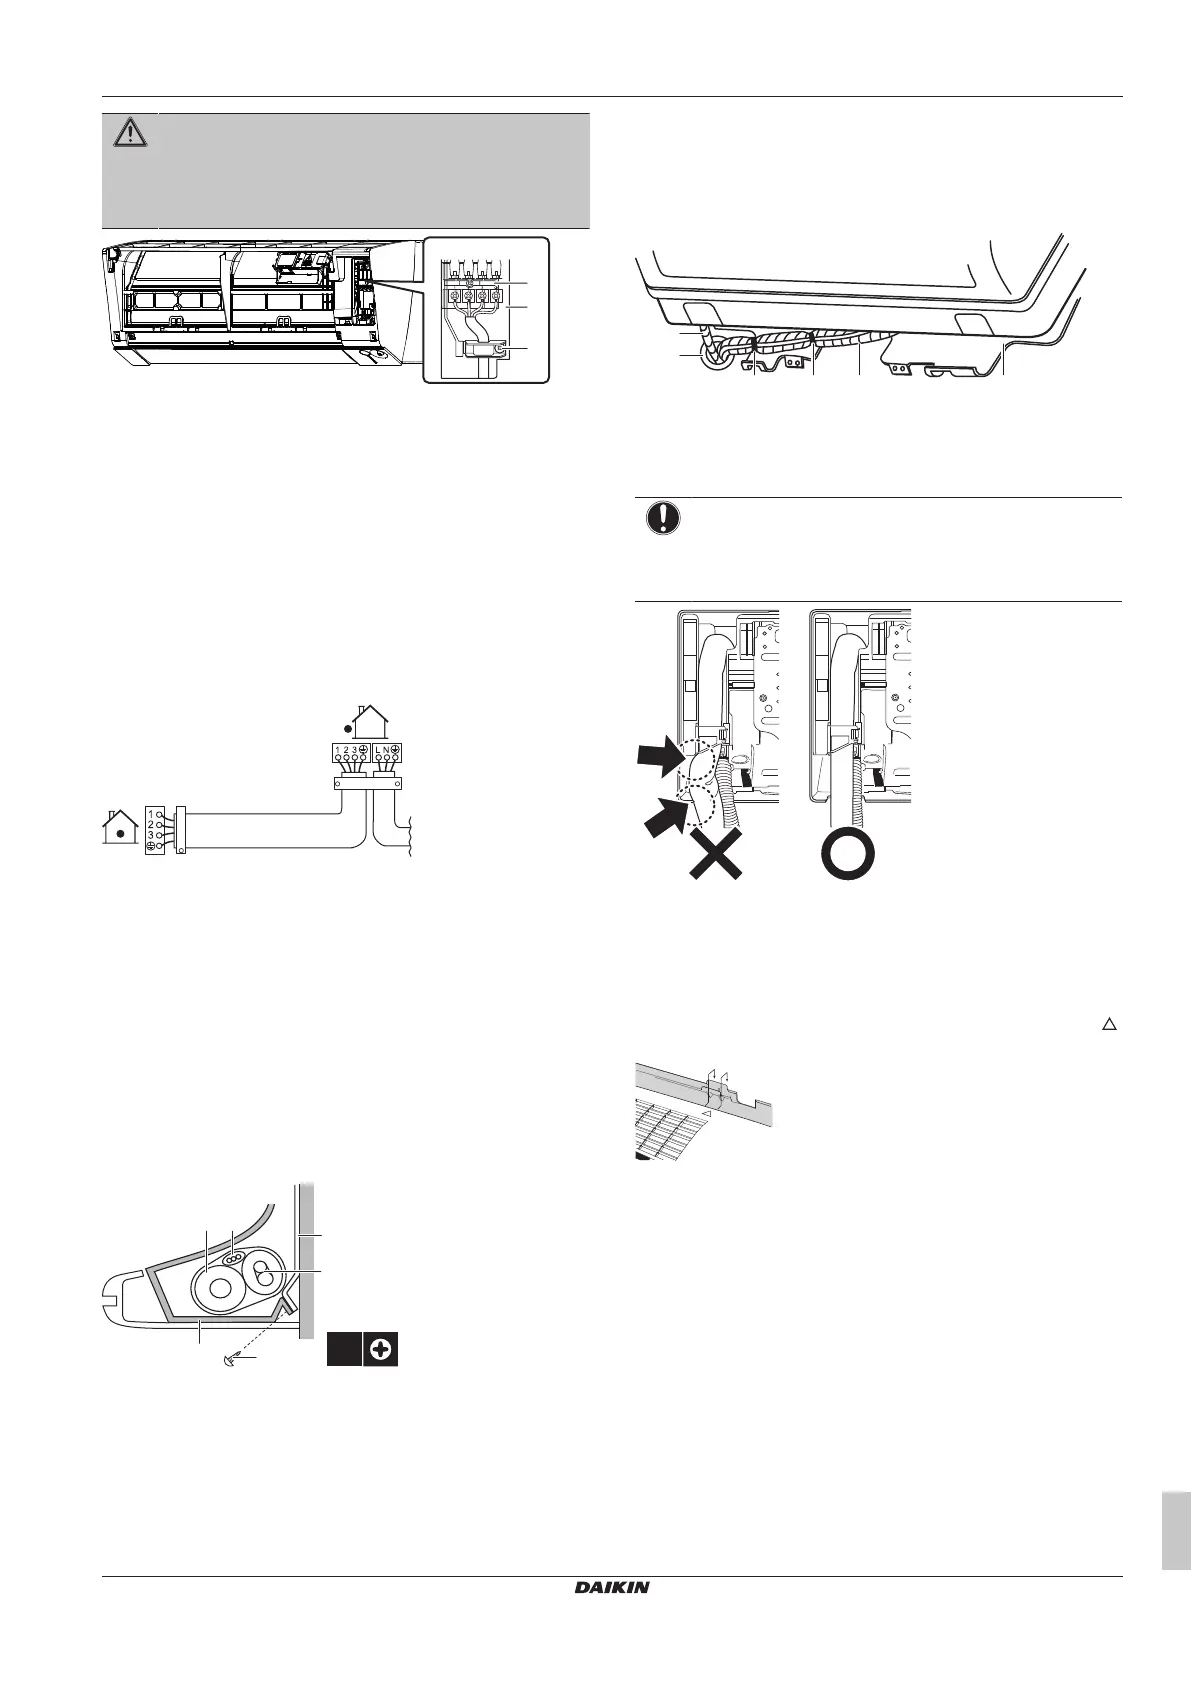
WARNING
Provide adequate measures to prevent that the unit can be
used as a shelter by small animals. Small animals that
make contact with electrical parts can cause malfunctions,
smoke or fire.
a Terminal block
b Electrical component block
c Cable clamp
5 Strip the wire ends approximately 15mm.
6 Match wire colours with terminal numbers on the indoor unit
terminal blocks and firmly screw the wires to the corresponding
terminals.
7 Connect the earth wire to the corresponding terminal.
8 Firmly fix the wires with the terminal screws.
9 Pull the wires to make sure that they are securely attached,
then retain the wires with the wire retainer.
10 Shape the wires so that the service cover fits securely, then
close the service cover.
8 Finishing the indoor unit
installation
8.1 To insulate the drain piping,
refrigerant piping and
interconnection cable
1 After the drain piping, refrigerant piping and the electrical wiring
are finished. Wrap refrigerant pipes, interconnection cable and
drain hose together using insulation tape. Overlap at least half
the width of the tape with each turn.
a Drain hose
b Interconnection cable
c Mounting plate (accessory)
d Refrigerant piping
e Indoor unit fixing screw M4×12L (accessory)
f Bottom frame
8.2 To pass the pipes through the wall
hole
1 Shape the refrigerant pipes along the pipe path marking on the
mounting plate.
a Drain hose
b Caulk this hole with putty or caulking material
c Adhesive vinyl tape
d Insulation tape
e Mounting plate (accessory)
NOTICE
▪ Do NOT bend refrigerant pipes.
▪ Do NOT push the refrigerant pipes onto the bottom
frame or the front grille.
2 Pass the drain hose and refrigerant pipes through the wall hole.
8.3 To fix the unit on the mounting
plate
1 Set the indoor unit on the mounting plate hooks. Use the " "
marks as a guide.
2 Press the bottom frame of the unit with both hands to set it on
the bottom hooks of the mounting plate. Make sure that the
wires do NOT get squeezed anywhere.
Note: Take care that the interconnection cable does NOT get
caught in the indoor unit.
3 Press the bottom edge of the indoor unit with both hands until it
is firmly caught by the mounting plate hooks.
4 Secure the indoor unit to the mounting plate using 2 indoor unit
fixing screws M4×12L (accessory).
8.4 To close the indoor unit
8.4.1 To re-install the front grille
1 Install the front grille and firmly engage the 3 upper hooks.
2 Install 2 screws (class 15~42) or 3 screws (class 50~71) back
on the front grille.

 Loading...