4 Positioning Control
4.1 Introduction
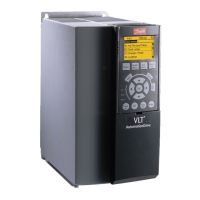
FC 360 supports positioning control. To use the function,
set parameter 37-00 Application Mode to [2] Position control.
When positioning control is enabled, the frequency
converter runs in VVC
+
control mode. It is important to
perform an AMA with correct motor data prior to
positioning control.
Position feedback signals are sent to FC 360 via MCB102 or
MCB103. 24 V encoder to terminals 32/33 is not supported
in position control mode.
Positioning control in FC 360 provides the following
features:
•
Supports both relative and absolute positioning.
•
Can be controlled via digital outs or PROFIBUS.
•
Supports direct positioning (via PROFIBUS) and
indexed positioning (via digital inputs).
•
Up to 8 fixed positions.
•
Supports homing function (without z index).
•
Uses MCB102 or MCB103 as signal feedback
source.
•
Supports both software and hardware limit
settings.
4.2
Programming
4.2.1 Preparation
Complete the following tasks before starting the
positioning control.
•
Check the motor phase
In Hand on mode, set the frequency to a low
positive value. For example, +3 Hz. Make sure the
motor rotates in the positive direction. If it
rotates in the negative direction, exchange the
motor phases.
•
Remove all signals to inputs.
•
Select Off mode via the local control panel (LCP
or GLCP).
•
Initialise the frequency converter in 14-22
Operation Mode.
•
Perform an AMA.
•
Set 37-00 Application Mode to [2] Position Control.
•
Select the feedback source in 37-01 Pos. Feedback
Source and 7-00 Speed PID Feedback Source.
•
MCB102
Set 17-10 Signal Type and 17-11
Resolution (PPR) according to the specifi-
cation of the actual encoder used.
•
MCB103
Set 17-50 Poles, 17-51 Input Voltage,
17-52 Input Frequency, and 17-53
Transformation Ratio according to the
specification of the resolver.
Set 17-59 Resolver Interface to [1] Enabled
to enable MCB103 for capture resolver.
Monitor the value of 34-50 Actual Position, rotate
the motor shaft manually in the positive
direction, then 34-50 Actual Position should show
an increasing value. If the value is descending
with an incremental encoder, exchange the
feedback encoder track A+ with B+, and A- with
B-. If no value is displayed, check the wiring of
the encoder.
•
Set ramp time
Set the activated ramp-up time in 3-41 Ramp 1
Ramp Up Time, 3-51 Ramp 2 Ramp Up Time, 3-61
Ramp 3 Ramp up Time, and 3-71 Ramp 4 Ramp up
Time to be 75% of the minimum value in 37-05
Pos. Ramp Up Time.
Set the activated ramp-down time in 3-42 Ramp 1
Ramp Down Time, 3-52 Ramp 2 Ramp Down Time,
3-62 Ramp 3 Ramp down Time and 3-72 Ramp 4
Ramp Down Time to be 75% of the minimum
value in 37-06 Pos. Ramp Down Time.
•
Select Auto On mode via LCP or GLCP.
•
Ensure that there are no alarms.
4.2.2
Basic Settings
Selecting the positioning control source
Select [0] DI or [1] Fieldbus in 37-14 Pos. Ctrl. Source.
Limit settings
Block 1 direction, or set position or velocity limits to
achieve better safety.
•
Direction block
If necessary, block forward or reverse direction in
37-15 Pos. Direction Block.
•
Position limit
There are 2 types of position limits: hardware
limits and software limits. Hardware limits are set
by digital inputs. Software limits are set via
parameter settings.
Positioning Control
VLT
®
AutomationDrive FC 360
14 Danfoss A/S © 11/2014 All rights reserved. MG06E102
44
 Loading...


