Getting Started
10 Allegro2
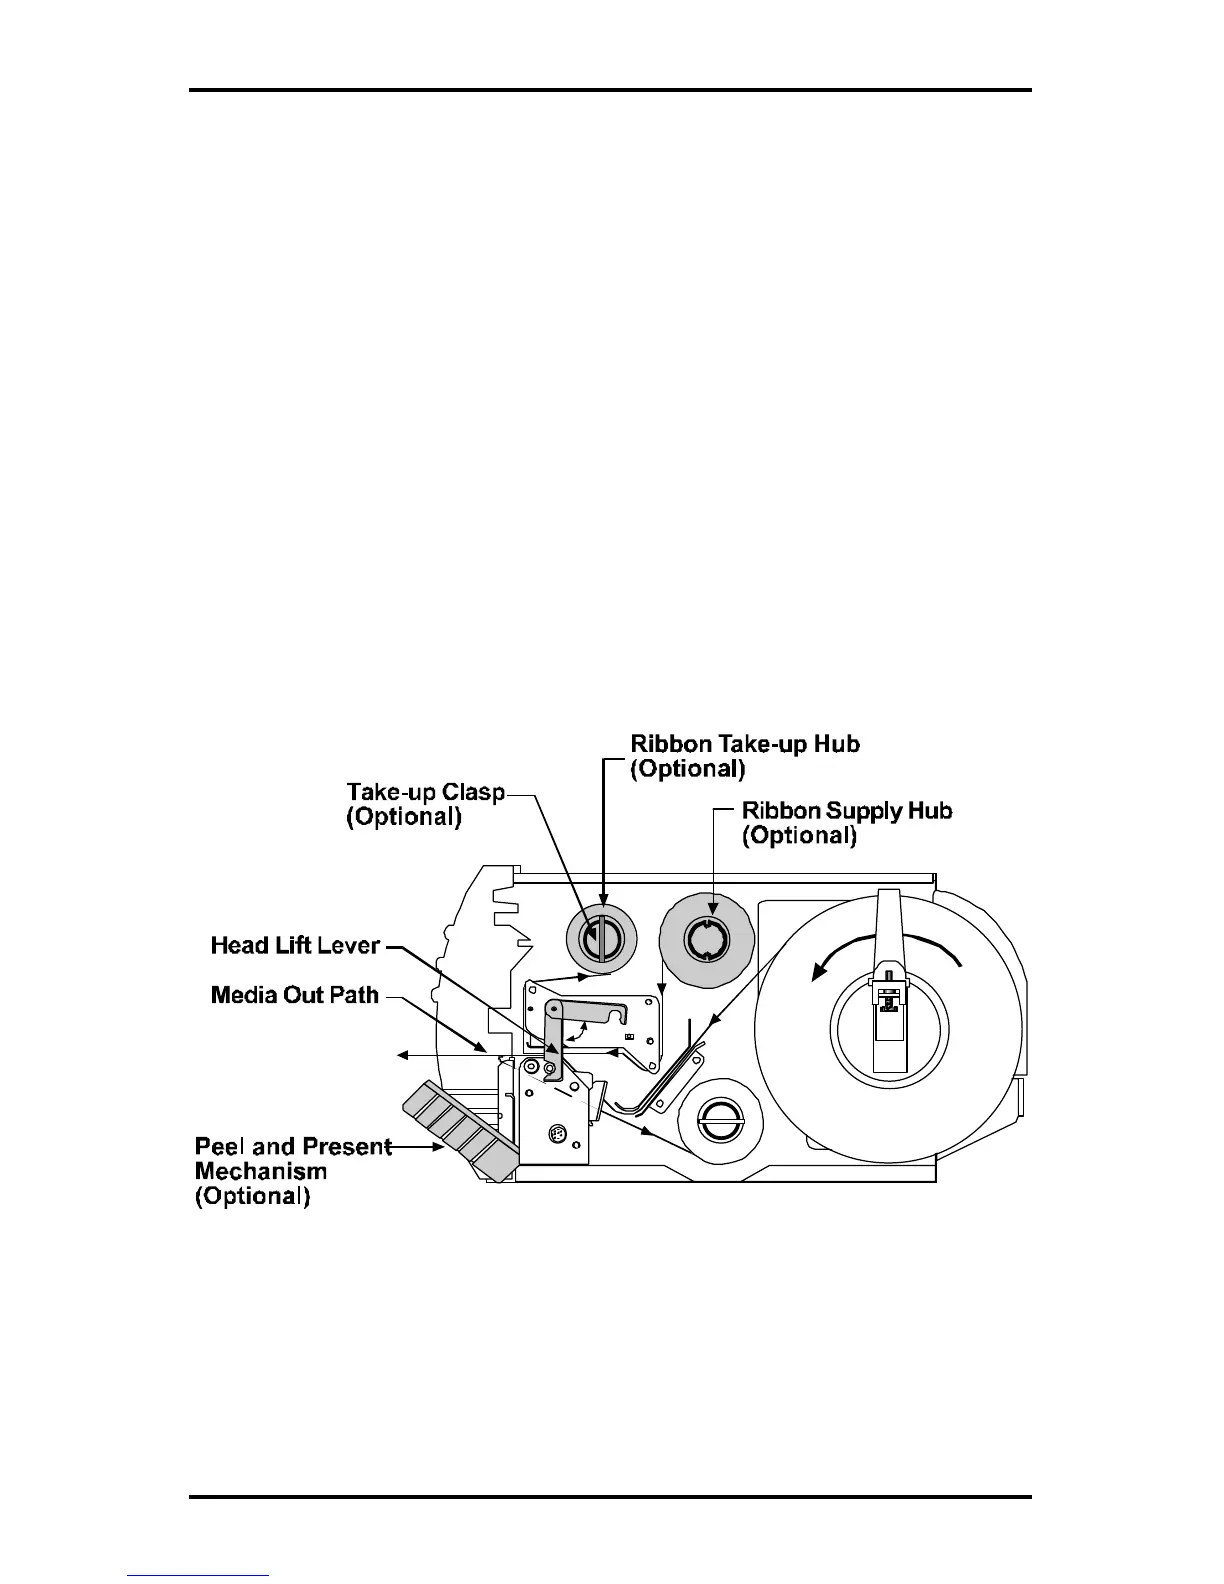
1.4.2 Ribbon Loading Instructions
Load ribbon as shown below in Figure 1-7. The ribbon can be
wound directly on to the hub and held with a clasp, or a used ribbon
core can be placed on the hub. To load the ribbon complete the
following steps:
1. Disengage the Printhead by rotating the Head-Lift Lever
counterclockwise to the ‘up’ position.
2. Slide the Ribbon on to the Ribbon Supply Hub. Route
the ribbon, (see Figure 1-7), and attach the ribbon to the
Ribbon Take-up Hub.
3. Engage the Printhead by rotating the Head-Lift Lever
clockwise to the ‘down’ position.
Figure 1-7 Ribbon Loading

 Loading...